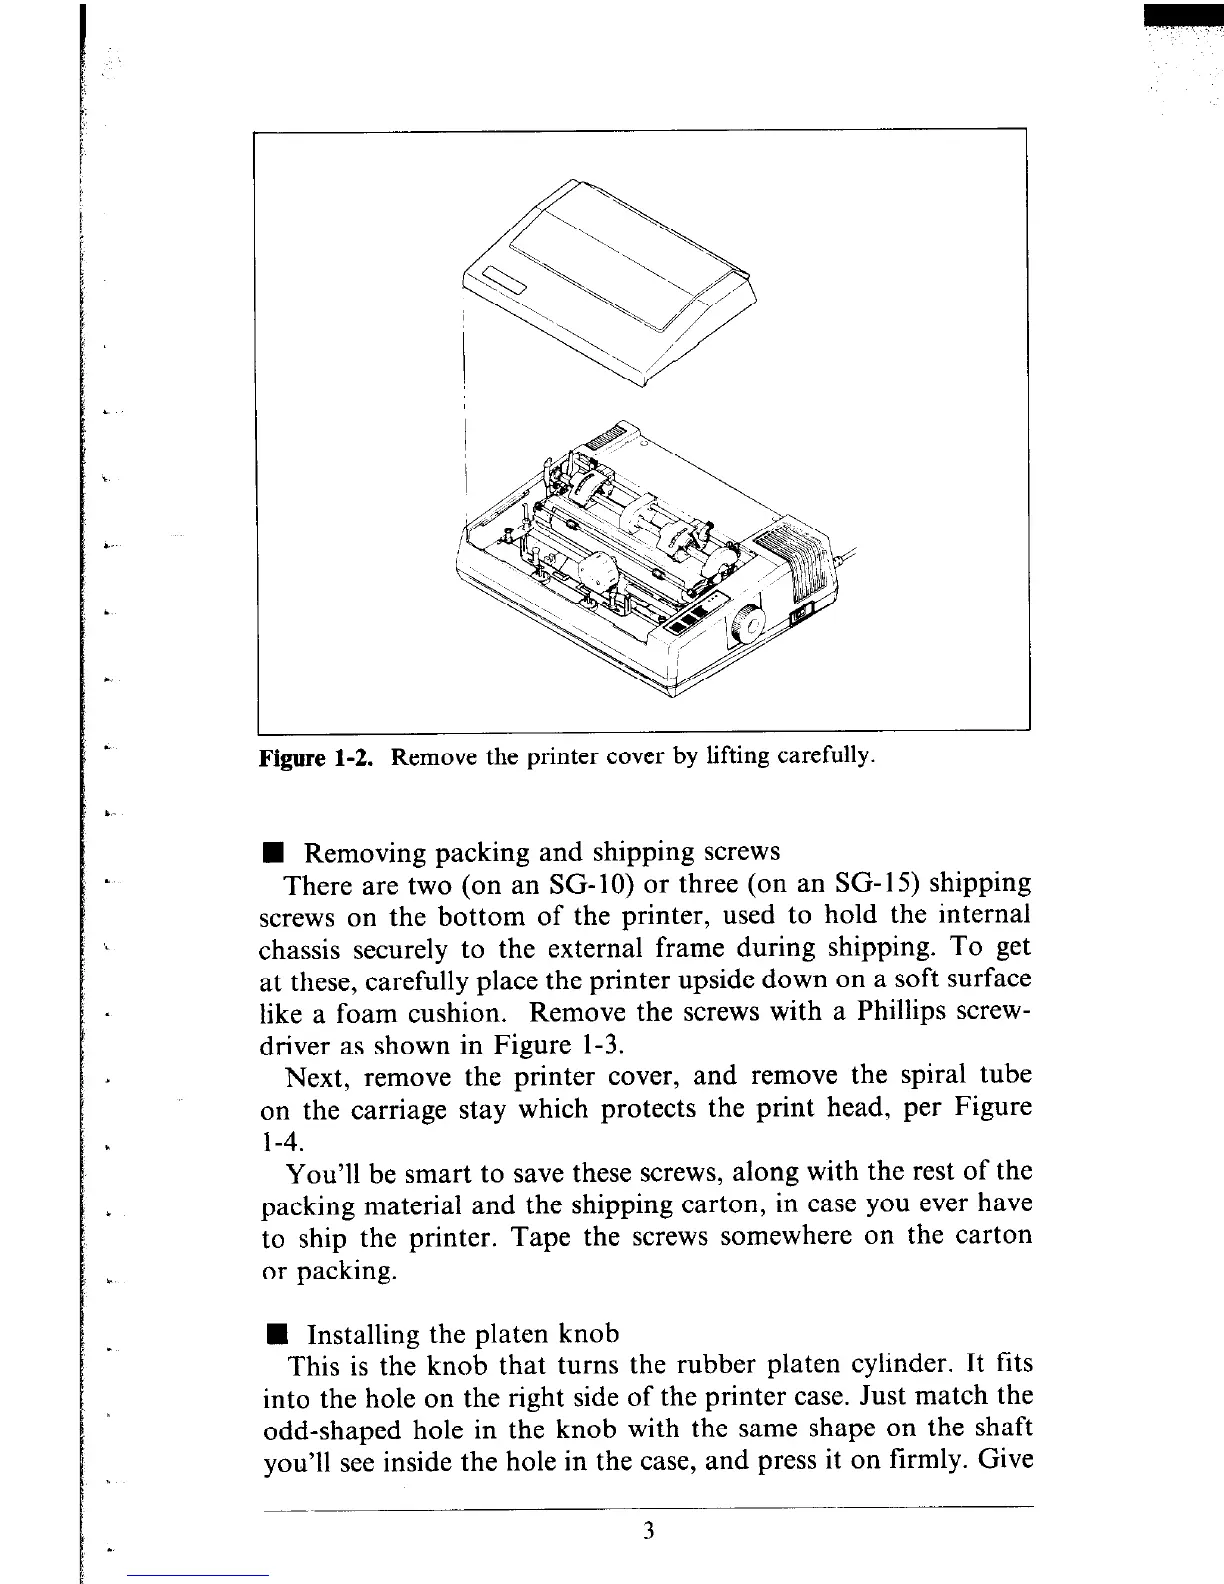
Figure 1-2. Remove the printer cover by lifting carefully.
n Removing packing and shipping screws
There are two (on an SG- 10) or three (on an SG- 15) shipping
screws on the bottom of the printer, used to hold the internal
chassis securely to the external frame during shipping. To get
at these, carefully place the printer upside down on a soft surface
like a foam cushion. Remove the screws with a Phillips screw-
driver as shown in Figure l-3.
Next, remove the printer cover, and remove the spiral tube
on the carriage stay which protects the print head, per Figure
l-4.
You’ll be smart to save these screws, along with the rest of the
packing material and the shipping carton, in case you ever have
to ship the printer. Tape the screws somewhere on the carton
or packing.
n Installing the platen knob
This is the knob that turns the rubber platen cylinder. It fits
into the hole on the right side of the printer case. Just match the
odd-shaped hole in the knob with the same shape on the shaft
you’ll see inside the hole in the case, and press it on firmly. Give
3