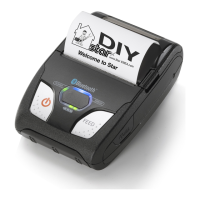
3. To switch the printer mode , press FEED button.
When the printer mode is switched over, the POWER lamp ashes. The number of ashes indicates
which mode allows setting change currently.
4. If the current printer mode does not need to be changed, press FEED button again and switch the
printer mode. To change the setting, press POWER button.
When the setting is changed, the ERROR lamp ashes. The number of ashes indicates which
setting is enabled currently.
<A typical operation ow for the steps 3 and 4 above is described below.>
When you want to change the settings of the printer mode as shown below,
<Before> USB / MEDIUM / LOW / NO USE / LOW / NO USE / ON
<After> Bluetooth(Mac) / MEDIUM / HIGH / NO USE / LOW / NO USE / OFF
① The setting change is enabled as the result of the steps 1 and 2, the POWER lamp ashes once and
the ERROR lamp ashes once. The number of ash(s) made by the ERROR lamp after the POWER
lamp ashing indicates the current setting.
Press the POWER button once. The ERROR lamp ashes twice and the communication mode is
changed to Bluetooth(Mac).
② Press the FEED button once. The POWER lamp ashes twice and the print density setting can be
changed.
③ If you do not change the print density, press the FEED button once more. The POWER lamp
ashes three times and the print speed setting can be changed.
Press the POWER button once. The ERROR lamp ashes once and the print speed is changed to
HIGH.
④ Press the FEED button once. The POWER lamp ashes four times and the BM sensor setting can be
changed.
⑤ If you do not change the BM sensor setting, press the FEED button once more. The POWER lamp
ashes ve times and the BM sensor sensitivity setting can be changed.
⑥ If you do not change the BM sensor sensitivity setting, press the FEED button once more. The POWER
lamp ashes six times and the automatic power down mode setting can be changed.
⑦ If you do not change the automatic power down mode setting, press the FEED button once more.
The POWER lamp ashes seven times and the Auto Connection function setting can be changed.
Press the POWER button once. The ERROR lamp ashes twice and the Auto Connection function is
changed to OFF.
5. After you have congured all of the settings, press and release POWER button and FEED button at
the same time. The new settings will be printed.
If the settings were not congured correctly, follow the above procedure to congure the settings
again.
- 24 -
 Loading...
