stewmac.com
11
Sand each brace with 80-grit, 120-grit, and 220-grit and try
to create an even, uniform, attractive looking brace.
Fit the back to the sides
The braces on the back are intentionally longer than the
width of the body. When you place the back on, these braces
will overhang the sides.
The next step is trimming braces to length, and creating
notches in the side linings so the back drops in place.
Place the back in position, aligning it on center. Use a weight
to hold it in place. Make small pencil marks on the sides to
show where the braces touch. Extend these marks over the
edge of the sides and linings.
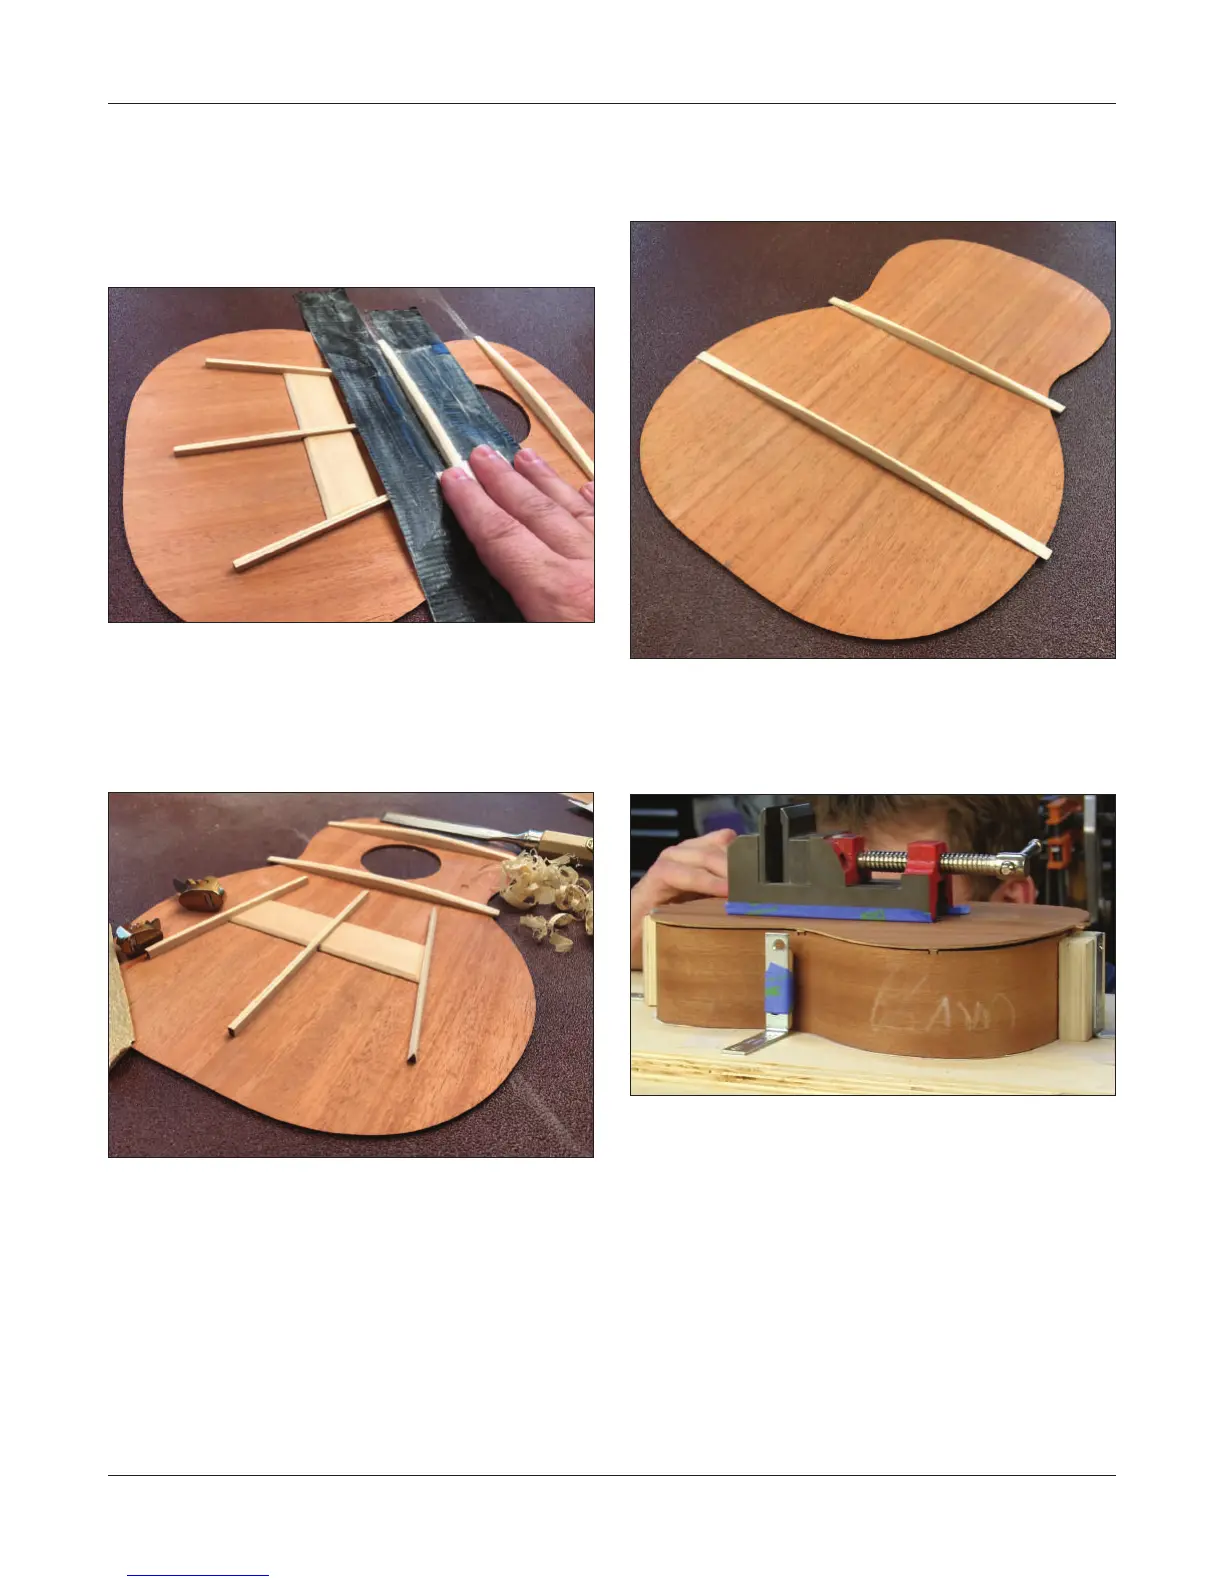
Shaping the Braces
After the glue has dried at least 2 hours, and all the clamps
have been removed lightly shape the top and back braces.
Using a small block of wood with adhesive sandpaper at-
tached lightly round over the top of each brace.
(To keep your work clean and neat, and to protect the top
and back plates of your instrument it is helpful to put down
protective layers of tape. Simply take regular duct tape or
masking tape and stick it to your shirt a few times to remove
some of the stickiness and apply it right next to your brace.)
Once the top of your brace has been roughly shaped with
the sanding block use a piece of sandpaper between your
ngers to round over the top of the brace.