STIHL 019 T 19
4.5 Oil Seals
It is not necessary to disassemble the
engine to replace the oil seals.
- Remove the fuel tank - see 10.4.
Important: Take special care not to
damage crankshaft stub.
- Thinly coat the outside diameter of
the oil seal with sealant - see 11.2.
- Position the oil seal so that the
clamping ring faces upwards.
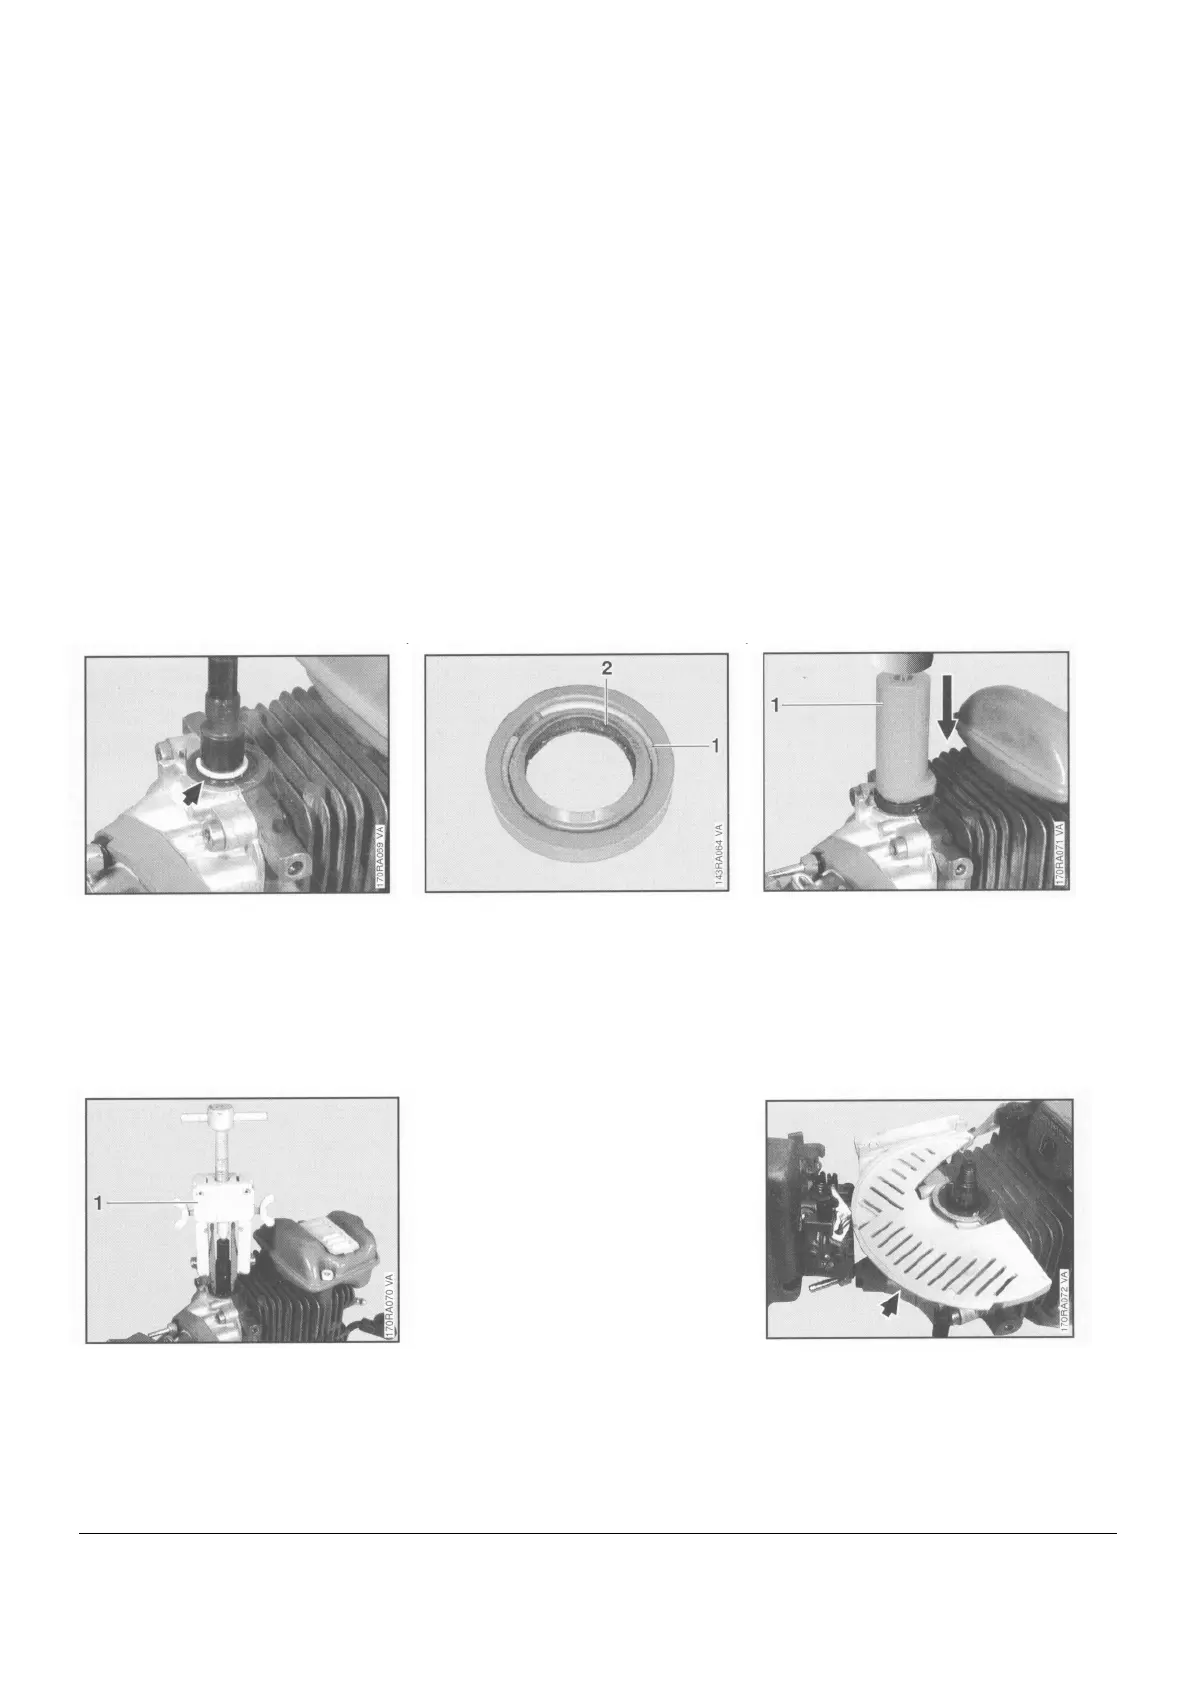
Clutch side:
• Pry out the retaining ring.
• If an oil seal with clamping ring
(1) is installed, use puller and
No. 3.1 jaws to remove the clamping
ring. Pry the sealing ring (2) out of the
housing.
- Clean sealing face on crankshaft stub
with standard commercial, solvent-
based degreasant containing no
chlorinated or halogenated
hydrocarbons - see 11.2.
Note: If the cylinder and engine pan
are assembled, only oil seals 9638 003
1581 (with clamping ring) may be
installed.
- Lubricate sealing lips of oil seal with
grease - see 11.2.
• Apply puller (1) 5910 890 4400
(jaws 0000 893 3706 with No. 3.1
profile).
- Clamp the puller arms.
- Pull out the oil seal.
Starter side:
- Remove the flywheel - see 5.3.
• Remove the air baffle.
• Use the press sleeve (1)
1123 893 2400 to install the oil
seal.
- Fit a new retaining ring in the
crankshaft groove.
- Fit the fuel tank.
 Loading...