37034, 036, 036 QS
– The ohmmeter must now show a
reading of 0 Ω. If no reading is
obtained, check the connection
between the contact spring and
connector sleeve.
Checking short circuit wire and
STOP contact:
– Leave one test lead clipped to the
contact spring.
– On machines with carburetor
heating, pull the thermostatic
switch’s flag connector off the
contact spring.
– Move the Master Control lever
upwards to "STOP".
– Clip other lead to short circuit
wire’s terminal.
– The ohmmeter must again show
a reading of 0 Ω. If no reading is
obtained, check the connection
between the connector sleeve in
the switch shaft’s cam and the
contact spring.
– On machines with carburetor
heating, push the thermostatic
switch’s flag connector onto the
contact spring.
– Remove the air filter - see 12.1
– Remove the tank vent - see 12.6.
The short circuit system is in
order if the short circuit wire
makes contact with the connector
sleeve when the Master Control
VA
138RA096
lever is in the "STOP" position.
Replacing a bent or broken
contact spring:
– To avoid damaging the fuel hose,
pull it off the carburetor’s elbow
connector.
– On machines with carburetor
heating, pull the thermostatic
switch’s flag connector off the
contact spring.
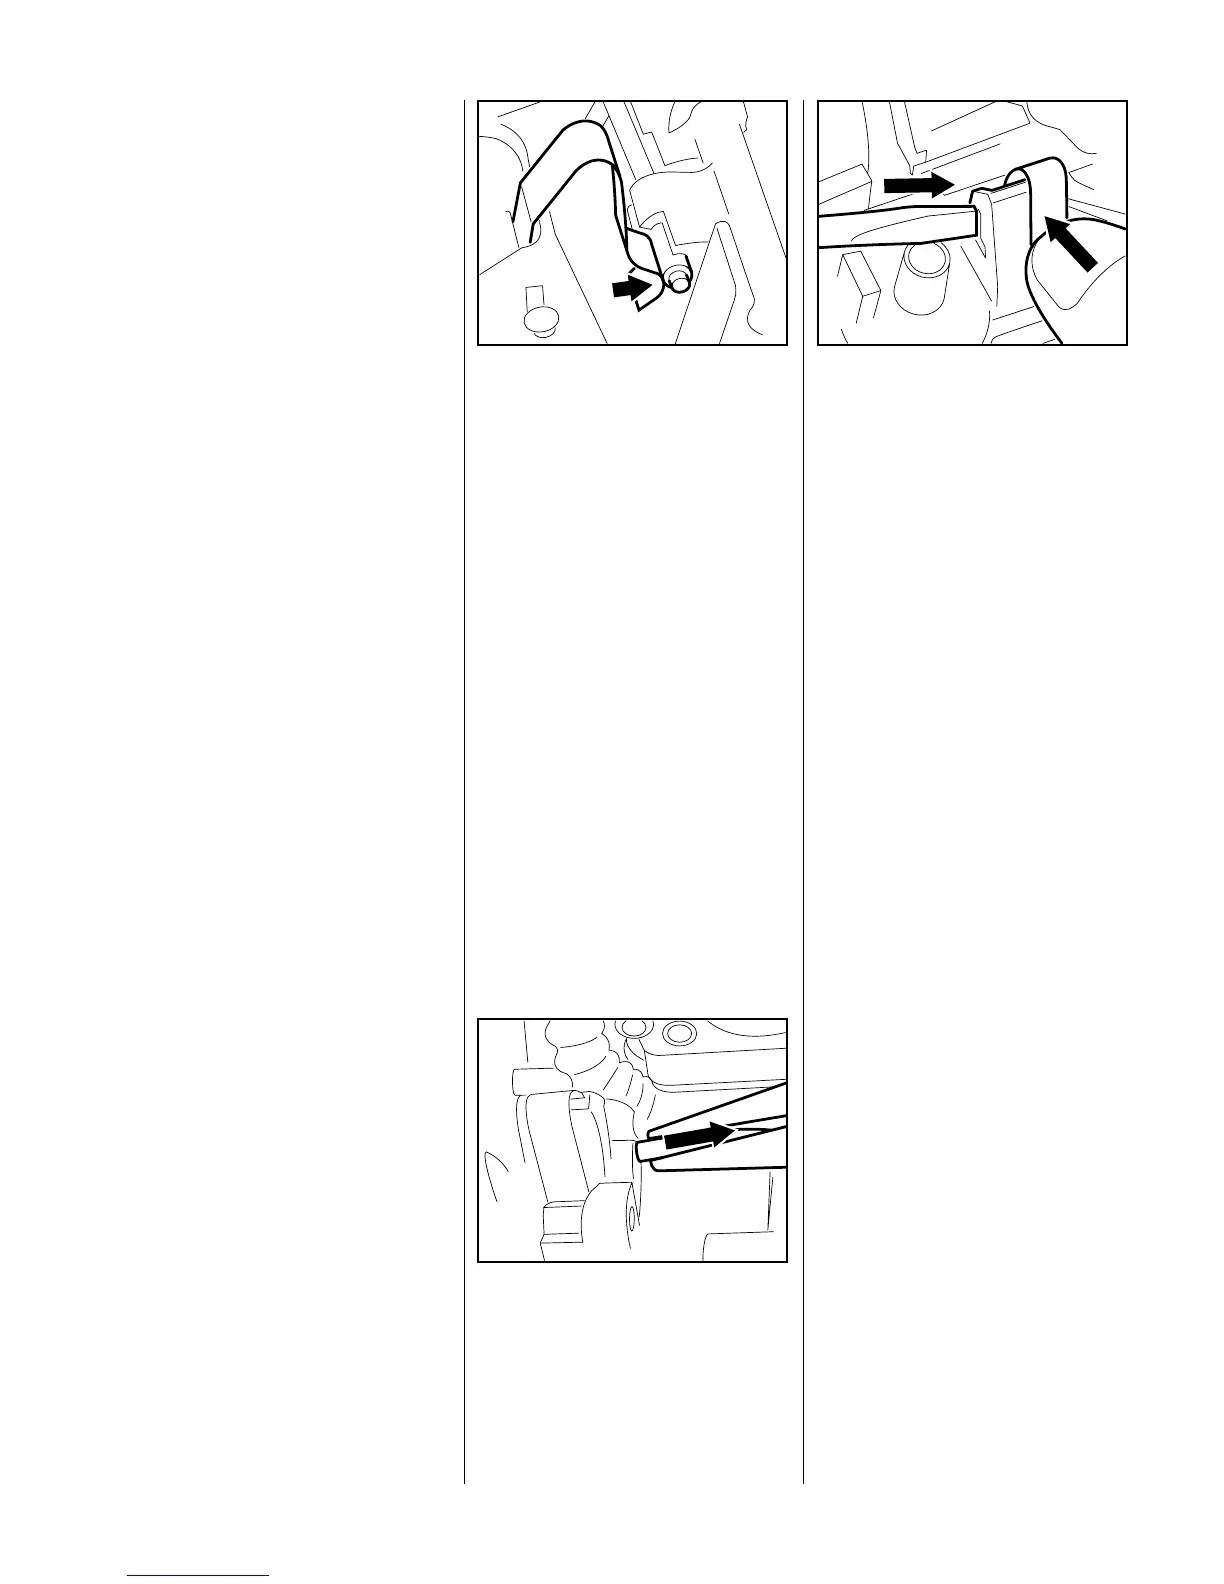
Pull the ground wire connector
sleeve out of the contact spring.
– Move Master Control lever to
"STOP" position.
VA
138RA092
Squeeze the contact spring so
that is disengages from the
Master Control lever and, at the
same time, use a screwdriver to
pry it out of its seat in the
crankcase.
– Install the new contact spring.
VA
138RA097
– Reconnect the ground wire
connector sleeve.
Important:
– Check operation of the short
circuit wire - see 6.2.
– On machines with carburetor
heating, push the thermostatic
switch’s flag connector onto the
contact spring.
– Fit the tank vent - see 12.6.
– Fit the air filter - see 12.1.
6.3 STOP Contact

 Loading...