12
Operation
Plug in the STB. Then press the “power” button on the remote control or the
“Standby” button on the STB Front Panel. The Main Menu screen, the
beginning of the OSD screen, will appear as shown in the following picture. The
Main Menu displays various functions of the STB or you can select with “CH”
buttons and the numeric buttons on the remote control. To proceed to the next
stage, press the “OK” button on the remote control.
1. Satellite
Your STB can be easily installed by using “Satellite” Menu.
Plug in the STB, and power on, to get
started, please go to satellite menu by
pressing “Menu” button on the remote
control (default lock code: 00000). The
installation menu allows you to set the
Antenna and various functions, and
customize service. Use the direction
buttons on the remote control to select an
option and press the”OK” button to
proceed to enter. To move backwards to
the previous stage, press the” Exit” or”
Menu” button.
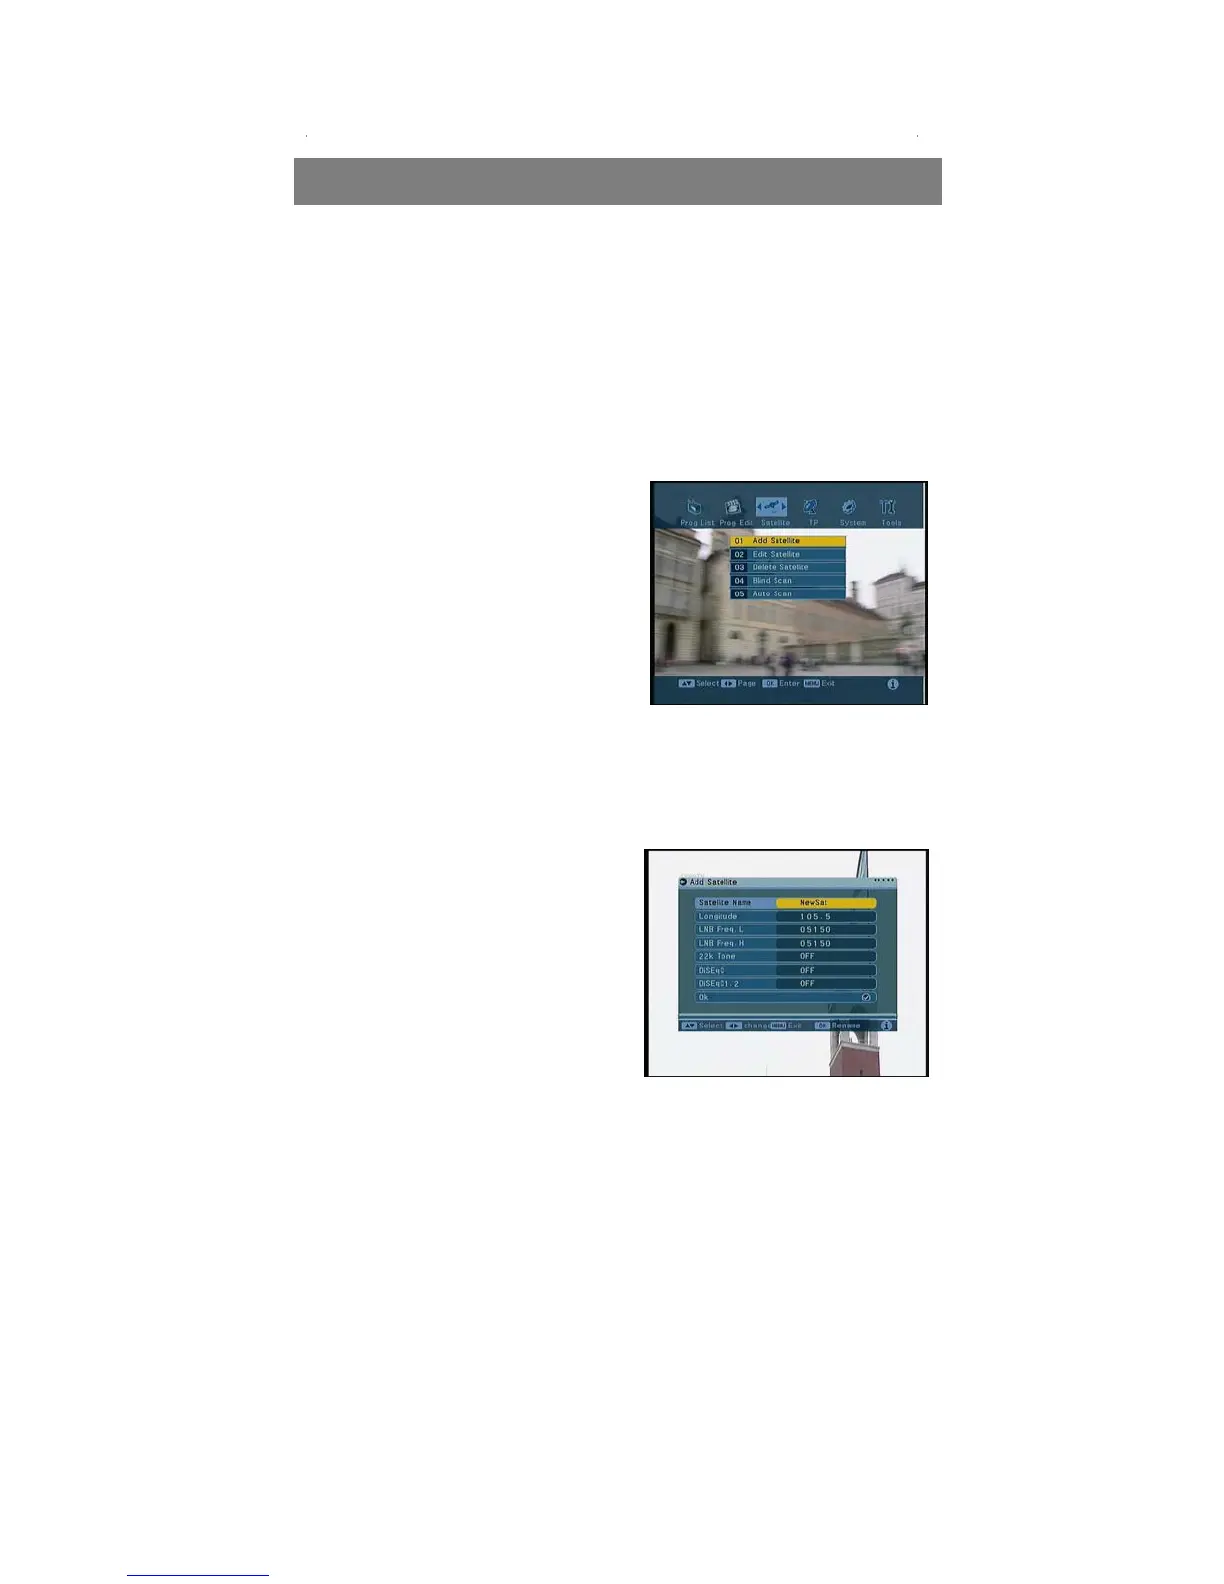
1.1 Add satellite
Add your preferred satellites and edit
them. And you can rename the satellite
as you like to press OK. You can the
seethe following picture.
 Loading...