7
Operating Instructions
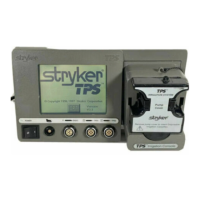
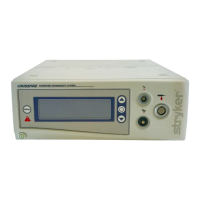
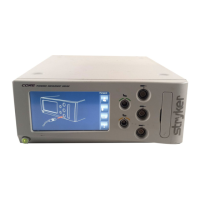
Connecting the Equipment
This is a system overview. For specific instructions on each TPS component, refer to the
information supplied with the component.
1. Place your console on a sturdy, flat surface near a hospital grade outlet.
2. Plug the console's power cord into the recessed power socket on the back of the
console.
3. Plug the other end of the power cord into a hospital-grade wall outlet.
4. Turn on the console. The on/off switch is located on the front of the console.
NOTE: As you set up the system, the console's screen will change to indicate the various
components as they are plugged in.
5. If using a Footswitch, plug the footswitch cable into the console port marked
FOOTSWITCH. Align orientation marks and gently push connectors together.
CAUTION: All TPS Cords have push/pull connectors. Do not thread or twist for insertion or
removal.
6. Plug the handpiece cord(s) into the console port(s) identified for the handpiece. Align
connector orientation marks and gently push connectors together.
NOTE: Ports marked TPS1 and TPS2 are for Stryker TPS handpieces only.
The port marked ENDO is intended for the following list of Stryker Endoscopy handpieces:
SE5 Handpiece REF 272-704-100, SE5 Hand-controlled REF 272-704; QuadraCut Shaver
REF 275-701; QuadraCut Bone Plug REF 275-705; and QuadraCut small Joint REF 275-
601.
NOTE: If using a TPS Universal Handswitch, attach it to the handpiece before you plug the
cord into the handpiece.
7. Plug the other end of the handpiece cord(s) into the handpiece(s).
8. Attach cutting accessories to handpieces. Instructions supplied with each handpiece or
attachment provide details for cutting accessory assembly.
WARNING: Use only Stryker approved cutting accessories.
9. If using an Irrigation Console REF 5100-50, assemble Irrigation Pole REF 5100-50-28 to
the console as shown. Hang irrigation bag from pole. Install irrigation cassette into the
pump. Attach irrigation clips to handpieces and connect tubing.
10. Power the system and test the devices to ensure they are performing properly prior to
surgery.
WARNINGS:
▪ Before using this system read and understand the information in this manual and the instructions supplied with each TPS
component and Stryker Endoscopy handpieces. Pay close attention to the User/Patient Safety Information.
▪ Familiarization with the Total Performance System prior to use is important. If you have any questions, contact your Stryker
Instruments representative or Stryker Customer Service at 1-800-253-3210.
▪ Prior to use, system components should be operated and inspected for any damage. DO NOT use if damage is apparent.
WARNINGS:
▪ Portable and mobile RF communications
equipment can affect the TPS Console.
▪ The TPS Console should not be placed
adjacent to or stacked with other
equipment. If adjacent to or stacked, the
equipment must be observed to verify
normal operation.
 Loading...