SunFounder 3in1 Kit
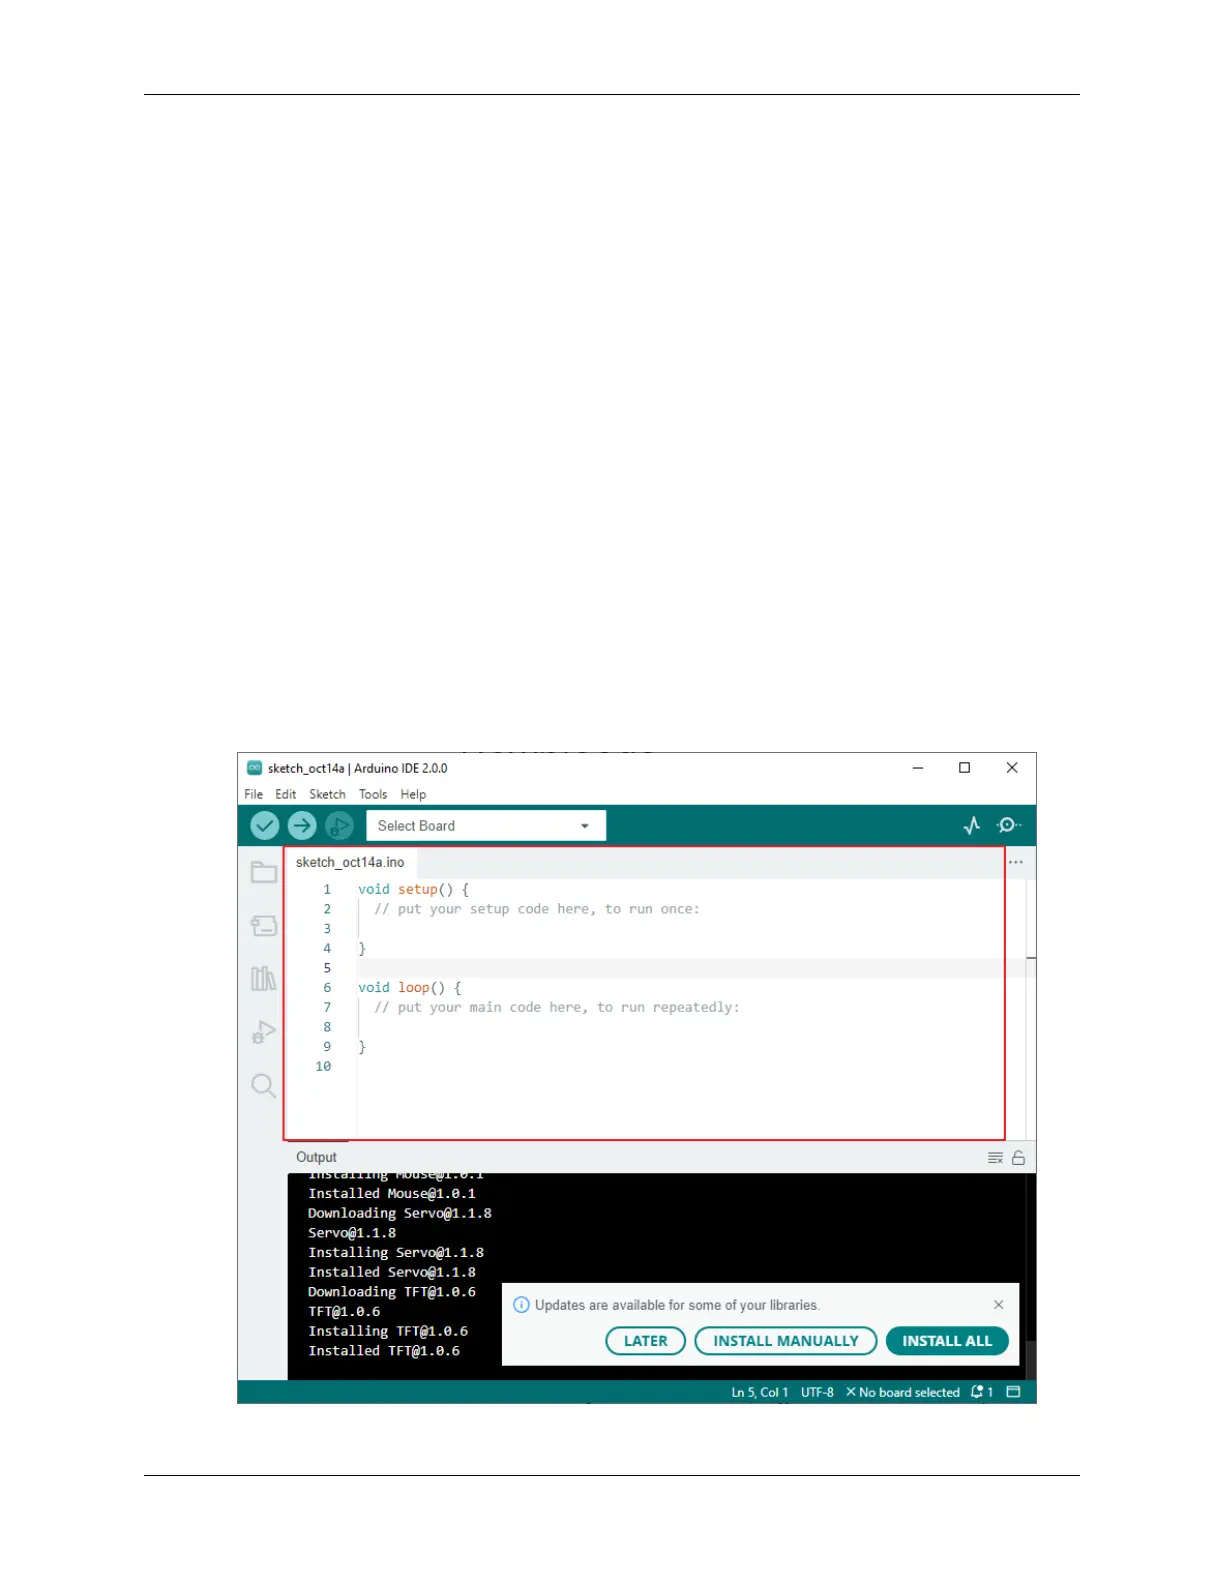
10. Tool: Includes some tools – the most frequently used Board (the board you use) and Port (the port your board is
at). Every time you want to upload the code, you need to select or check them.
11. Help: If you’re a beginner, you may check the options under the menu and get the help you need, including
operations in IDE, introduction information, troubleshooting, code explanation, etc.
12. Output Bar: Switch the output tab here.
13. Output Window: Print information.
14. Board and Port: Here you can preview the board and port selected for code upload. You can select them again
by Tools -> Board / Port if any is incorrect.
15. The editing area of the IDE. You can write code here.
16. Sketchbook: For managing sketch files.
17. Board Manager: For managing board driver.
18. Library Manager: For managing your library files.
19. Debug: Help debugging code.
20. Search: Search the codes from your sketches.
2.3.3 How to create, open or Save the Sketch?
1. When you open the Arduino IDE for the first time or create a new sketch, you will see a page like this, where the
Arduino IDE creates a new file for you, which is called a “sketch”.
2.3. How to build an Arduino Project 61