SunFounder 3in1 Kit
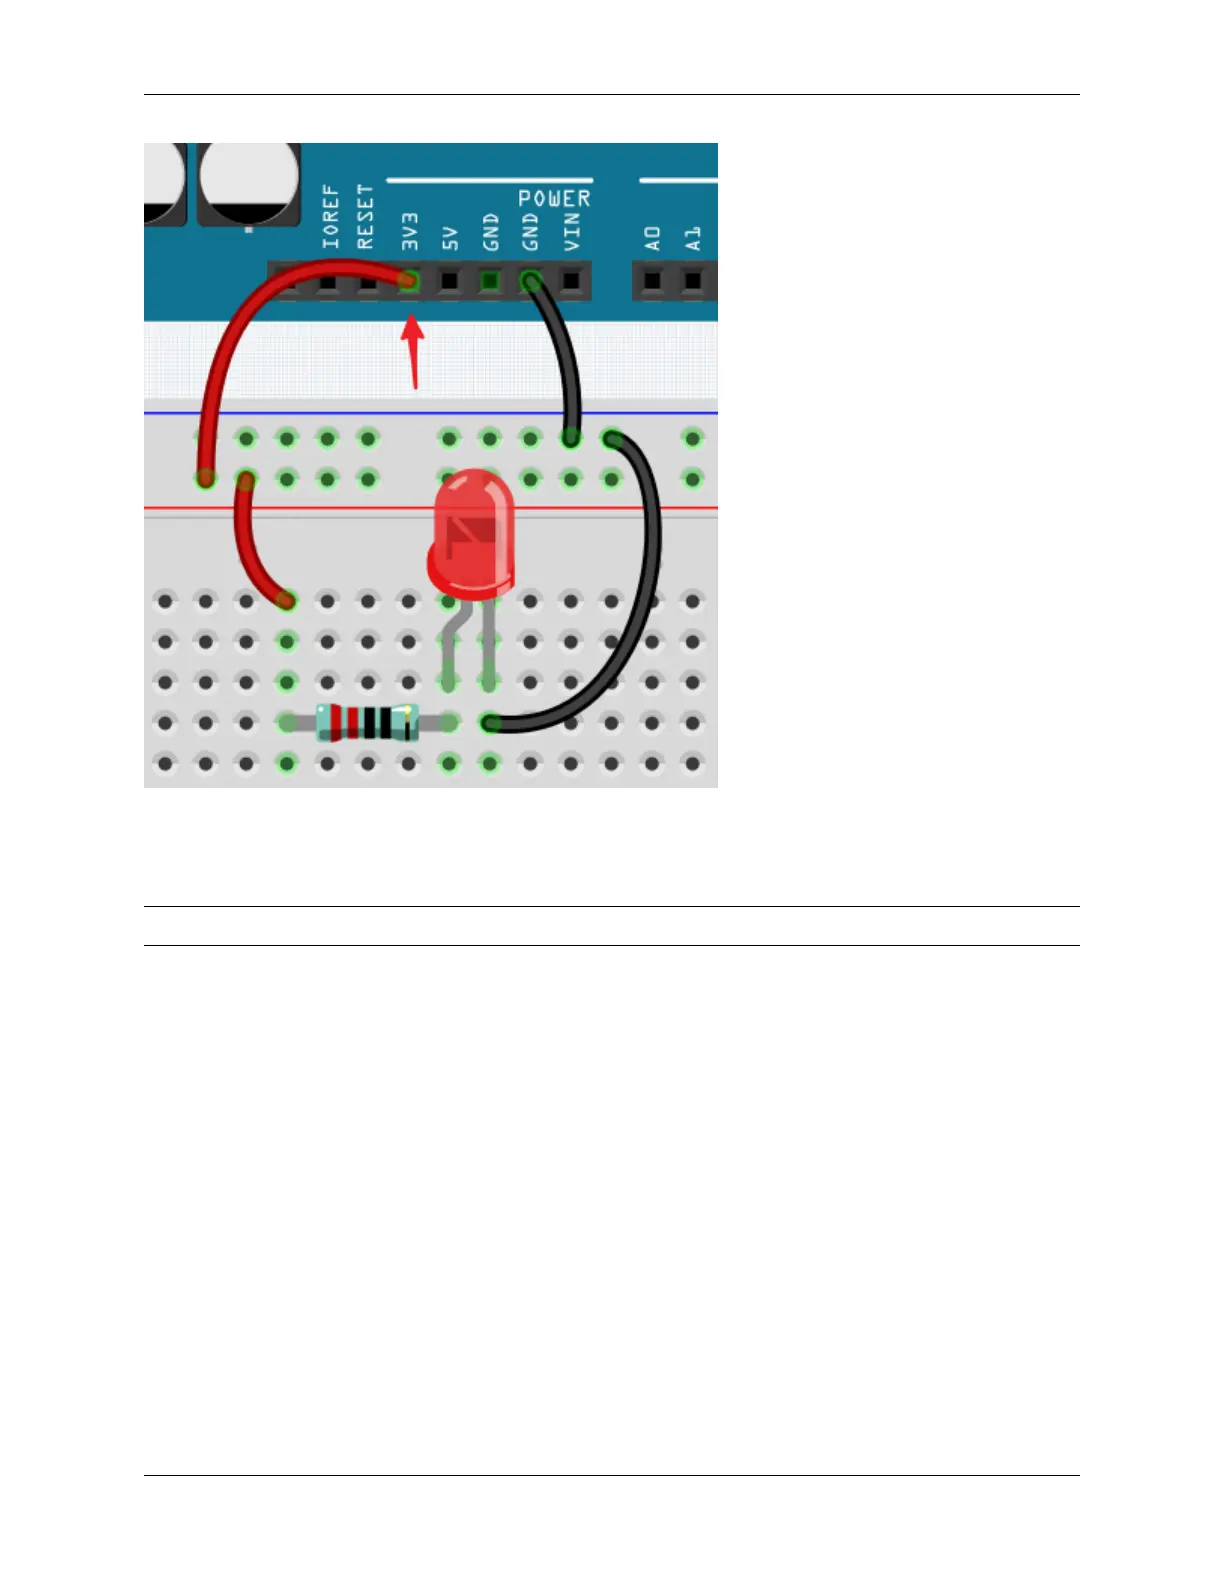
By changing the wire connecting 5V to 3.3V , the LED gets dimmer. If you change the resistor from 220ohm to
1000ohm (color ring: brown, black, black, brown and brown), you will notice that the LED becomes dimmer than
before. The larger the resistor, the dimmer the LED.
Note: For an introduction to resistors and how to calculate resistance values, see Resistor.
Most packaged modules only require access to the proper voltage (usually 3.3V or 5V), such as ultrasonic module.
However, in your self-built circuits, you need to be aware of the supply voltage and resistor usage for electrical devices.
As an example, LEDs usually consume 20mA of current, and their voltage drop is about 1.8V. According to Ohm’s
law, if we use 5V power supply, we need to connect a minimum of 160ohm ((5-1.8)/20mA) resistor in order not to burn
out the LED.
Control circuit with Arduino
Now that we have a basic understanding of Arduino programming and electronic circuits, it’s time to face the most
critical question: How to control circuits with Arduino.
Simply put, the way Arduino controls a circuit is by changing the level of the pins on the board. For example, when
controlling an on-board LED, it is writing a high or low level signal to pin 13.
Now let’s try to code the Arduino board to control the blinking LED on the breadboard. Build the circuit so that the
LED is connected to pin 9.
2.3. How to build an Arduino Project 81