[ Fig. 34 ]
[ Fig. 35 ]
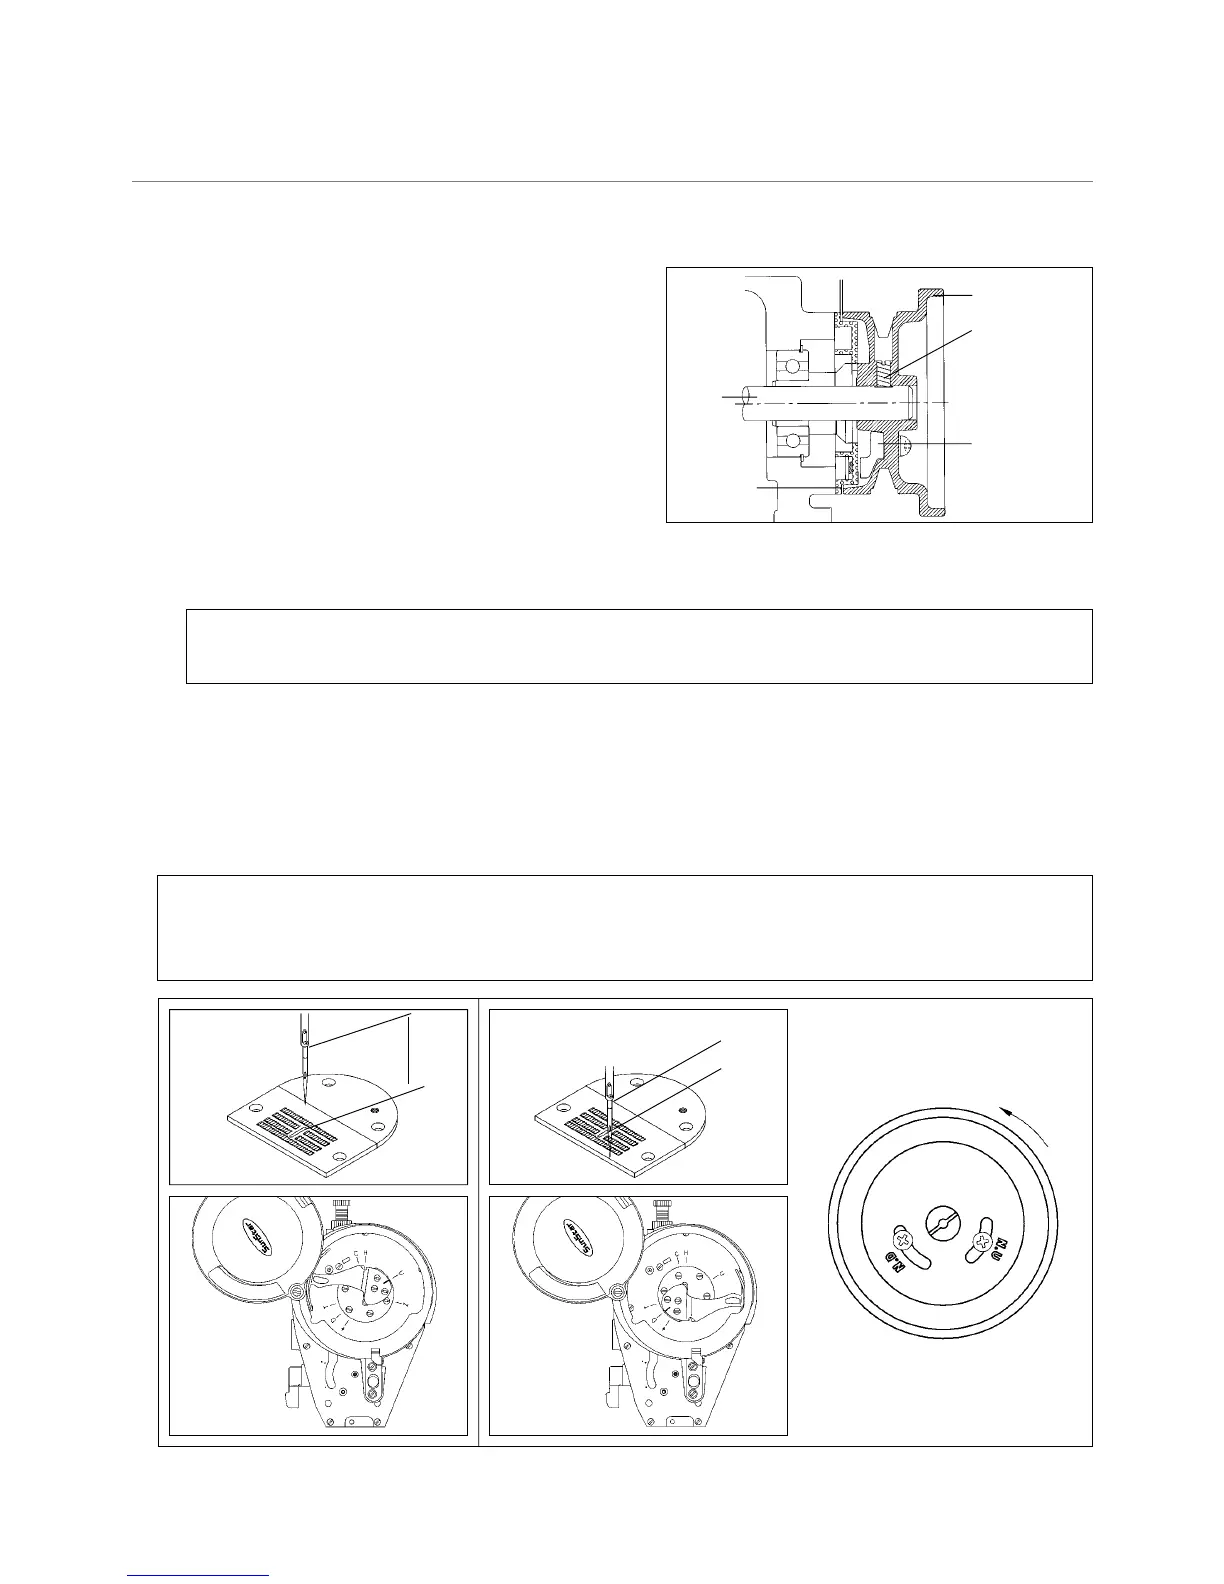
11) Synchronizer Adjustment
A. Mounting of synchronizer
ⓐ Fix the synchronizer to back side of arm.
ⓑ After setting the location of pulley that interval
between synchronizer and pulley becomes 1mm,
fasten pulley joint screw.
B. Needle Up Stop
ⓐ Turn off the power switch.
ⓑ Unfasten fixing screw①(2 pieces).
ⓒ Moving the fixing screw① to rotating direction of sewing machine pulley, needle bar② stops at high position.
ⓓ Fasten the fixing screw①.
C. Adjustment of needle down stop location
Do not adjust needle down stop location.
When turn the power switch on and stop the sewing machine at the location of needle up stop, base line of thread
take-up stops at around U mark on face plate (+-3mm). When stop the sewing machine at location of needle down
stop, base line of thread take-up stops at around D mark on face plate (+-4mm).
[ Note ]
·Attachment location of synchronizer was set at the moment of shipping. When taking off the pulley, do not take off
the synchronizer. Also, attach the fixing screw(2 pieces) of pulley to around of the screw of upper shaft against the
pulley rotating direction.
Needle
up stop
Rotating direction
Needle down stop
28
Upper
shaft
Magnetic Holder
Pulley joint screw
Pulley
Synchronizer
1mm
←→
←→
←→

 Loading...