20
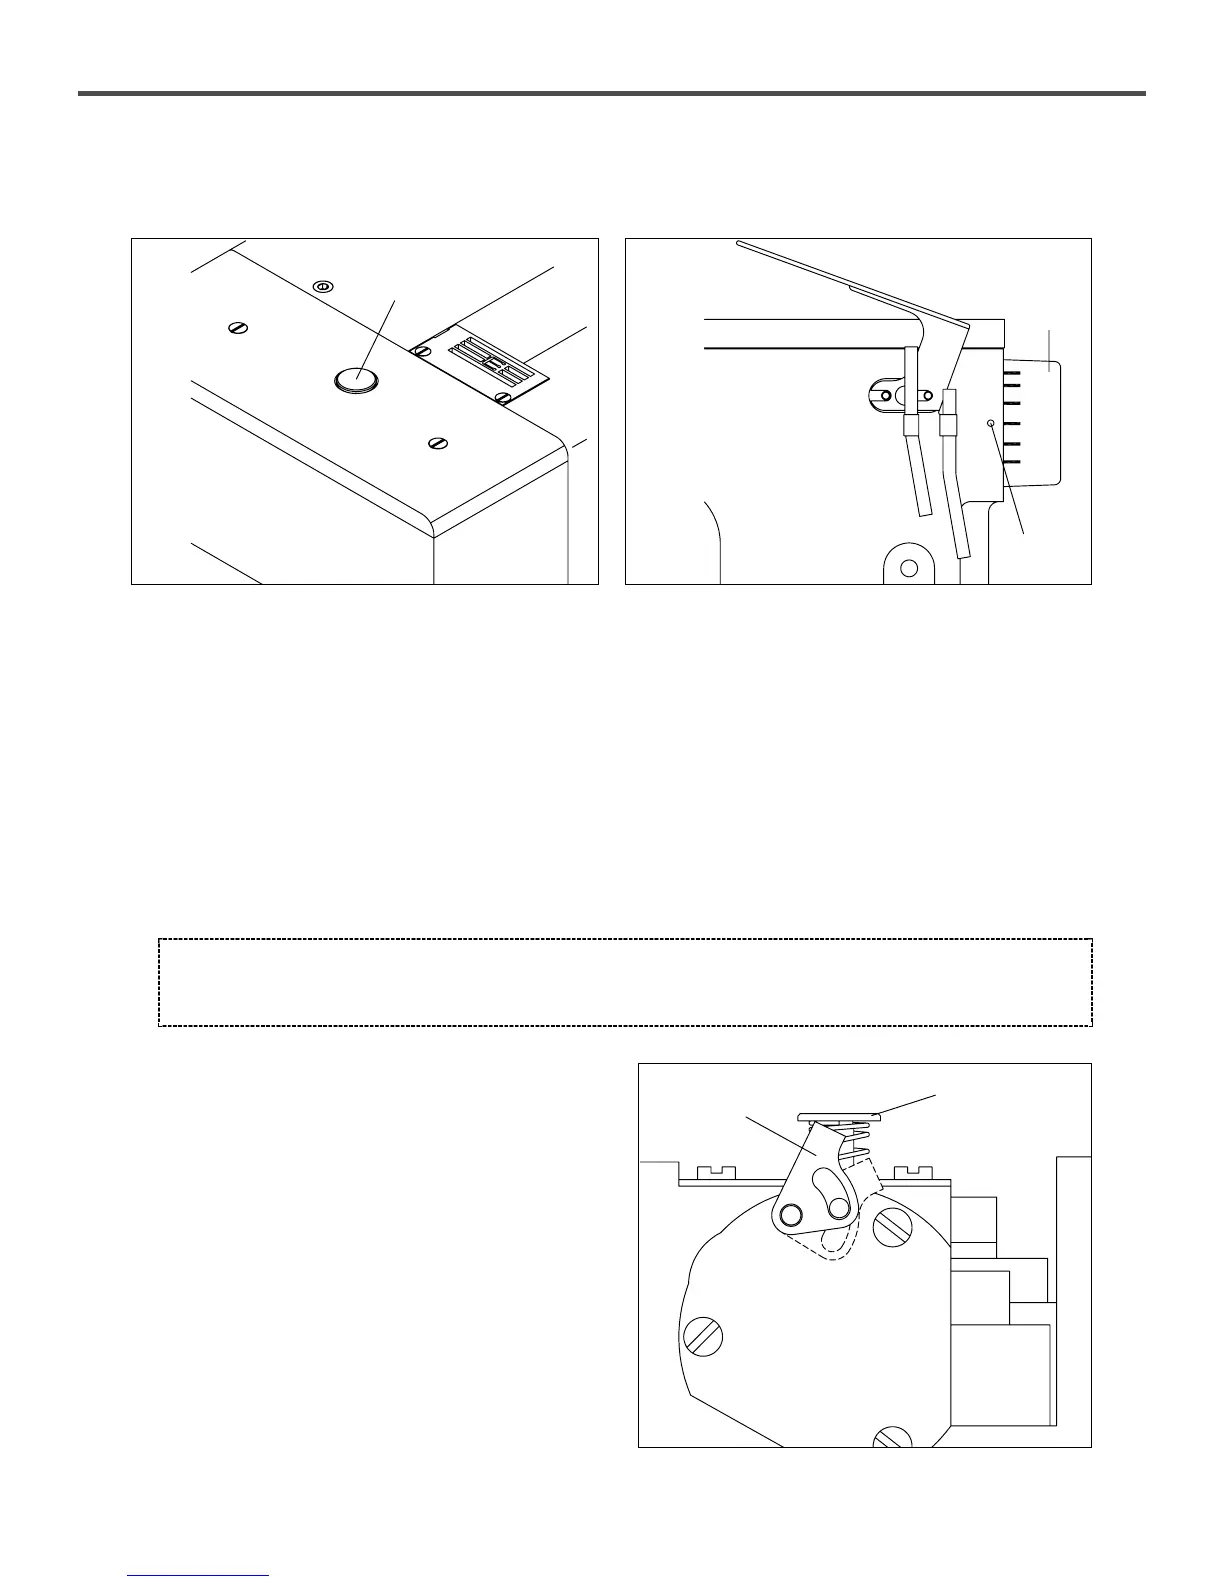
⑵ Change of stitch length
Press lightly stitch length-adjusting button① with your left hand so that the end comes in contact with inner parts.
With the button① pushed in, turn the upper shaft pulley② with your right hand so that the button① goes in deeper.
While [the button①] is pressed hard, turn the upper-shaft pulley to change the stitch length. Turn [the upper-shaft pulley
②] clockwise. The closer graduation「L」becomes to [Mark③], the larger the stitch length becomes.
When the mark points at 「L」, the stitch length becomes 3.6mm. When [the upper-shaft pulley②] is turned counter-
clockwise, and graduation 「S」gets closer to [Mark③], the stitch length gets smaller. When the mark points at 「S」, the
stitch length becomes 1.4mm. Although graduations are same, the corresponding stitch lengths could be different
depending on types of fabrics, fabric thickness and size of differential. Therefore, the upper-shaft pulley needs to be
readjusted depending on situations.
[ Caution ]
When using sewing machines mounted with pneumatic trimming devices designed to automatically find the needle
location, e.g., UT-A, UT-B or ST-C, be sure to turn off the power before stitch width conversion.
[ Figure 23 ][ Figure 22 ]
①
③
②
②
※ Main Feed Adjusting Button Stopper
Use this function to keep the set stitch length same.
Loosen [the screw③] to use the stopper. Turn [the
main feed adjusting button stopper②] upward to set
it up below [the main feed adjusting button①] and
fasten [the screw③].
[ Figure 24 ]
①
 Loading...

