27
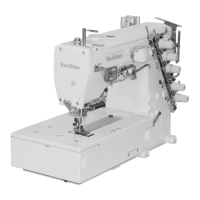
10) Height of Needle Bar
When the end tip of the looper passes the left needle center, it must pass the needle groove at 0.5~1.0 mm off from the
upper part. In other words, the height of the needle is set by the looper.
Using a driver, unfasten the screw① of the needle bar holder through a hole in the face plate and adjust the needle bar up
and down to get the right needle height.
[ Figure 45 ][ Figure 44 ]
①
0.5~1.0mm
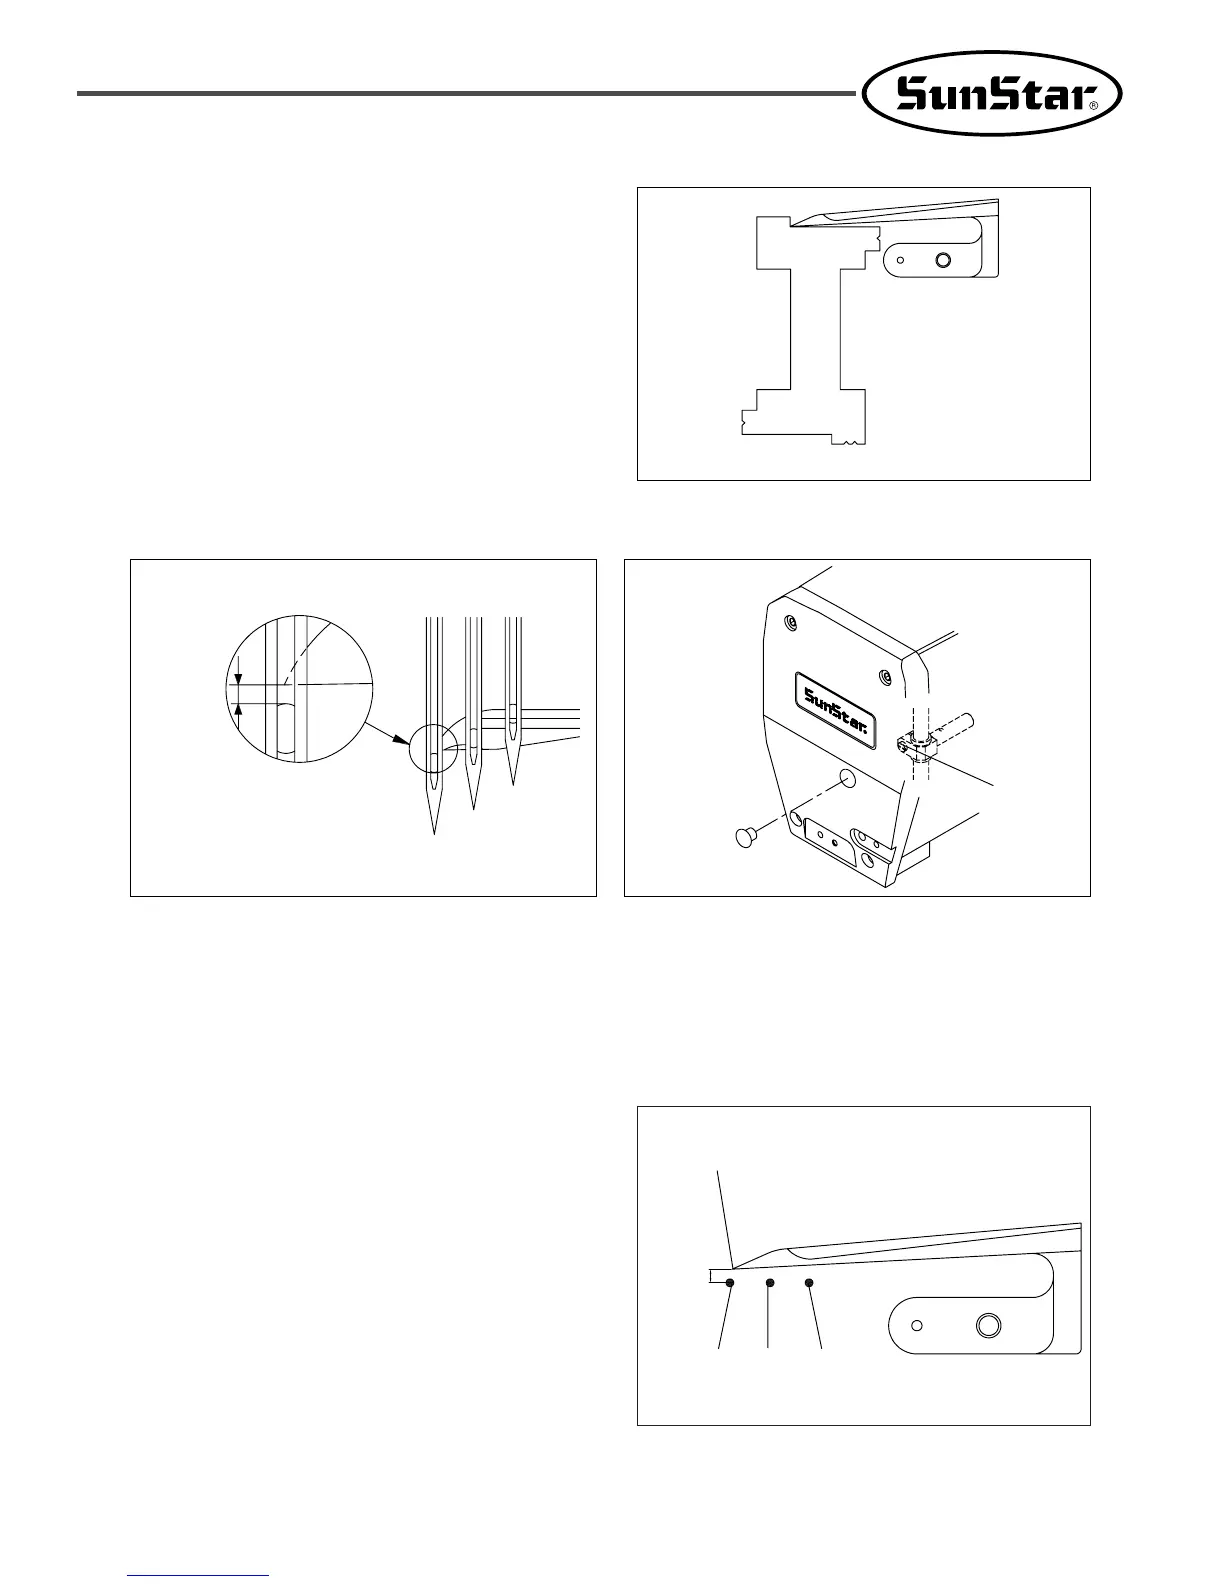
9) How to Use Timing Gauge
The timing gauge is marked with A, B, C, D, and E
depending on needle distance. When the looper is located on
the furthest right side and the right needle is nested at
corresponding needle distance “V groove”, align the looper
with the timing gauge and fasten “the looper holder screw.”
[ Figure 43 ]
☆☆
In case where three needles are used
When [the tip of the looper(A)] meets [the left needle
①], the needle distance should be 0.2~0.3mm.
When [the tip of the looper(A)] meets [the central needle
②], the needle distance should be 0.05~0.15mm.
When [the tip of the looper(A)] meets [the right needle
③], needles should be slightly contacted (some 0.2mm).
In this case, press [the needle guide(Rear)] for [the right
needle③], and adjust the distance between [the tip of the
looper(A)] and [the right needle③] at 0~0.05mm.
Make the adjustment by loosening the screw for [the
looper holder].
11) Longitudinal Position of Needle and Looper
[ Figure 46 ]
①
A
0.2~
0.3mm
②
③
 Loading...

