19
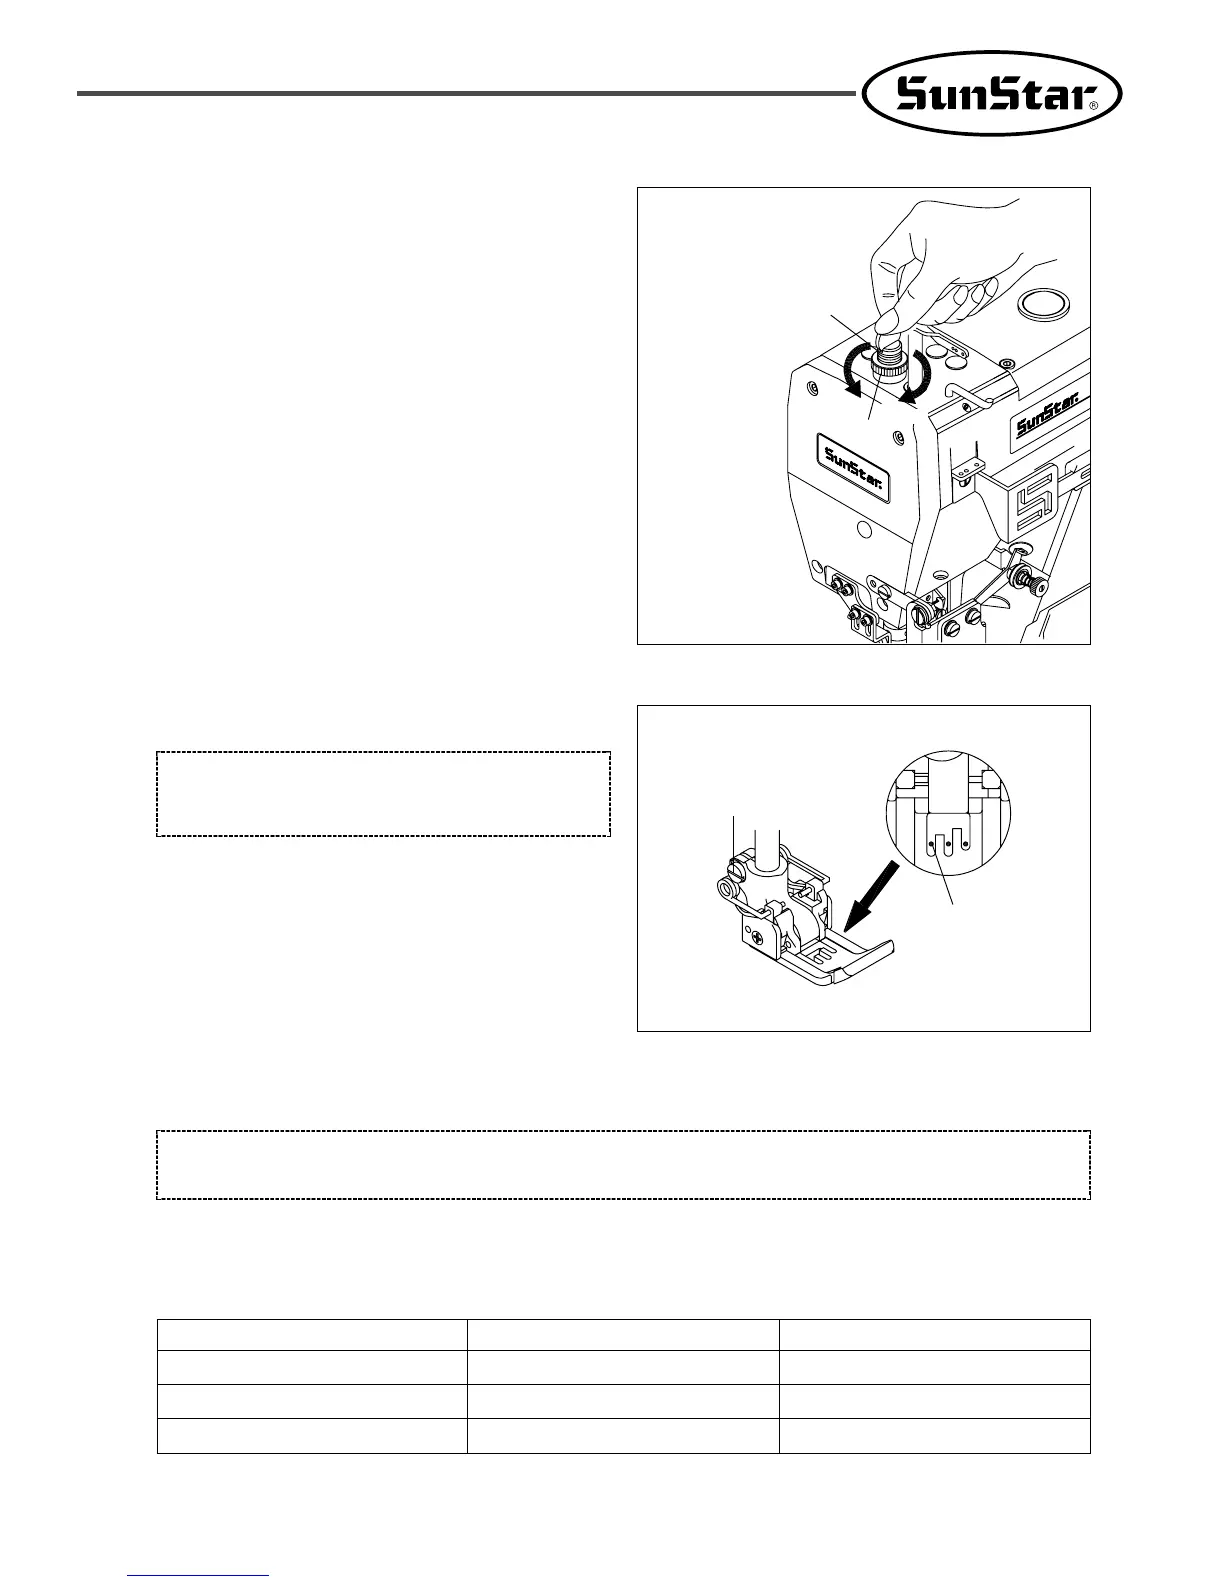
5) Adjustment of presser foot tension
If the sewing material is in good condition, it is better to
have as little tension as possible on the presser foot.
Loosen the presser bar nut① and turn the presser bar screw
② with a coin to adjust the tension of the presser bar. Re-
tighten it afterwards.
Tension will become stronger if the screw② is turned
clockwise, and weaker if turned counterclockwise.
6) Adjustment of presser foot
7) Adjustment of main feed
⑴ Stitch length
Stitch length can be adjusted straight from 1.4mm to 3.6 mm
The table below shows stitch length, number of stitches per inch(25.4mm) and per 30 mm.
After unfastening the screw ①, move the front part of the
presser foot left and right to bring the needle to pass the
center of the needle passage of the presser foot.
[ Warning ]
Be sure to turn the power switch off before adjusting the
position of the presser foot.
[ Warning ]
Be sure to turn the power switch off before adjusting stitch length.
Stitch length (mm) No. of stitches (per inch) No. of stitches (per 30mm)
3.6 7 8
2.4 10.5 12.5
1.4 18 21
[ Figure 21 ]
①
Needle
[ Figure 20 ]
②
①
Weak
Strong
 Loading...

