40
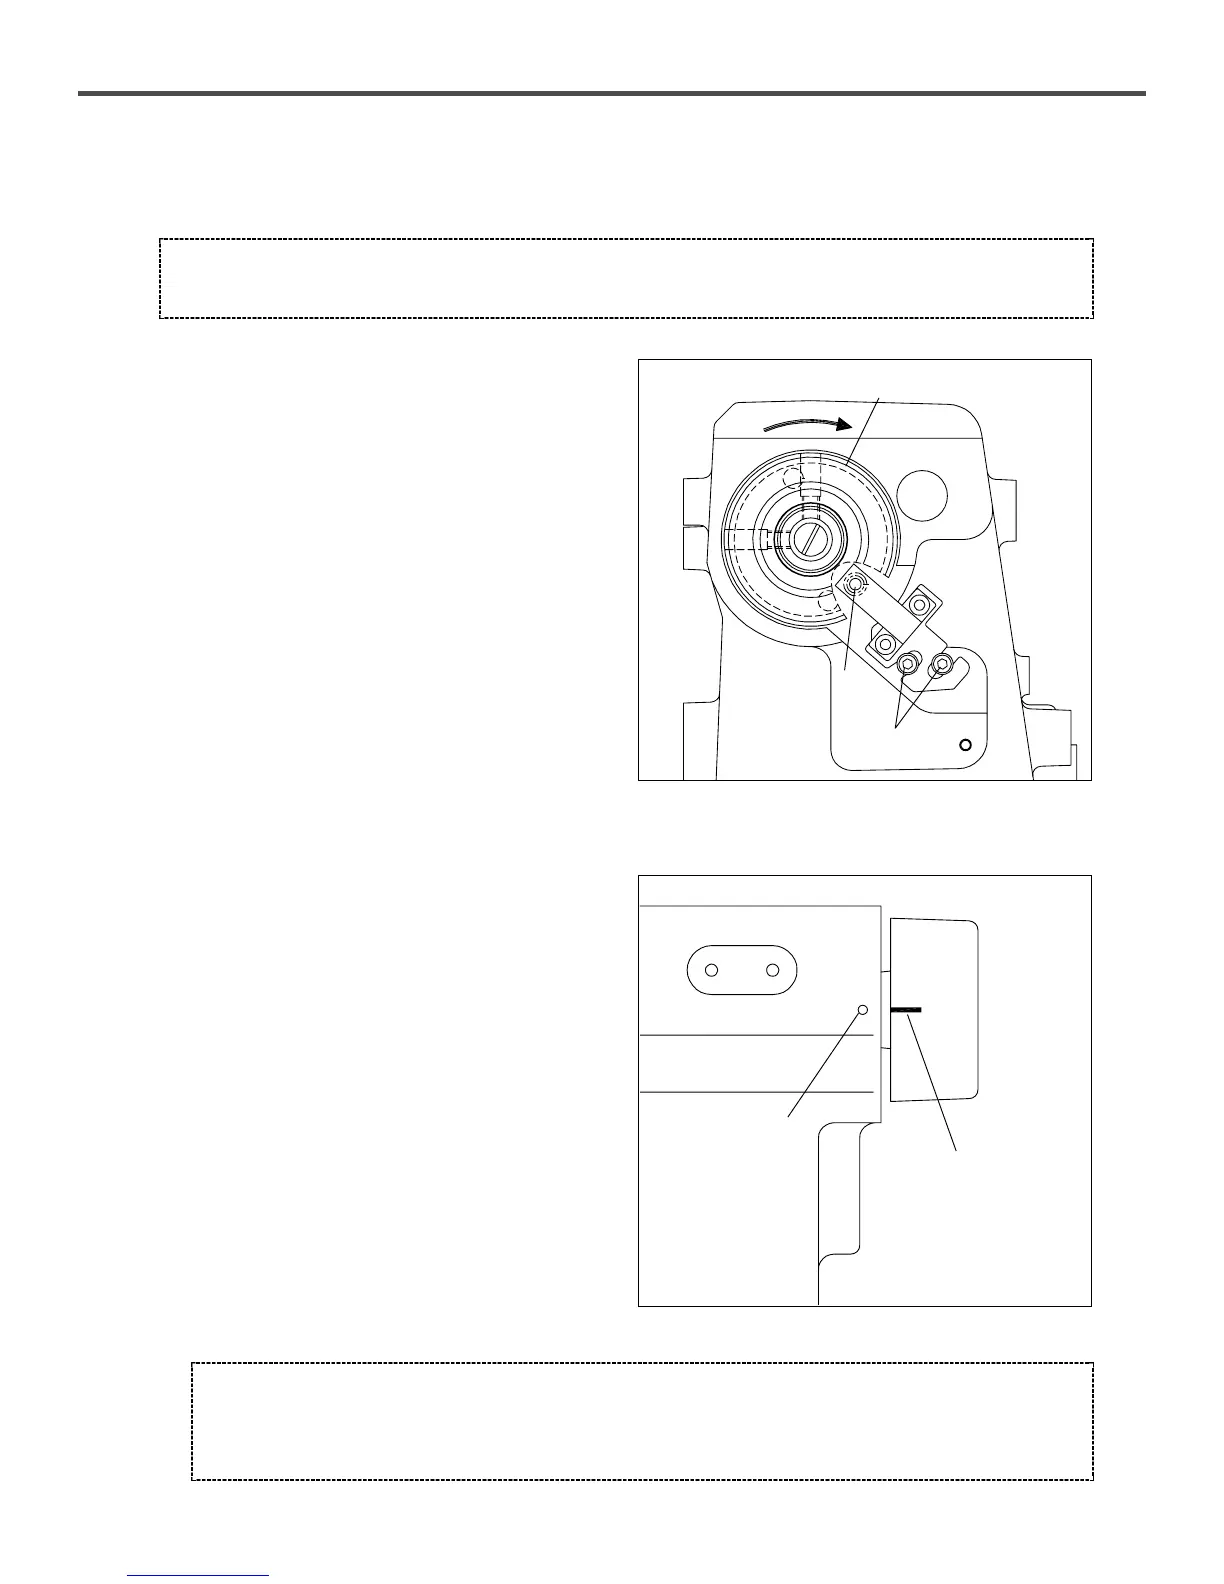
(1) Install the synchronizer ① on the machine and fasten
screw ② lightly.
(2) Turn on the motor switch.
(3) Press the pedal and form a few stitches.
(4) Press the pedal backward to stop the needle.
(5) Loosen the screw ② and turn the line ④ on the upper
shaft pulley to align with the hole ⑤ in the arm. Be sure
to keep the position of the screw ② unchanged.
4) Installation of synchronizer sensor
[ Figure 72 ]
[ Warning ]
Leave the trimming cylinder plug pulled off from the control box in the motor. Otherwise, parts can be damaged.
③
①
②
(6) To see whether the needle bar is located at 0.5mm below
the highest point, press the pedal and run the machine.
[ Figure 73 ]
⑤
④
[ Caution ]
(1) At this point, the needle bar should be positioned at the highest point.
(2) The optimal condition for the synchronizer sensor is when the needle bar is 0.5mm below the highest point by
turning the upper shaft pulley a bit more.
 Loading...

