25
[ Figure 37 ][ Figure 36 ]
①
②
thread
1/2
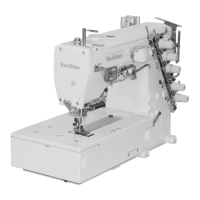
4) Position of Looper Cam
In the figure, the looper cam is viewed from the side of the needle bar.
When the left needle reaches the middle of the looper, lower the needle from the highest position so that the thread stays
away from the highest position of [the looper cam①].
See the figure below.
Make adjustments by loosening [the screw②].
[ Figure 39 ][ Figure 38 ]
①
⑥
③
④
⑦
②
stitch plate
0.2mm
7.0mm
(8.0mm)
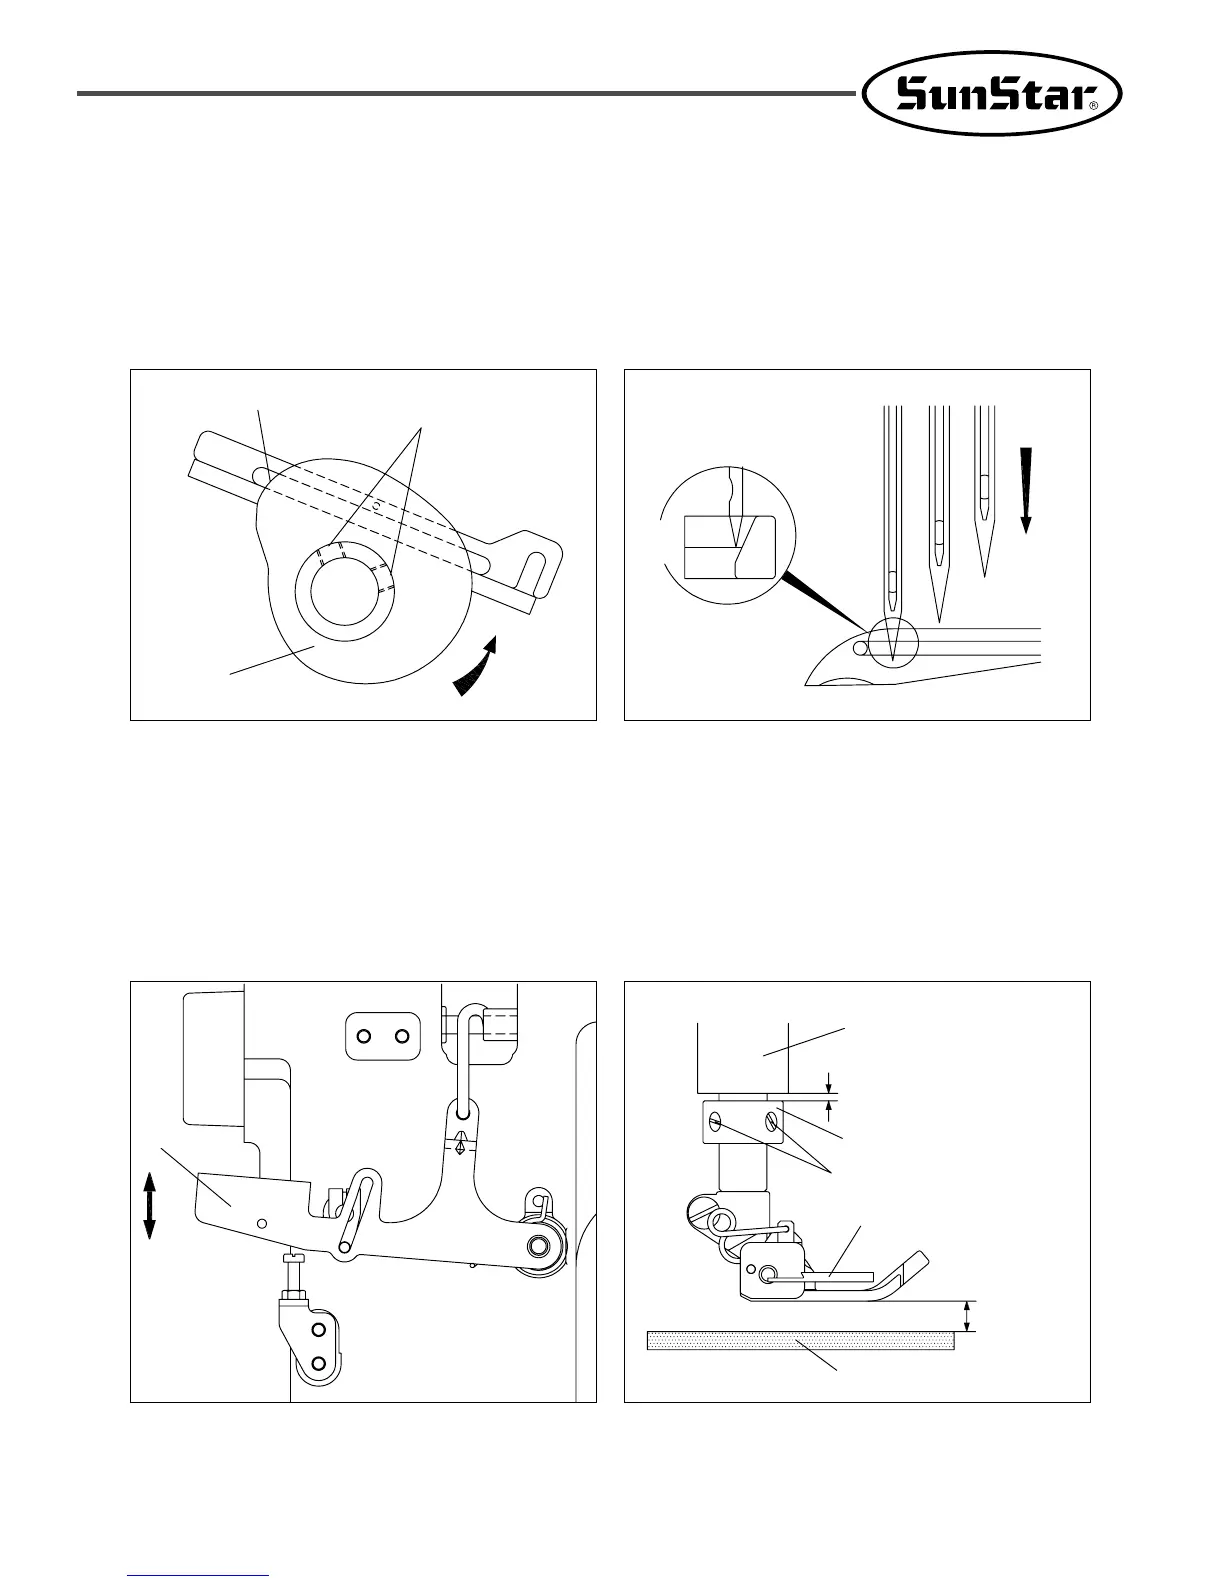
5) Removing Presser Foot and Amount of Presser Foot Lift
Loosen [the screw④] for [the presser plate collar③]. Press [the lap lift lever①] and separate the presser foot. When [the lap
lift lever①] is pressed, adjust the maximum height of the presser foot to set the distance between the front face of the needle
plate and the bottom of the presser foot at 7.0mm (when the spreader is equipped).
When this adjustment is completed, set the distance between the bottom of [the presser bar bushing⑥] and the front face of
[the presser bar collar③] at 0.2mm and fasten [the screw④].
If there is no [the spreader⑦], set the distance at 8.0mm. In this case, [the presser bar collar③] is not used.
 Loading...

