49
1) Specification
It is the same as the specification of SPS/B(A)-1811(2211)-HS-20.
2) Adjusting the Angle of Upper Feed Pplate
(Both Right and Left)
When the upper feed plate (both right and ldft) is parallel with
a needl plate, pressure to press down the sewing materials
of the front side of upper feed plate is insufficient. In that
case, keep the upper feed plate (both right and left) 3mm
above surface of the needle plate.
▶ How to adjust
ⓐ After loosen a cramp fixing screw ① of feed plate and
linking nut ③, turn the linking screw ② clockwise, the
front side of upper feed plate comes to descend.
ⓑ After adjusting angle, fasten the cramp fixing screw ① of
feed plate and linking nut ③.
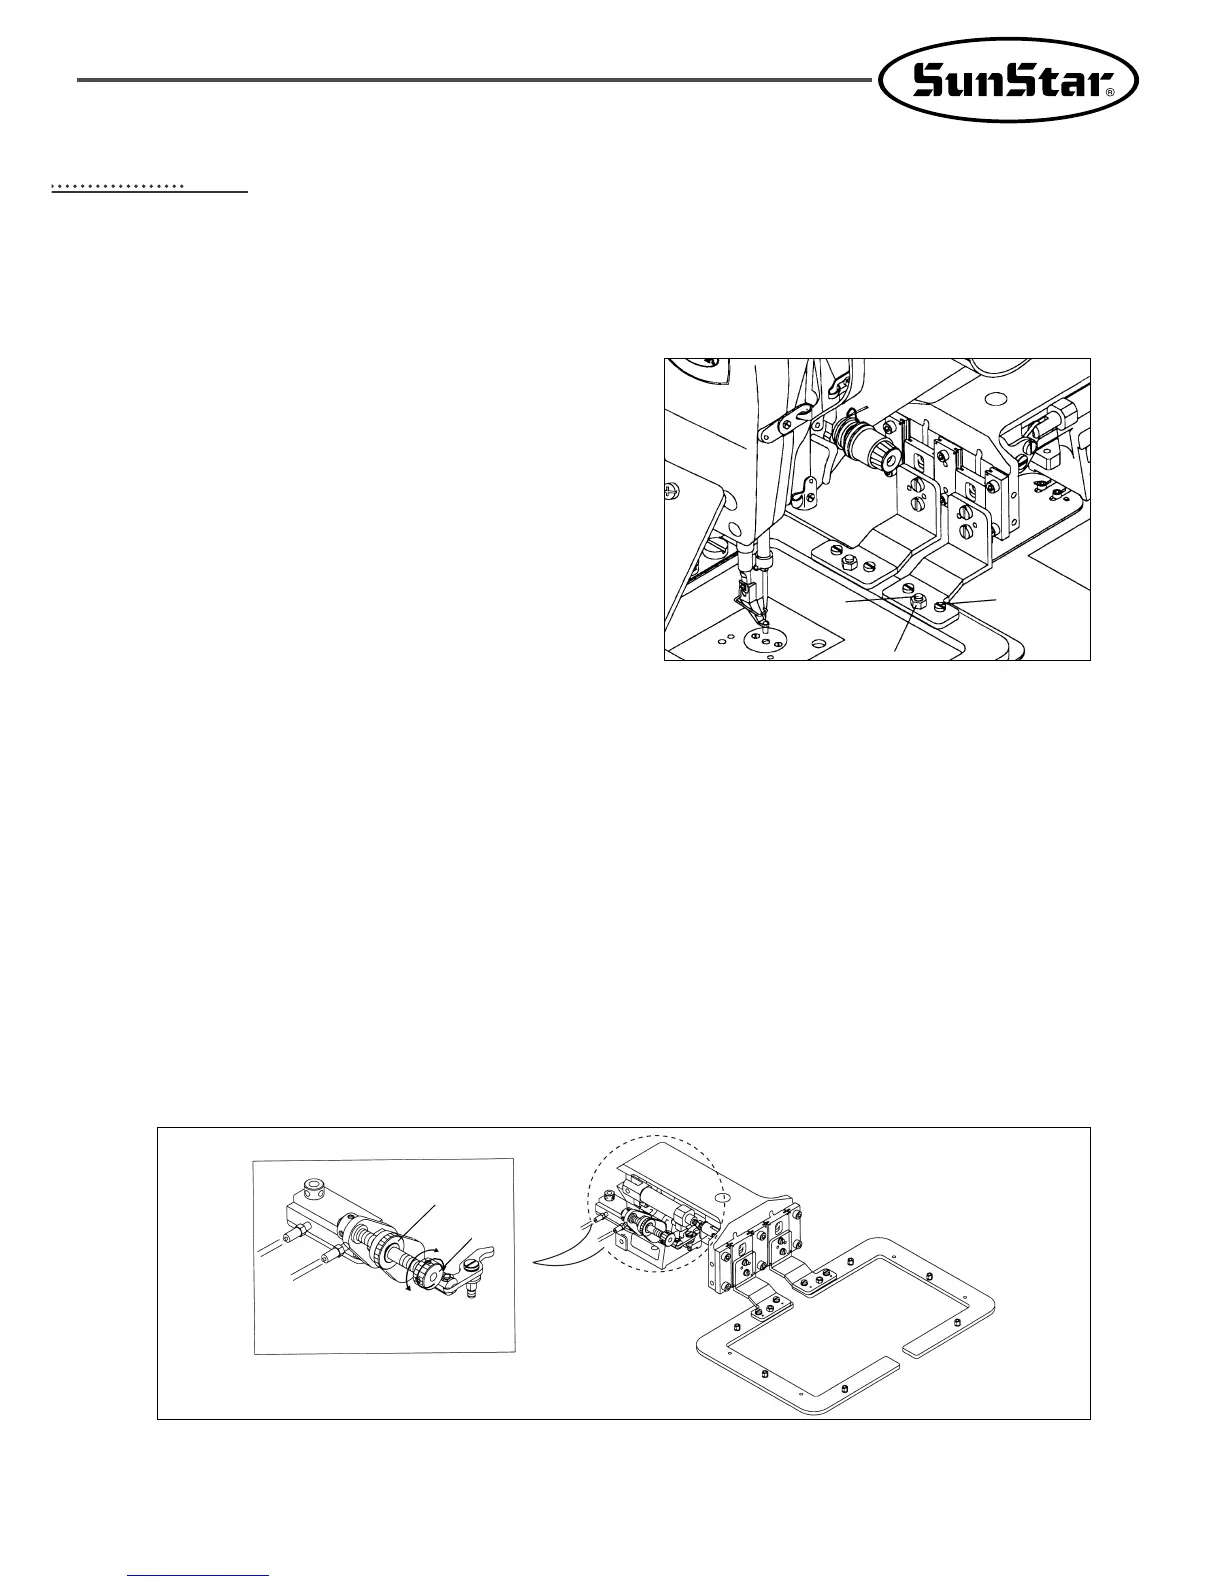
3) Adjusting the Initial Position of Air Cylinder
Adjust the distance from a center of two-step stroke air cylinder shaft and a center of cylinder knuckle to be
112.5±0.3mm.
4) Adjusting the Middle Stop Position of the Left Upper Feed Plate
Adjust the middle stop position of the left upper feed to be suitable for working according to the position of sewing
materials. Fit the gap between the upper feed plate and sewing materials to be 1mm.
▶ How to adjust
ⓐ Loosen the cylinder bracket fixing nut ①.
ⓑ Turn the cylinder stroke adjusting nut ② to make the middle stop position a little higher than thickness of sewing
materials. If you turn cylinder stroke adjusting nut ② to the direction of B, the middle stop position will be lower.
ⓒ Fasten the cylinder bracket fixing nut ① for sure.
[ Fig. 71 ]
[ Fig. 72 ]
①
②
③
①
②
B
A
99
SPS/B(A)-1811(2211)-HS-22
 Loading...

