SINGLE PHASE HI 3.6/5kW | User Manual25
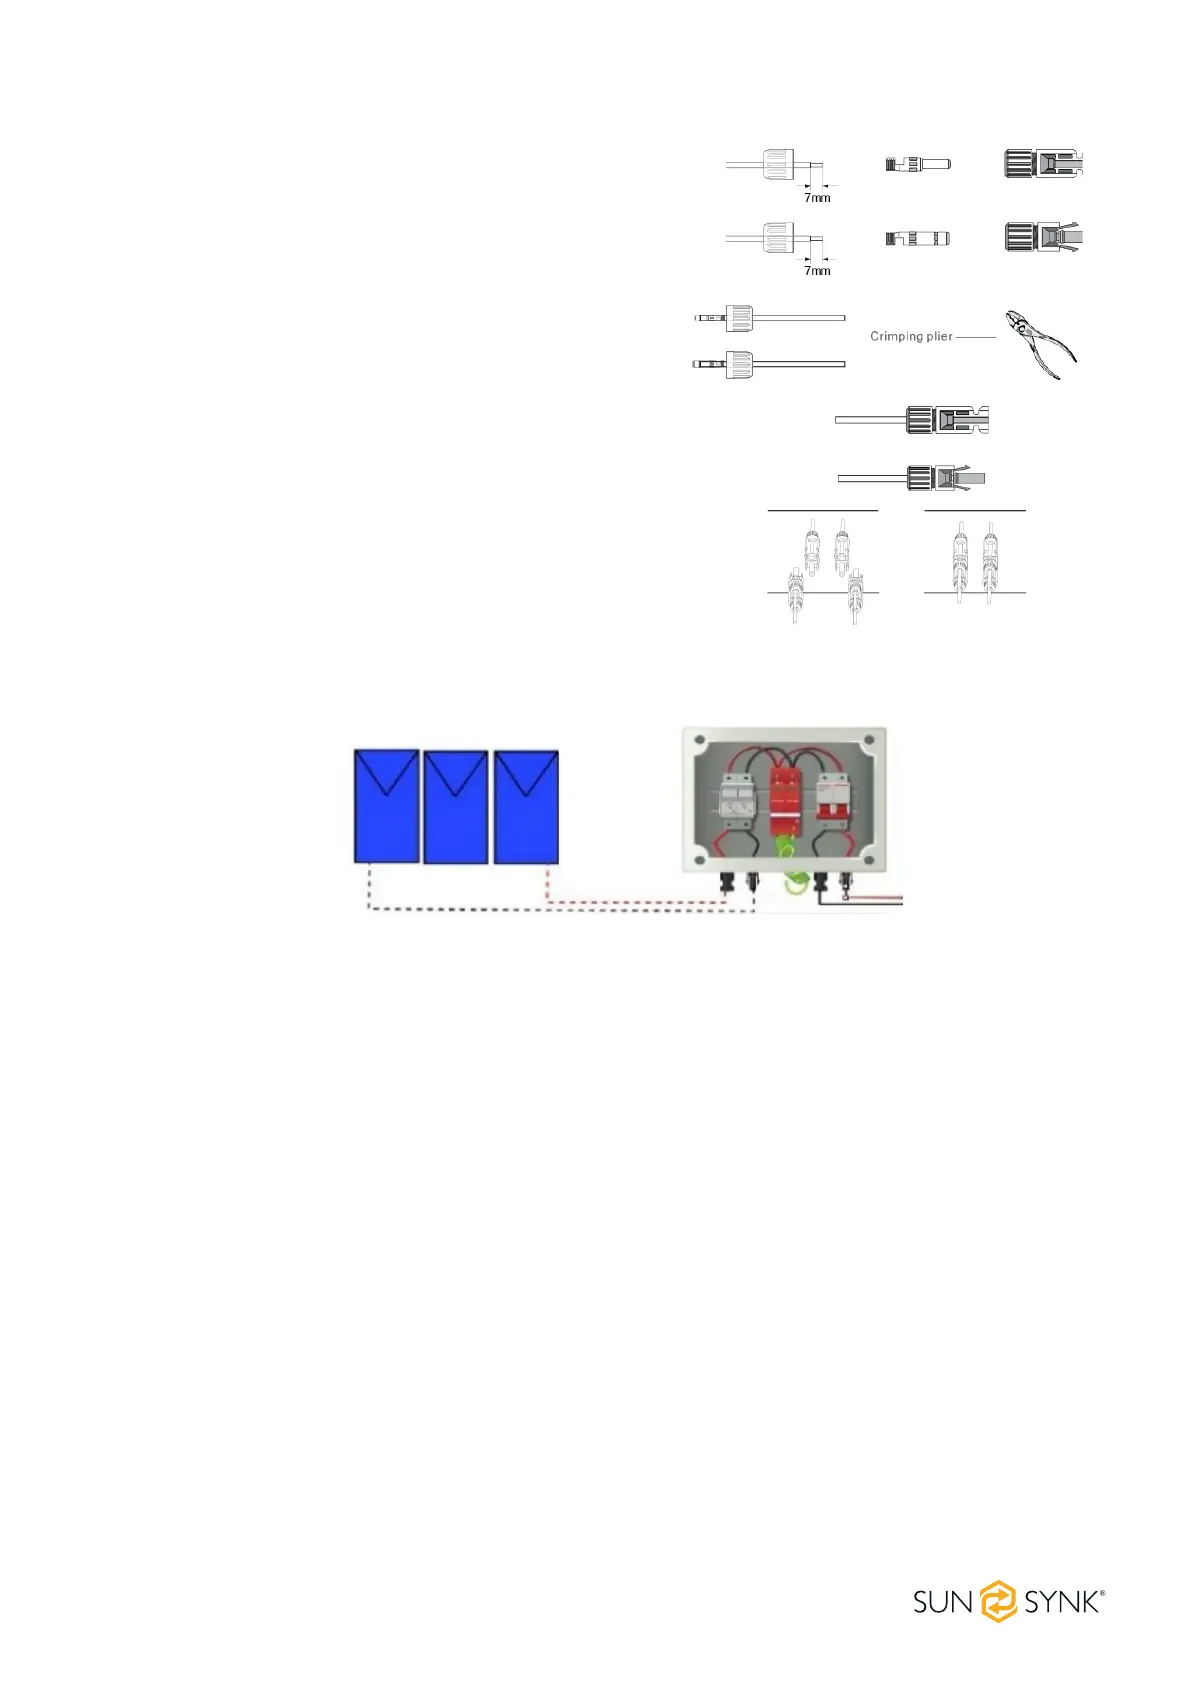
The correct steps in assembling the DC connector are explained below:
1. Strip 7mm of the plastic coating o the DC wire and
disassemble the connector cap nut.
2. Crimp metal terminals with crimping pliers.
3. Insert the contact pin into the connector housing until it
locks into place. Then screw the cap nut onto the connector
housing. Torque to 2.5-3 N.m.
4. Finally, insert the DC connector into the positive and negative
input of the inverter.
4.8.3. PV Protection
solar surge
protection and
fuse
The CT coil is one of the most important parts of the Sunsynk Parity inverter. This device reduces the power
of the inverter to prevent feeding power to the grid. This feature is also known as “Zero Export”.
1. Fit the coil (sensor) around the live cable on the main fuse feeding the building and run the cable back to
the inverter. If using an external meter, you can extend the cable for more than 10 metres. Plese consult
the meter manual on distance.
2. Connect the other end of the CT coil to the inverter terminals marked as CT coil.
4.9. Installing the CT Coil