58
Chapter 3: Maintenance and Component Installation
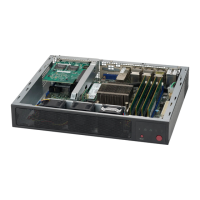
Installing M.2 Solid State Drives on Motherboard
The X13DEM motherboard has two hybrid PCIe 3.0 and NVMe or SATA M.2 slots (M.2-H1,
M.2-H2). M.2 allows for a variety of card sizes, increased functionality, and spatial eciency.
The M.2 slot on the motherboard supports PCIe 3.0 x2 or SATA 3.0 devices in the 2280 and
22110 form factors.
Note: M.2 slots are intended to be used for boot devices only. Any write intensive workloads
may result in thermal issues and the M.2s overheating.
Installing M.2 SSDs
1. Remove power from the system and then remove the top cover as described in Sections
3.1 and 3.2.
2. Refer to its layout image and locate the M.2 slot. Insert the plastic clip into the hole
against the M.2 slot on the motherboard.
3. Turn the plastic clip by 90° degrees.
4. Insert the M.2 sideways into the connector so that it lays at, then secure it to the
motherboard with the plastic clip.
5. Repeat as necessary for more M.2 drives.
6. Finish by replacing the cover and restoring power to the system.
2
3
3
4
Figure 3-12. Installing an M.2 SSD

 Loading...