Chapter 2: Installation
2-3
2-3 Processor and Heatsink Installation
Warning: When handling the processor package, avoid placing direct
pressure on the label area of the fan.
Notes:
1. Always connect the power cord last and always remove it before add-
ing, removing or changing any hardware components. Make sure that you
install the processor into the CPU LGA 775 socket before you install the
CPU heatsink.
2. The Intel LGA 775 Processor package contains the CPU fan and
heatsink assembly. If you buy a CPU separately, make sure that you use
only Intel-certied multi-directional heatsink and fan. (This motherboard is
optimized for 1U.)
3. Make sure to install the motherboard into the chassis before you install
the CPU heatsink and fan.
4. When receiving a motherboard with an LGA 775 Processor pre-installed,
make sure that the CPU plastic cap is in place and none of the CPU pins
are bent; otherwise, contact the retailer immediately. Refer to the MB
Features Section for more details on CPU support.
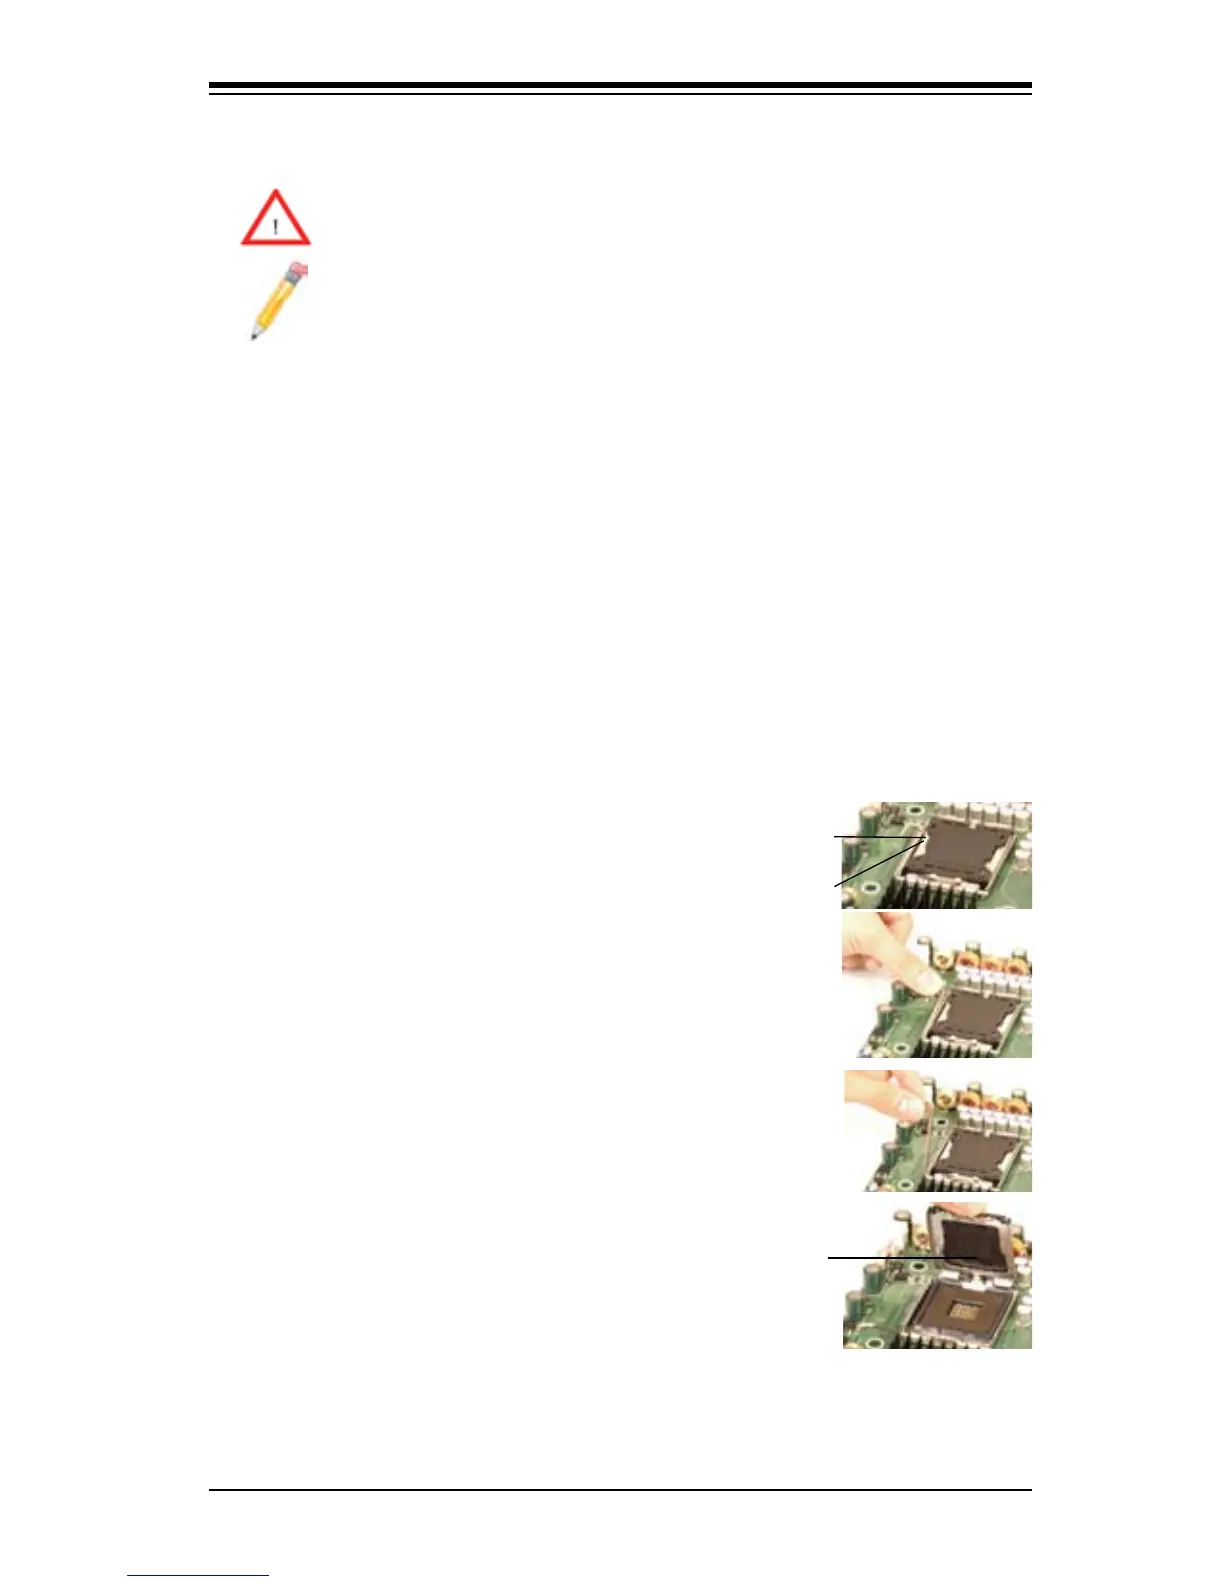
Load Lever
PnP Cap on
top of the
Load Plate
Load Plate(w/PnP
Cap attached)
Installing the LGA 775
Processor
Press the load lever to release the load 1.
plate, which covers the CPU socket, from
its locking position.
Gently lift the load lever to open the load 2.
plate.
Use your thumb and your index nger to 3.
hold the CPU at the top center edge and
the bottom center edge of the CPU.
Align CPU Pin1 (the CPU corner marked 4.
with a triangle) against the socket corner
that is marked with a triangle cutout.
Align the CPU key that is the semi-circle 5.
cutout below a golden dot against the
socket key, the Notch on the same side
of the triangle cutout on the socket.