Chapter 2: Installation
2-7
Removing the Heatsink
Caution: We do not recommend
that the CPU or the heatsink be
removed. However, if you do
need to remove the heatsink,
please follow the instructions be-
low to remove the heatsink and to
prevent damage done to the CPU
or other components.
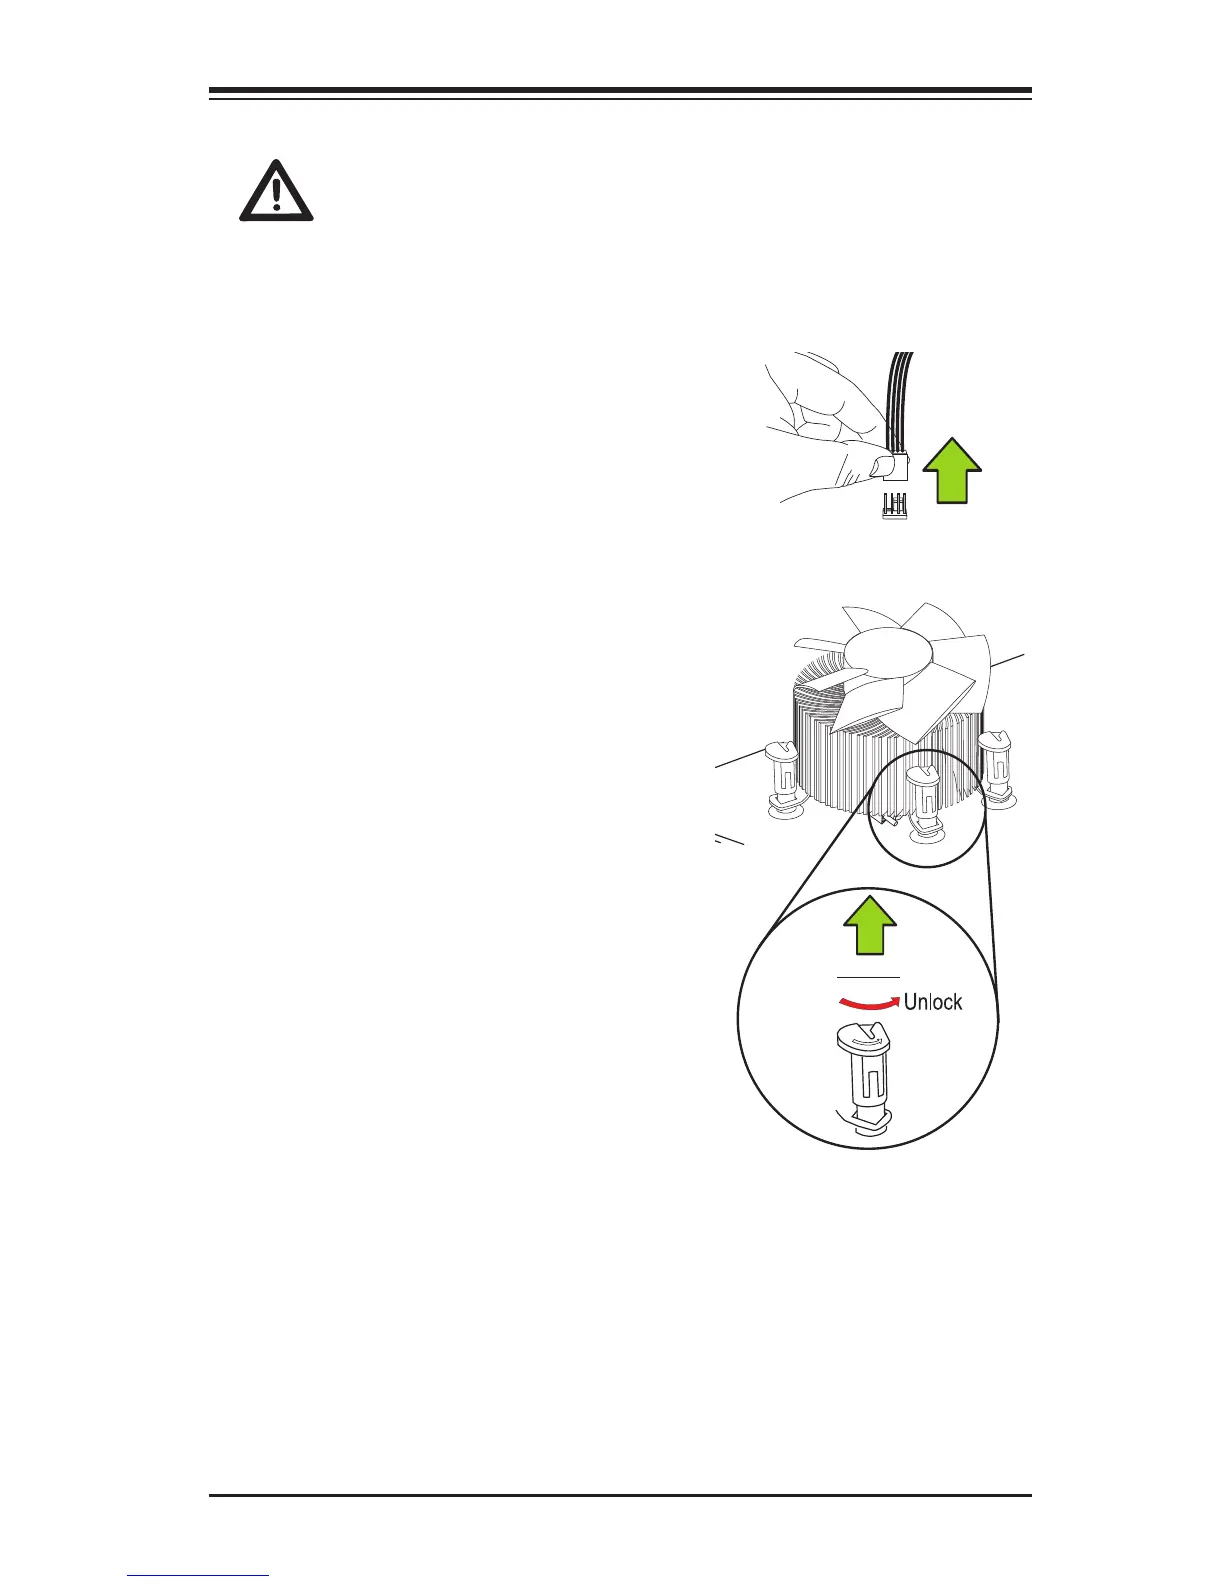
Active Heatsink Removal
1. Unplug the power cord from the
power supply.
2. Disconnect the heatsink fan wires
from the CPU fan header.
3. Use your nger tips to gently press
on the fastener cap and turn it
counterclockwise to make a 1/4 (90
0
)
turn, and pull the fastener upward to
loosen it.
4. Repeat Step 3 to loosen all fasteners
from the mounting holes.
5. With all fasteners loosened, remove
the heatsink from the CPU.
Unplug the
PWR cord
Pull Up
For the 1U passive heat sink, ask for SNK-P0046P (back plate is included),
for the 2U active heat sink, SNK-P0046A4.