Chapter 2: Installation
2-3
Installation Instructions
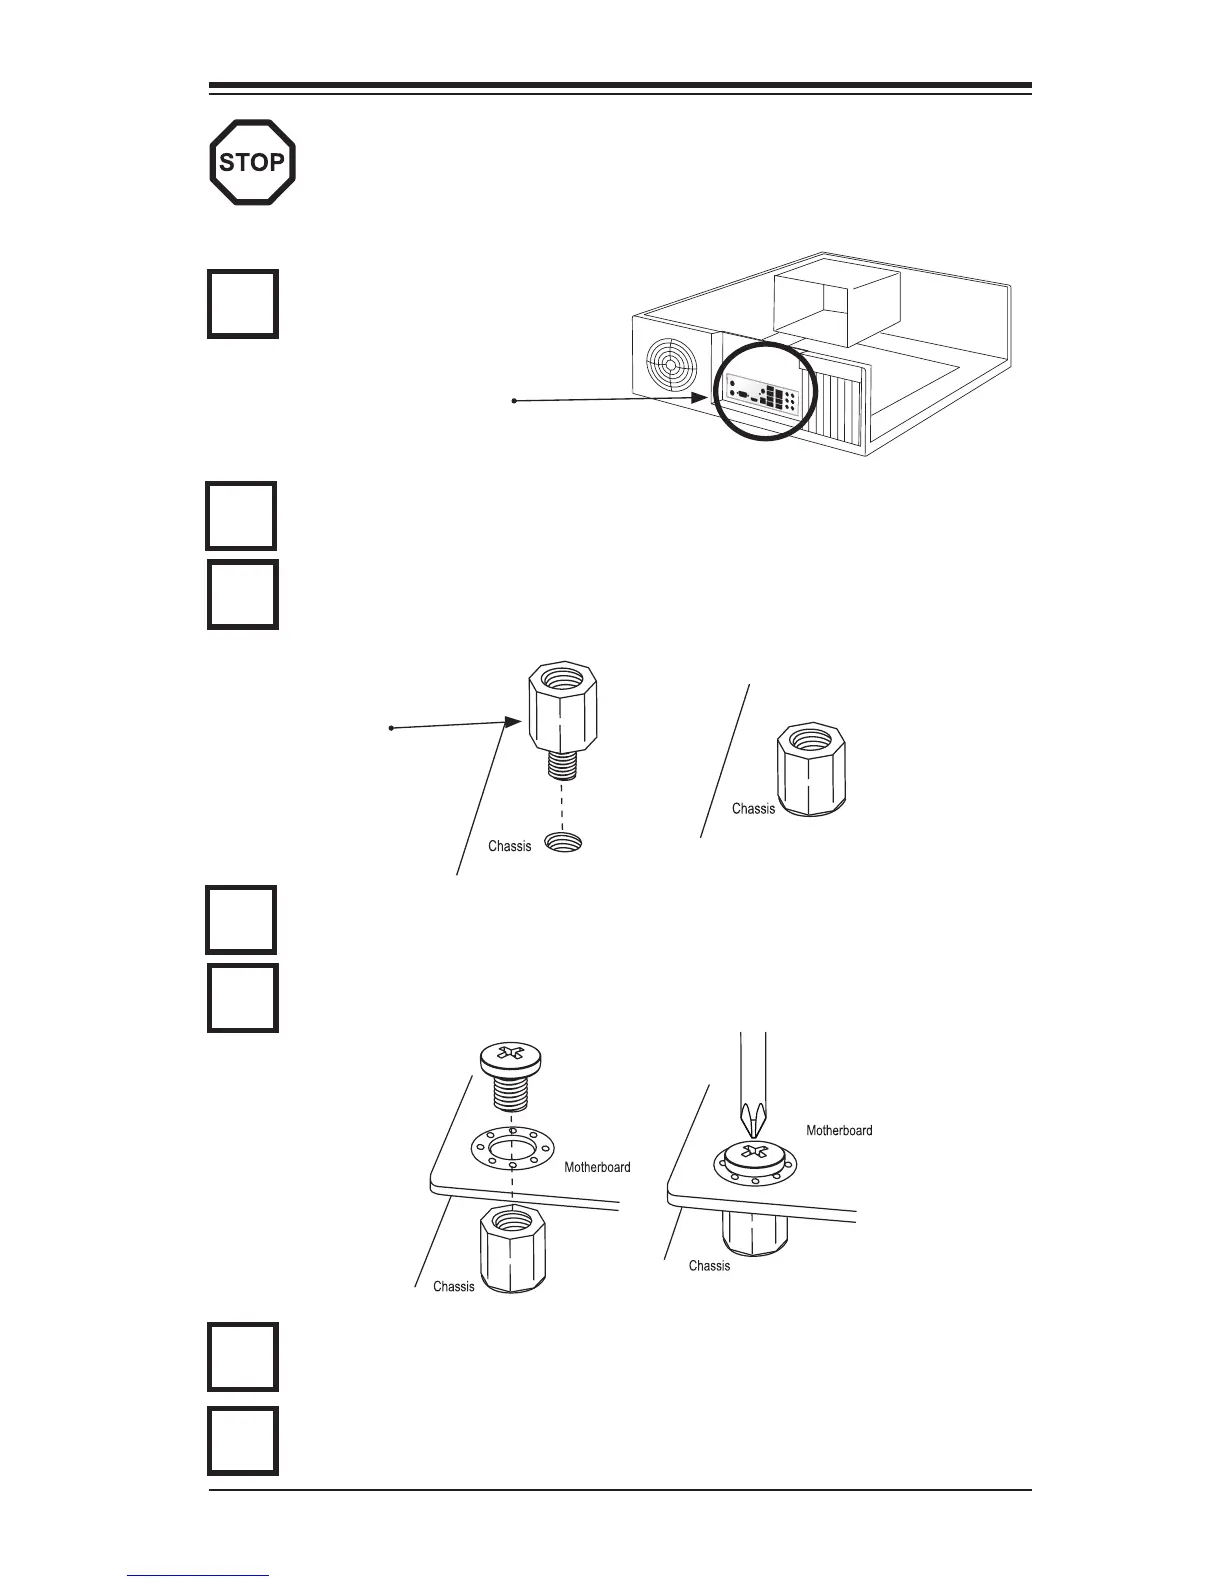
Install the I/O shield into the chassis.
Caution: To avoid damaging the motherboard and its components, please
do not use a force greater than 8 lb/inch on each mounting screw during
motherboard installation.
Locate the mounting holes on the motherboard. Refer to the layout on the
previous page for mounting hole locations.
Locate the matching mounting holes on the chassis. Install standoffs in the
chassis as needed. Align the mounting holes on the motherboard against the
mounting holes on the chassis.
Install the motherboard into the chassis carefully to avoid damage to mother-
board components.
Insert a Pan head #6 screw into a mounting hole on the motherboard and its
matching mounting hole on the chassis, using the Philips screwdriver.
Repeat Step 4 to insert #6 screws to all mounting holes.
I/O Shield
1
2
3
Stand Off
4
5
6
Make sure that the motherboard is securely placed on the chassis.
7
 Loading...