2-4
X9SPV Motherboard Series User's Manual
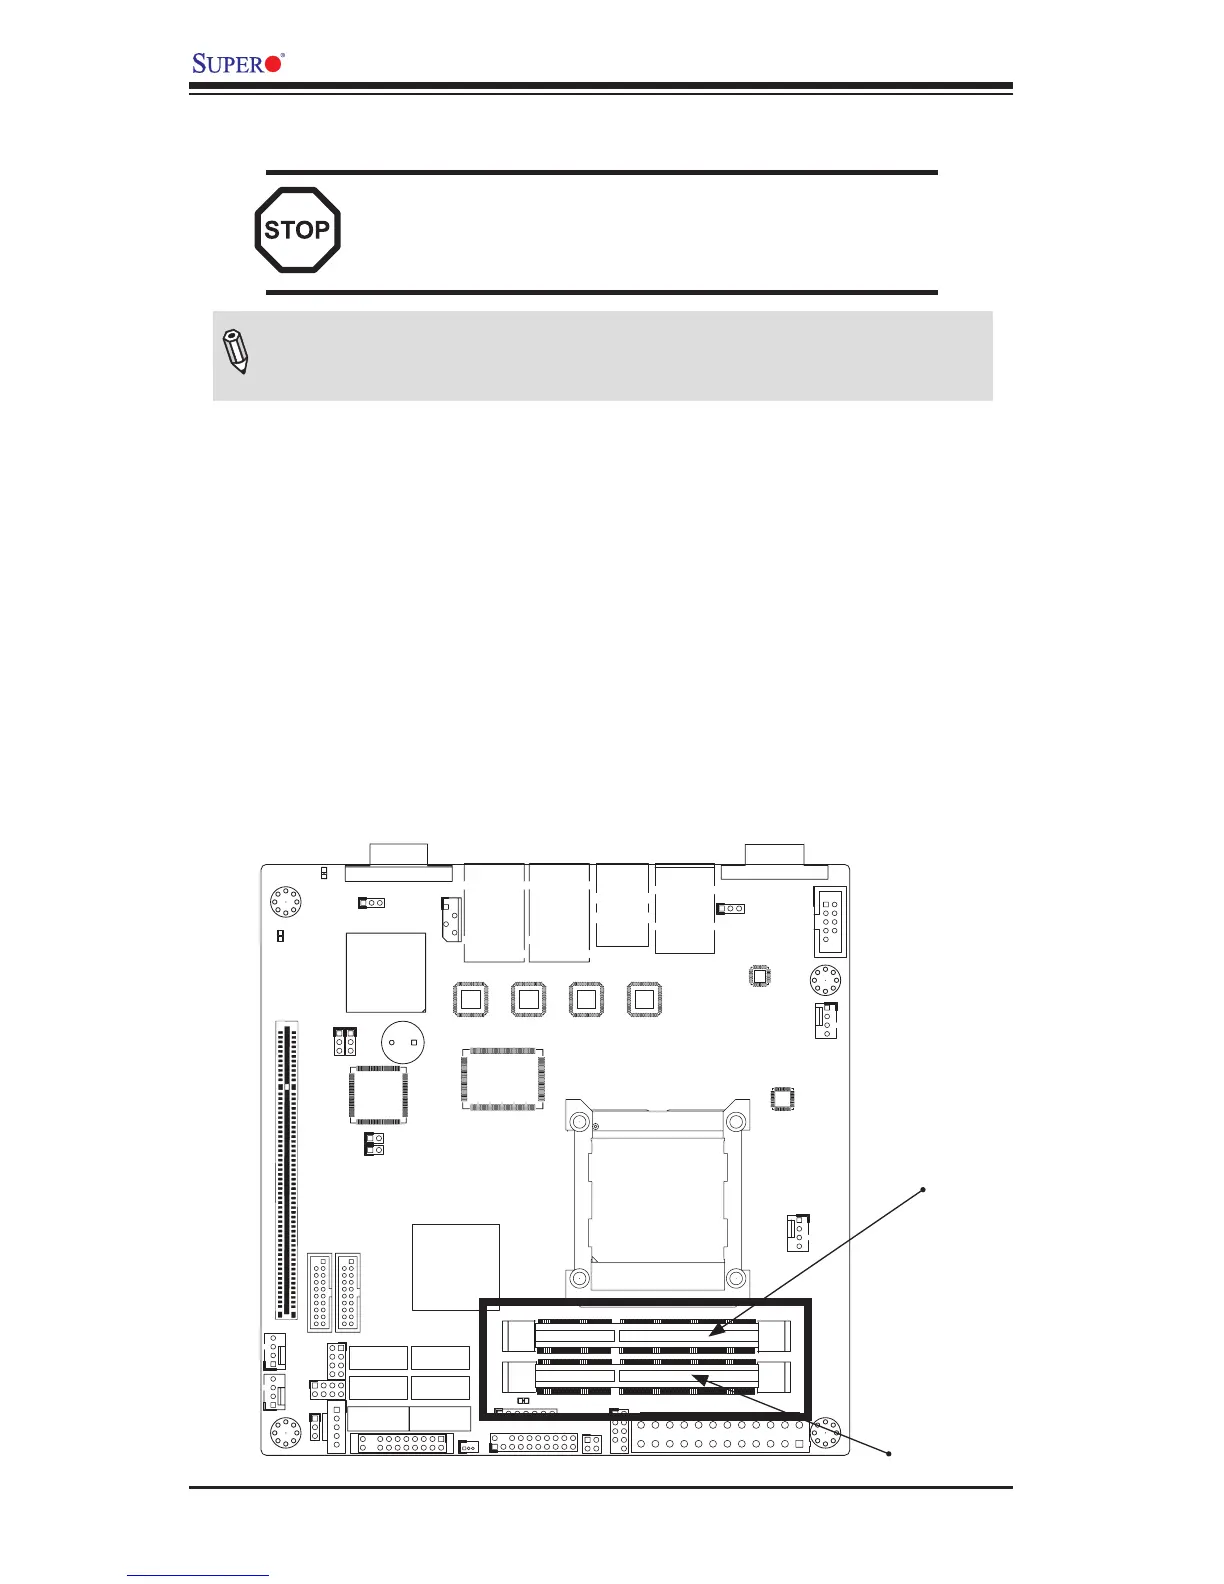
Installing and Removing DIMMs
1
JWD1
UID
VGA
JWP1:WRITE PROTECT
PWR I2C
U60
I-SATA0I-SATA1
JVGA1
JIPMB1
T-SGPIO2T-SGPIO1
JSD1
I-SATA5
I-SATA2
I-SATA4
I-SATA3
J1
J3
F6
JCOM2
J20USB1
SP1
LED2
LED1
LED3
U21
U7
U10
U22
U6
JDIMM1
JDIMM2
JCOM1
FAN2FAN3
FAN1
FAN4
U26
JPW1
JPI2C1
JPK1
U3
JTPM1
JLAN1JLAN2
MH7
MH6
MH2
MH4
JD1
JF1
JP1
JPUSB1
JPB1
JWP1
JL1 JOH1
MH4
U57
X9SPV-F
JTPM1:TPM/PORT80
DOM POWER
P1-DIMMB1
USB8/9
IPMI
JSD1:SATA
COM2
USB6/7
LAN2/4
LAN1/3
P1-DIMMA1
COM1
USB4/5
KB/MOUSE
2-3 System Memory
CAUTION
Exercise extreme care when installing or removing
DIMM modules to prevent any possible damage.
How to Install SO DIMMs
1. Insert the desired number of SO DIMMs into the memory slots, starting with
DIMMA1, then DIMMB1. Pay attention to the notch along the bottom of the
module to prevent incorrect DIMM module installation.
2. Insert each SO DIMM module vertically and snap it into place. Repeat step 1
to install DIMMB1 if needed. See instructions on the next page.
Memory Support
The X9SPV Motherboard Series supports up to 16GB of DDR3 ECC SODIMMs
(1066/1333 MHz in 2 SODIMM slots).
Note: Check the Supermicro website for a list of memory modules that
have been validated with the X9SPV motherboard series.
DIMMA1
DIMMB1
 Loading...