NTP
NTP stands for “Network Time Protocol”.
It’s a way for the DVR to automatically
update its internal clock and ensure it’s
always in sync. There’s no requirement
to use NTP, but it’s easy to setup and
free to use, so there’s really no reason
not to.
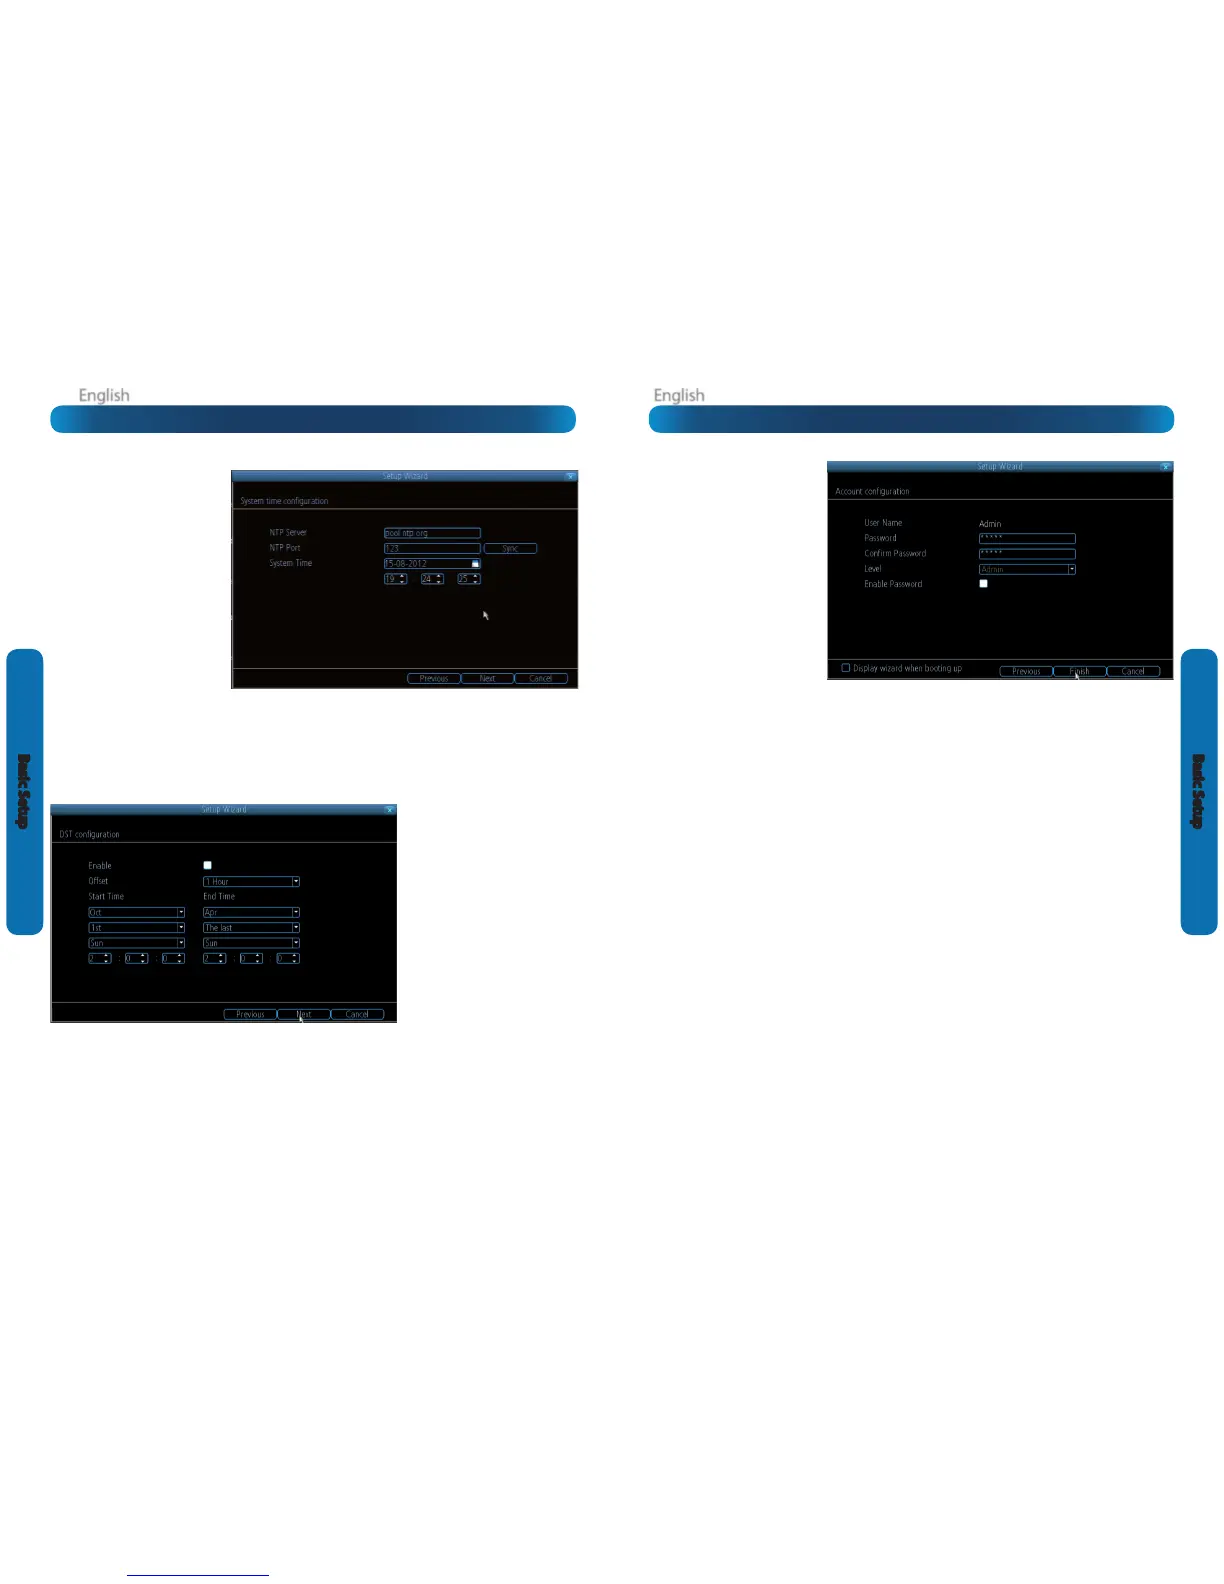
NTP Server: The server you’d like to use
for NTP. They’re all quite comparable
in terms of reliability and accuracy, so
unless you’ve got some kind of master
plan for world domination (which is
aected by the time, for some reason)
then the default (pool.ntp.org) works
ne.
NTP Port: The default is 123. You
should only change this if you’re using
a dierent NTP server, and you know
they use a dierent port. If you’re using
pool.ntp.org, ensure the port is 123.
Sync: Triggers the DVR to automatically synchronize its internal clock with the time server immediately. If your DVR is connected
to the Internet and the network is correctly congured, this will update almost instantly.
System Time: The DVR’s current clock reading.
DST Conguration
You can congure the DVR to
automatically update its internal clock
when daylight saving starts and ends.
Note that using DST and NTP
simultaneously can cause problems,
depending on your NTP server and how
DST works in your locale.
Enable: Whether the DVR will
automatically adjust the time for DST or
not.
Oset: The amount by which the time
changes during DST. For the vast majority
of locations, the oset is one hour, but
exceptions to this rule exist.
Start Time / End Time: When DST begins
and ends in your locale.
Account Conguration
User Name: The name you’d like to
use for the account. An account can
be called anything you like (up to 16
characters in length) except the default
Admin account, which is always called
“Admin”. We suggest using this as the
default all-access account for the DVR.
Password: The password you’d like
to be associated with the selected
account. A password can be between
1 and 8 characters in length, and
consists of numbers only (no letters or
symbols).
Conrm Password: Re-enter the
password to ensure accuracy.
Level: The level of access that the selected account will have. There are three levels of access: Guest, User or Admin.
Guests: Can view live images from the cameras, but cannot access recorded footage, nor can they alter any settings.
User: The most customizable level of access to the DVR. You’ll be able to set a User account to have as little access as a Guest
account, or nearly as much power as an Admin account. User accounts will probably make up the majority of accounts registered
to a DVR if there are multiple users requiring varying levels of access.
Finishing the Setup Wizard
When you choose Finish, the DVR will update and save your settings. It may reboot while doing so.
Display wizard when booting up (checkbox): While this is highlighted, the DVR will automatically run the conguration
wizard when booted up. Simply click this box to de-select it, and the wizard won’t run automatically in future. You can run the
wizard at any time by clicking the icon on the DVR menu tray.
If you don’t want the Setup Wizard to be displayed upon start-up in the future, uncheck the “Display wizard when booting up”
checkbox.
Basic Setup: NTP & DST Basic Setup: Account Conguration & Completion