INSIDE COMPONENTS AND ELECTRONICS | SECURITY DOOR 38
APR/2017 TECHNICAL OPERATIONS AND MAINTENANCE GUIDE | NEXUS STATION
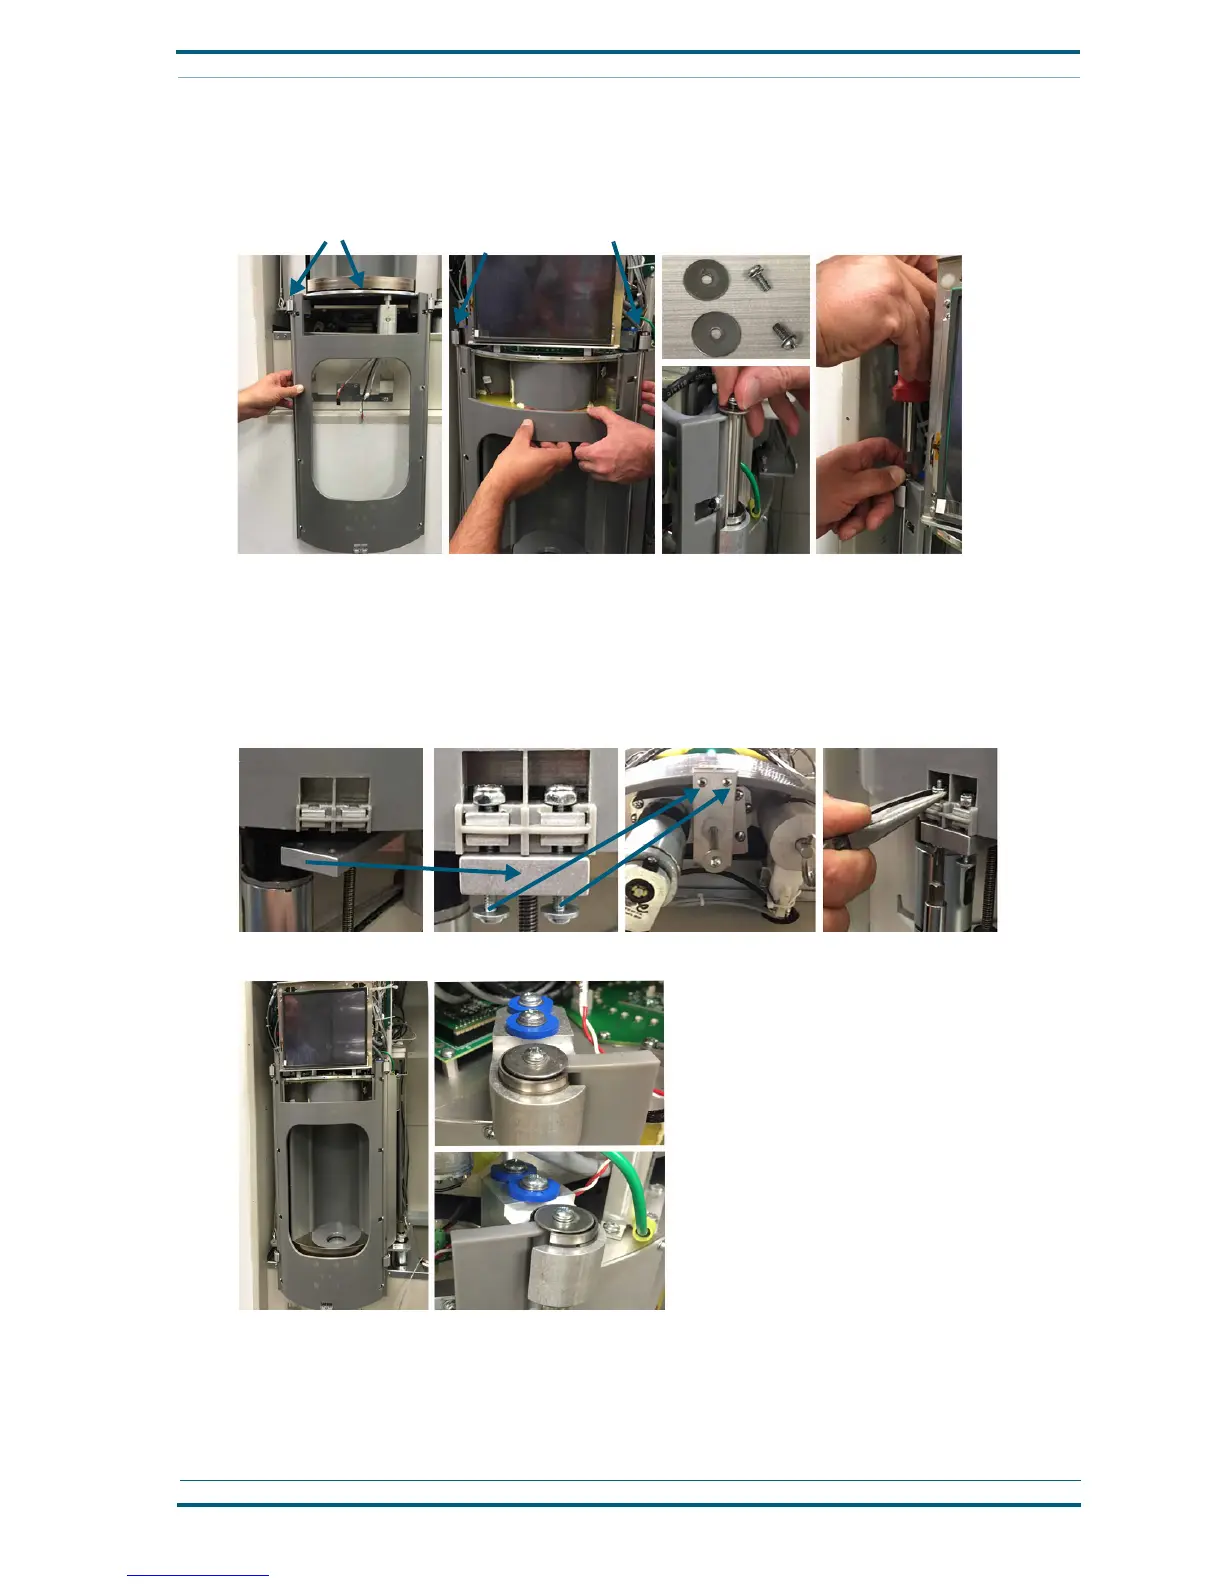
2 Carefully slide the door assembly upward, guiding the rods through the upper bearings.
3 Hold the door in place while you add a washer and pan-head screw into the top of each rod to attach
the rods at the upper bearings and secure the door.
4 With the two 1.25-inch pan-head machine screws, attach the plate on the security-door actuator
through the two openings at the bottom-center of the security door. Place a washer next to the head
of each screw, and then push the screws from below the plate on the motor-actuator assembly and
through the openings on the security door.
5 Attach the locking nuts to the ends of the screws, and then with a Phillips screwdriver, tighten each
screw while holding the nut with a pair of long-nose pliers. Do not over-tighten the screws.
An installed security door is shown in the next photo.
Follow these steps to remove the security door from the turnstile assembly.
1 Remove the screws and locking-nuts from the lower-front of the security door, as shown in the pre-
vious installation photos.
Lower door bearings
Upper door bearings
Left security-door attachment
Right security-door attachment
 Loading...