5
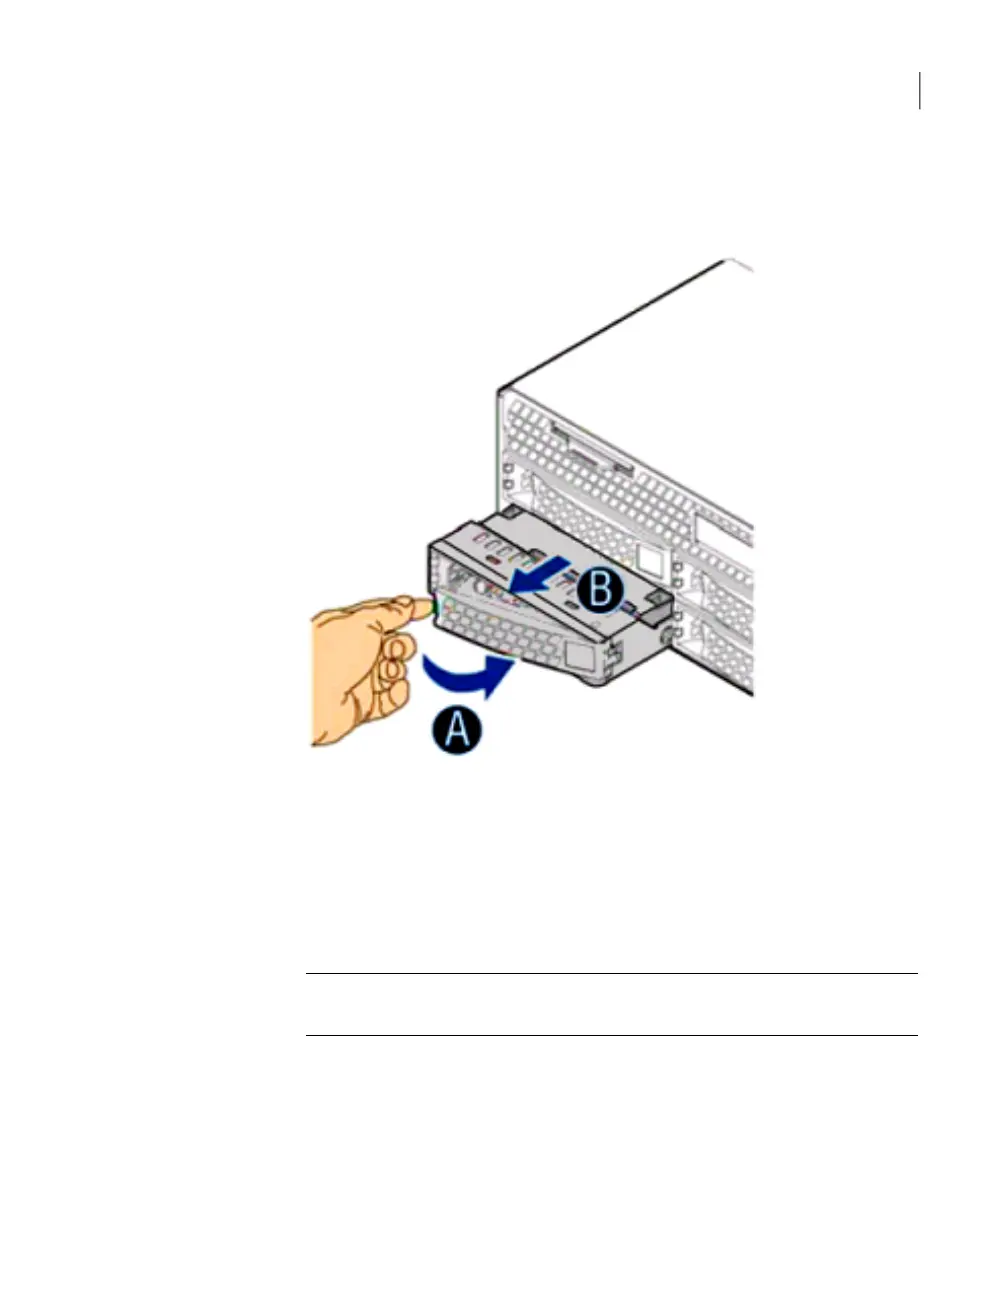
Press the green button on the left side of the drive. The front panel pivots
forward and the drive carrier ejects. The front panel also serves as a latch for
the drive carrier. The following figure shows the drive latch.
6
Slide the drive carrier out of the bay.
To install a replacement drive
1
Put on a wrist strap or take other ESD precautions.
2
Grasp the replacement drive carrier by the sides or metal surfaces only and
remove it from the shipping container.
Warning: Grasping and pinching any part of the printed circuit board on the
drive can damage the drive.
3
Remove the drive carrier from the antistatic bag.
4
Press the green button on the left side of the carrier front panel to release the
latch.
103Removing and replacing appliance hardware components
Removing and replacing NetBackup 5230 disk drives