Synology DiskStation User's Guide
Based on DSM 3.0
149 Chapter 14: Safeguard Your Environment with Surveillance Station
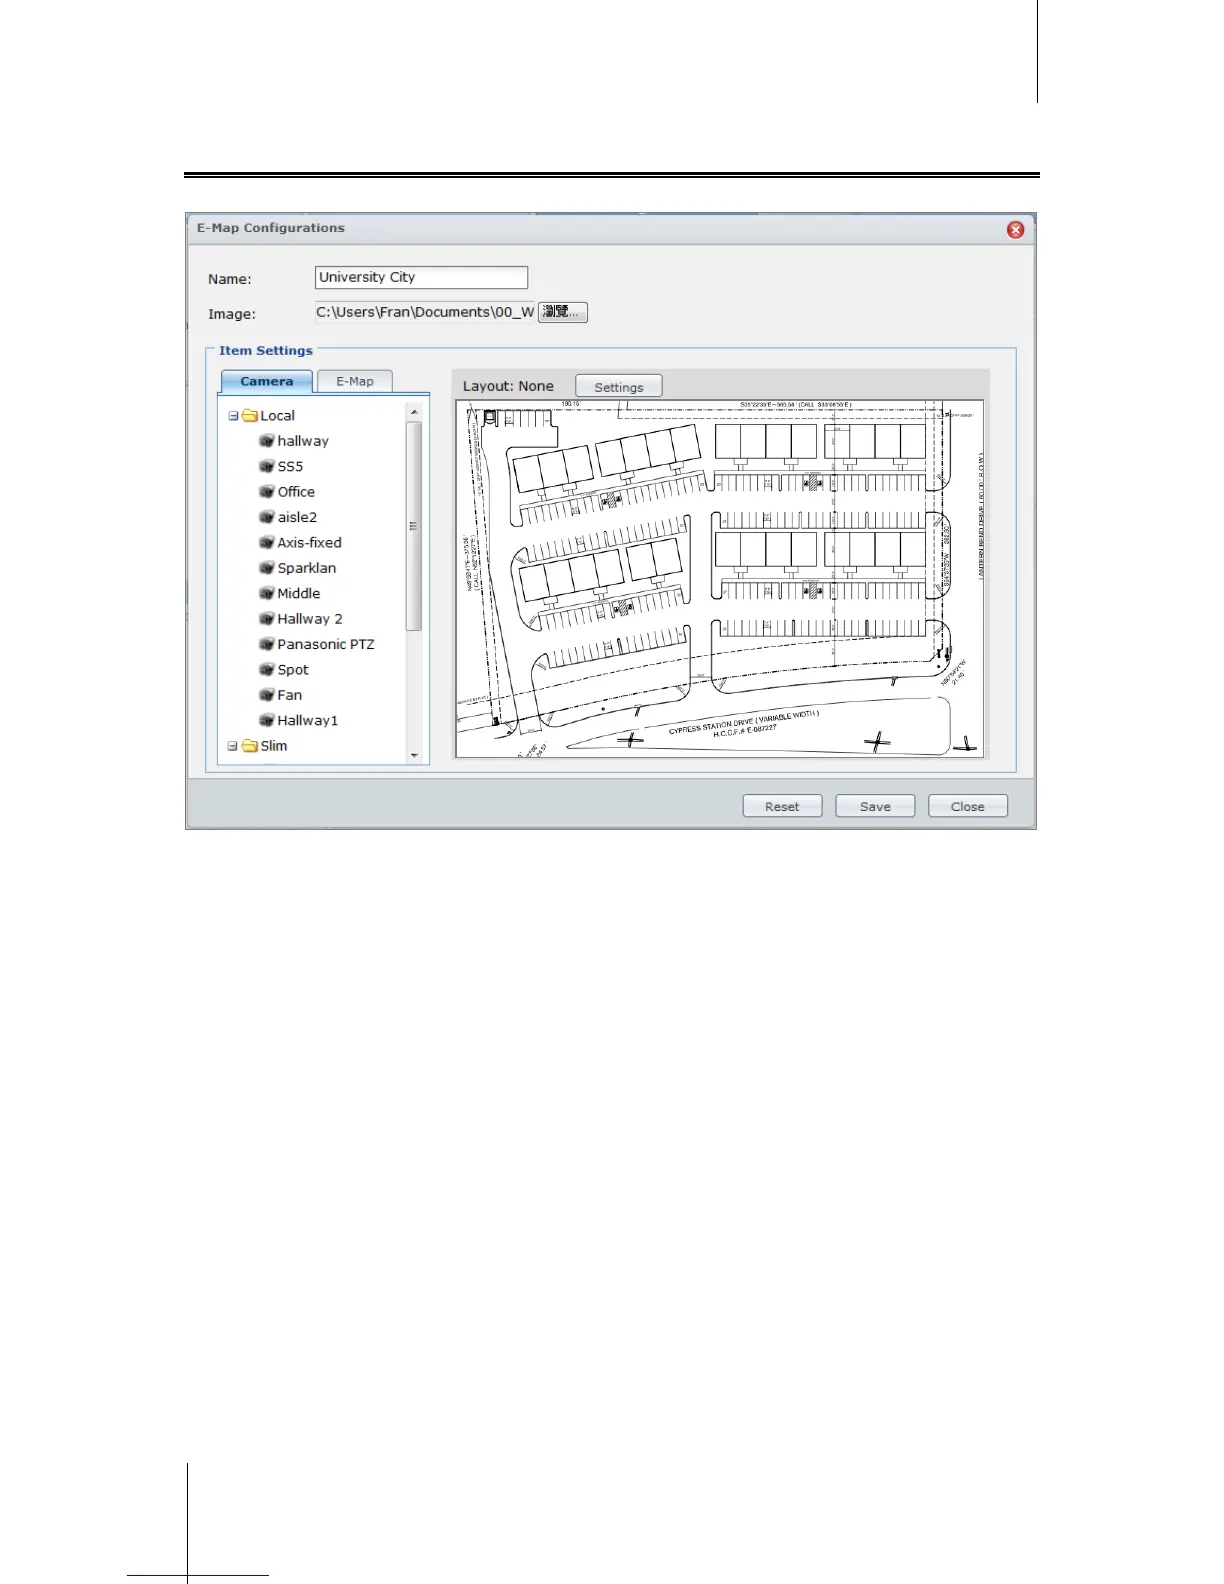
Use E-Map
You can add, edit, and delete E-Maps at System > E-Map under Management.
To add an E-Map:
1 Click Add.
2 Name the E-Map.
3 Click Browse to locate the image file and upload the file.
4 The image will be displayed in the Items Settings area when the transmission is complete.
5 Click Settings next to Layout. In the window that appears, Tick the layout(s) where you want to apply the E-
Map, and then click OK.
6 On the uploaded E-Map image, you can arrange camera positions, or add other E-Maps links:
From the Camera or E-Map tab, drag the items you would like to place onto the uploaded image. Double-
click any camera on the map to change its direction.
To remove any item, drag the item out of the E-Map. The removed item will return to Camera or E-Map list.
7 Click Save to save the changes. To undo all setting modifications, click Reset.
8 Click Close to close the E-Map Configurations window.
To edit E-Map settings:
1 Select the E-Map you want to edit, and click Edit. Or you can double-click on the E-Map to open the E-Map
Configurations window.
2 Modify the name, re-upload the image, and arrange items to update the settings.
3 Click Save to save the changes.
4 Click Close to close the E-Map Configurations window.
To remove E-Maps:
Select the E-Maps you want to remove, and click Delete.