Synology DiskStation User's Guide
Based on DSM 3.0
65 Chapter 7: Set Up File Sharing
Create and Edit Users
Follow the steps below to create a user account. The user can login to edit his/her account info after the user
account has been established. You can also choose to set an account expiration date or disallow the user to
change account password.
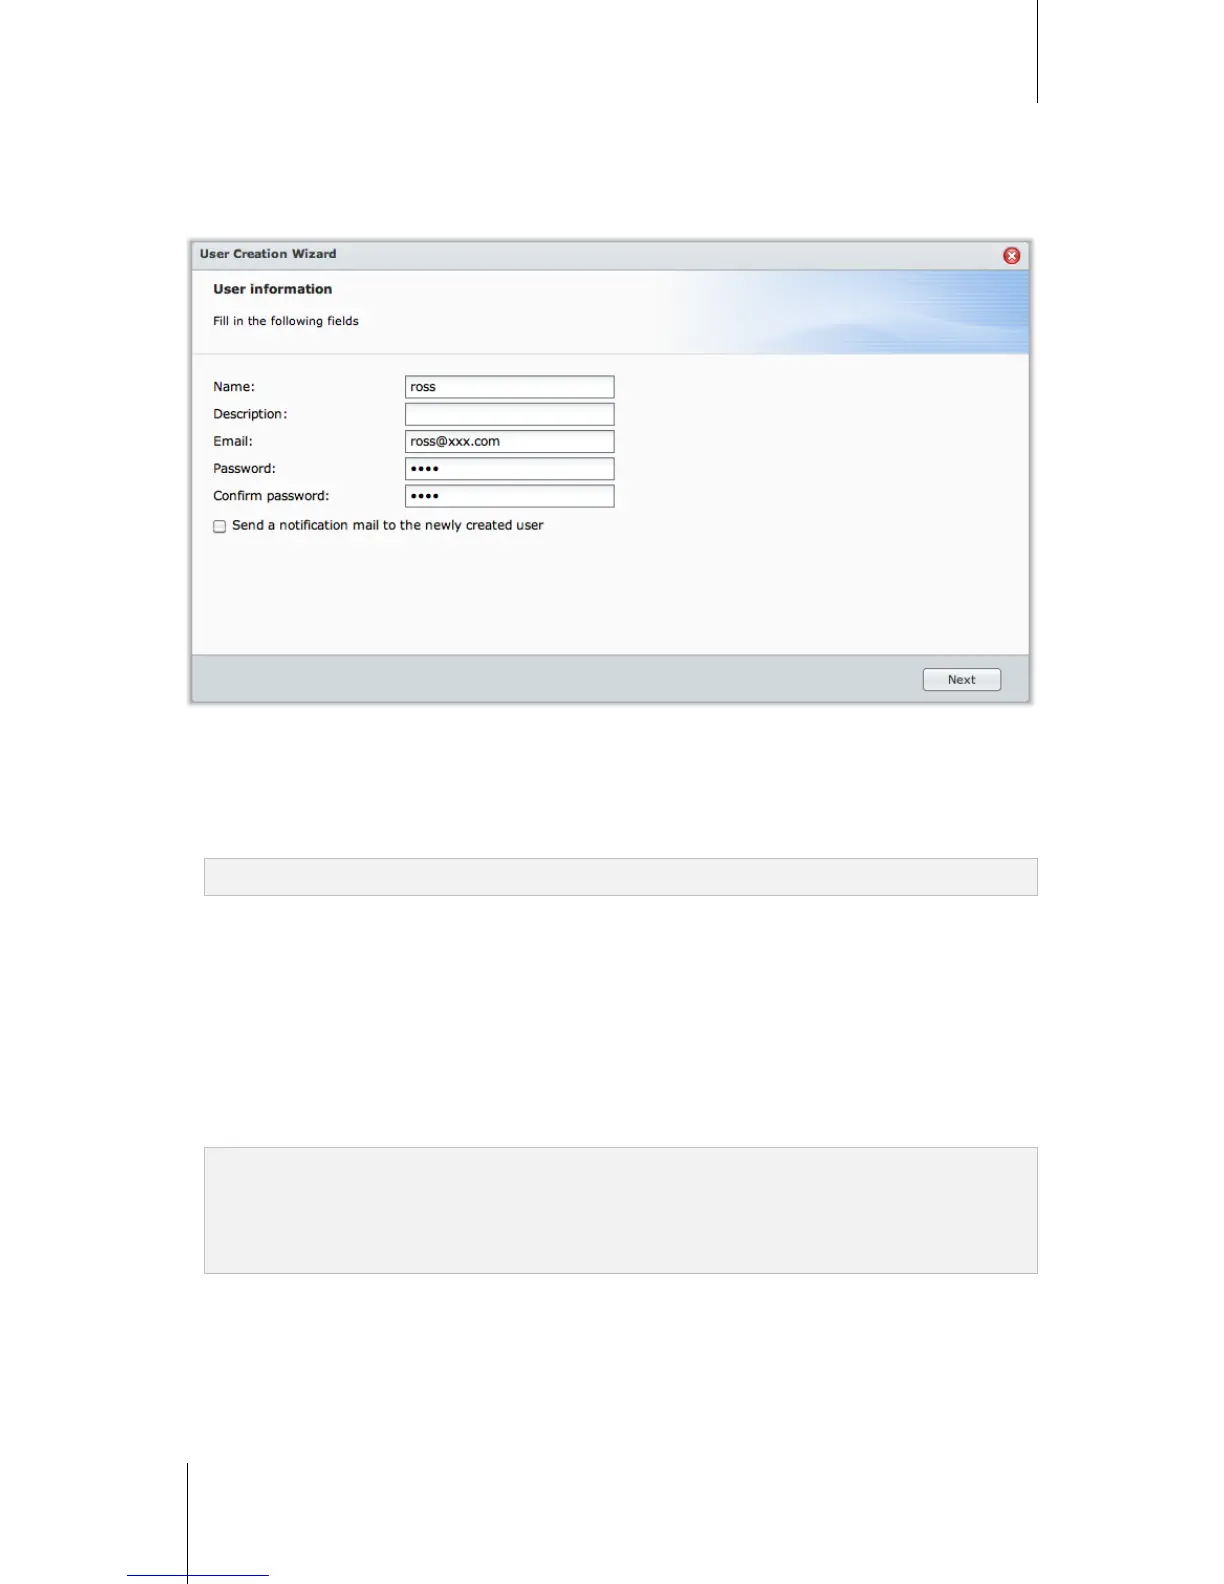
To create a user account:
1 Click Create to open the User Creation Wizard.
2 Enter the user name and other information, and click Next.
3 In the Join Group section, tick the checkboxes to select the user group for the user, and click Next. By default,
the user is categorized under the users group.
Note: For more information about groups, see "Create and Edit Groups" on Page 69.
4 In the Assign Privileges – shared folder section, do the following:
a Assign the following shared folder privileges for the user:
Read/Write: The user can access and make changes to the files and subfolders in the shared folder.
Read only: The user can access the files and subfolders in the shared folder, but cannot make changes
to them.
No access: The user cannot access the files and subfolders in the shared folder.
b See Privilege preview to see the user’s privilege that is decided based on the privileges setting of the user
and the groups joined by the user.
c See Group privileges for the shared folder privileges of the group the user belongs to.
Note:
When you encounter privilege conflicts, the privilege priority is as follows: No access > Read/Write > Read
only.
For more information about editing a group's access privileges to shared folders, see "Allow Users or Groups to
Access Shared Folders" on Page 73.
5 In the User quota setting section, do the following if you want to set the maximum storage quota for the user.
a Tick Enable quota and enter a value under the Quota column.
b Click Next.
6 In the Assign Privileges – applications section, assign the application privileges for this user, and click Next.
7 Click Apply to finish.