getting started
115
Synrad
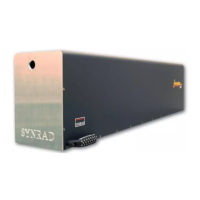
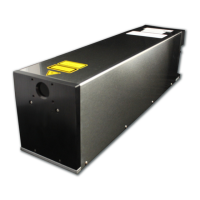
Series 48Series 48
Series 48Series 48
Series 48 operator’s manual
Connecting
To connect a UC-2000 Controller (not included with Series 48 lasers), perform the following steps:
1
Connect the mini-DIN connector on the end of the UC-2000 Controller’s Power/Control cable to
the Laser connector on the rear panel of the UC-2000.
2
Connect the miniature DC power plug on the UC-2000’s Power/Control cable to the laser’s side-
mounted Auxiliary Power connector.
To use the UC-2000’s wall plug transformer instead, connect the miniature DC power plug on the
UC-2000’s Power/Control cable to the miniature connector on the wall plug transformer cable
3
On 48-1 and 48-2 lasers, attach the BNC connector on the end of the UC-2000’s Power/Control
cable to the BNC connector labeled CTRL on the rear of the laser.
On 48-5 lasers, attach the long “leg” of the BNC “Y” control cable to the BNC connector on the
UC-2000’s Power/Control cable. Attach the short “legs” of the “Y” cable to the laser’s CTRL1 and
CTRL2 connectors located on the rear of the laser.
Note: When driving the laser from an FH Series marking head, connect the marking head’s Laser
Control cable between the Laser Control connector on the marking head and the CTRL
connectors on the rear of the laser.
4
If your application uses external gating signals to command On/Off switching of the laser, attach a
BNC cable between your gate signal source and the UC-2000’s Gate connector.
5
If your application uses external analog voltage or current signals to control the PWM duty cycle of
the laser, attach a BNC cable between your analog voltage or current source and the UC-2000’s
ANV/ANC connector.
Note: Series 48 lasers can also be controlled from an alternate user-supplied PWM Command signal
source. Refer to Controlling laser power in the “Technical Reference” section for control signal
descriptions.
DB9 connections
48 Series lasers are equipped with a female DB9 connector mounted to the sidewall of the laser. This
connector provides the user with a convenient method for monitoring fault conditions (over-tempera-
ture, control/RF circuitry failure) and adds remote interlock, remote keyswitch (relay or switch), message
output, and remote LED indicator capability. For a complete description of DB9 pin assignments and
functions, see DB9 connections in the “Technical Reference” section.
A factory-installed jumper plug is attached to the DB9 Connector on each laser to enable normal opera-
tion. Two jumpers (see Figure 3-9) are wired to the plug. One jumper between pins 6 and 7 closes the
Remote Keyswitch function, and the other jumper between pins 3 and 4 closes the Remote Interlock. If this
jumper plug is removed, it is essential that pin 3 be jumpered to pin 4 (or pin 2) or be connected to
external “remote interlock” circuitry in order to enable lasing.
Note: On lasers manufactured as OEM (-S) version lasers, i.e. without a keyswitch, the “remote
interlock” function is bypassed internally. For OEM customers wishing to access the “remote
interlock” feature via the DB9 Connector, please consult the factory for details.