June 2003 IPN: M5000-00-105 Replacing key mechanical and ancillary devices D - 9
the hole at the top of the PTT recess. Be sure
not to split or otherwise damage it.
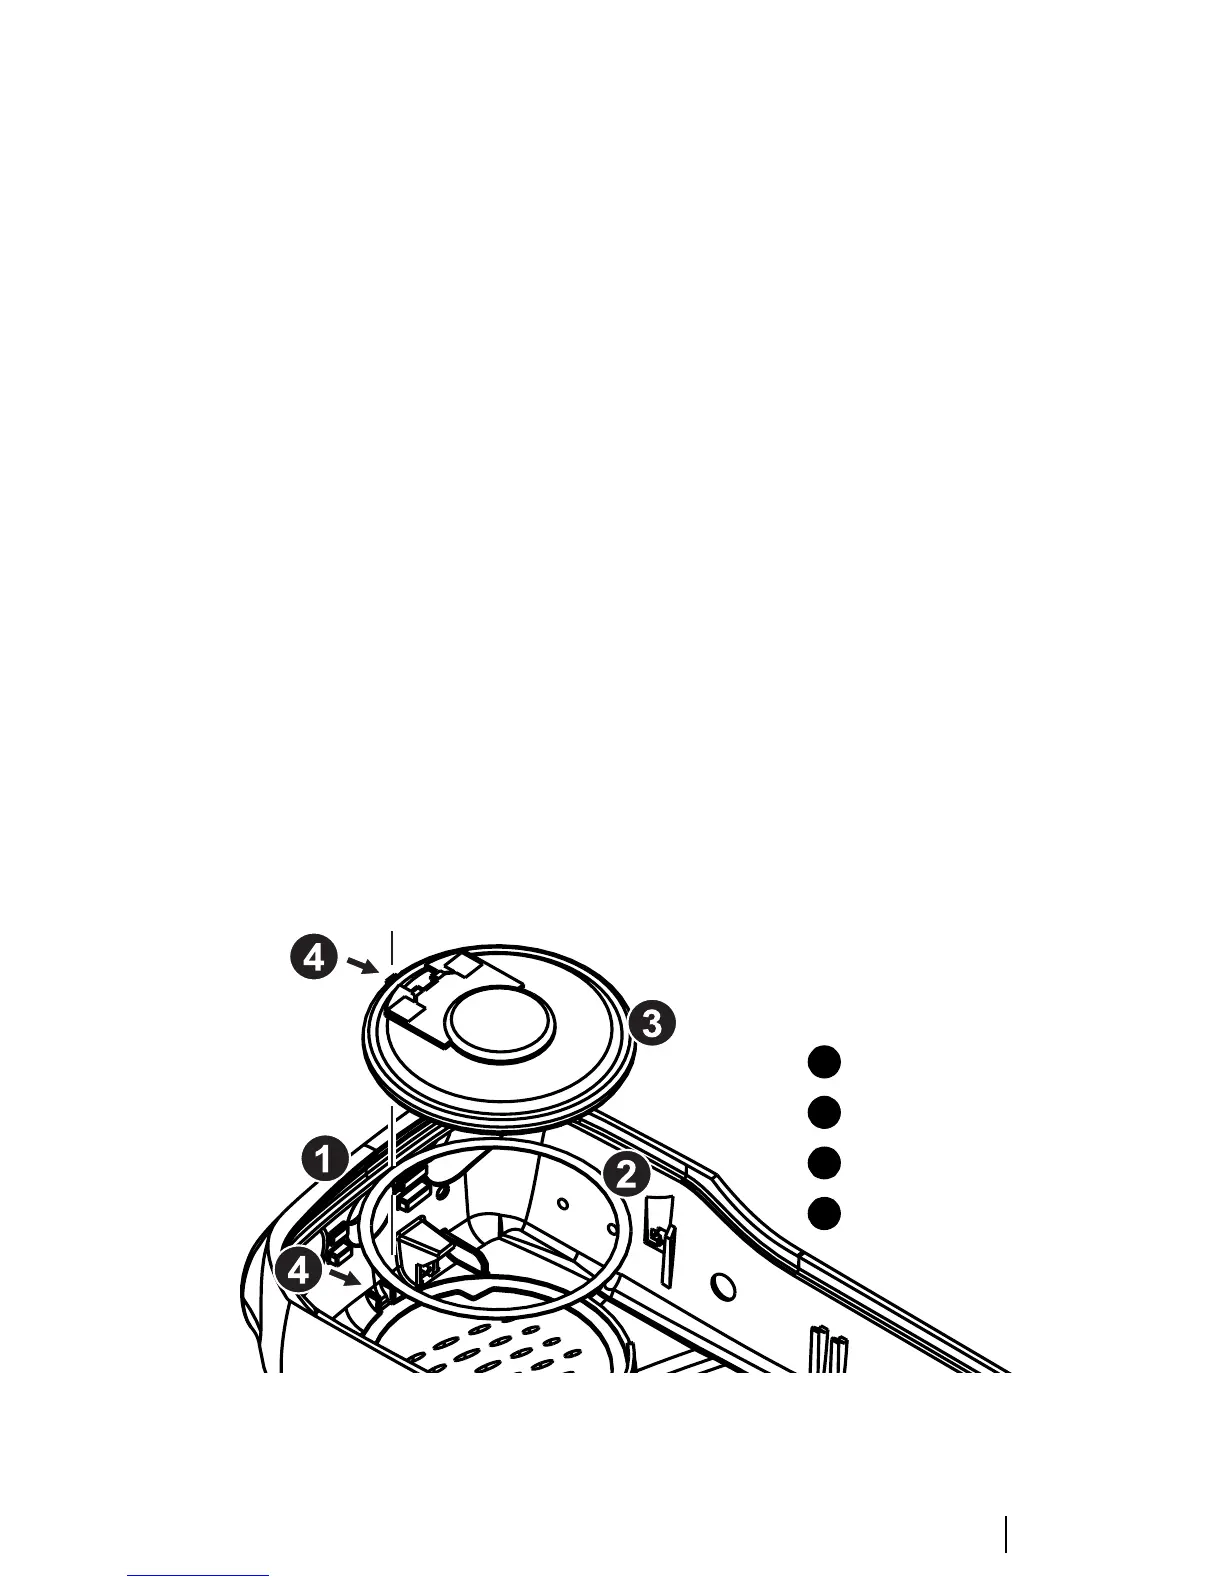
Replacing the speaker
Following the disassembly instructions,
remove the front panel from the chassis. The
speakers sits in the inside of the front panel
(see Figure D-7).
Using a scalpel and a flat screw driver, carefully
remove the speaker from the front panel.
Clean with alcohol any remaining adhesive
from the speaker seating. Replace the adhesive
ring and secure a new speaker in place. Be sure
to align the tabs.
Replacing the LCD display (Orca
5015/2x/35/40)
Following the disassembly instructions, remove
the shield from the front panel and unplug the
user interface loom from the main PCB.
Unplug the LCD display loom from the user
interface PCB, remove the LCD display from
the shield and discard the LCD display.
Position the new LCD display on the shield,
pass the LCD loom through the gap in the
shield and plug into the connector on the user
interface PCB. Push down the two connector
lugs to secure the loom.
Plug the user interface PCB loom onto the
connector on the main PCB and push down the
connector lugs to secure.
Refit the shield onto the chassis (refer to page
D-15 for detailed instructions).
Place the LCD holder over the LCD, fitting the
LCD holder locating blocks into the holes in
the shield.
Refit the front panel to the chassis (refer to
page D-16 for detailed instructions).
Figure D-7: Mounting the speaker in the front panel
front panel
adhesive
speaker
alignment tabs
1
2
3
4