E - 16 Multi-charger June 2003 IPN: M5000-00-105
■ Gently pull the wires through the multi-
charger top while aligning the charger
with the three screw holes.
■ Fasten the charger to the multi-charger
top using the three screws.
■ Reconnect the red and black wire to the
fuse connector. Ensure that the polarity is
correct.
■ Close up the multi-charger, replacing the
10 screws using a Pozi 1 driver.
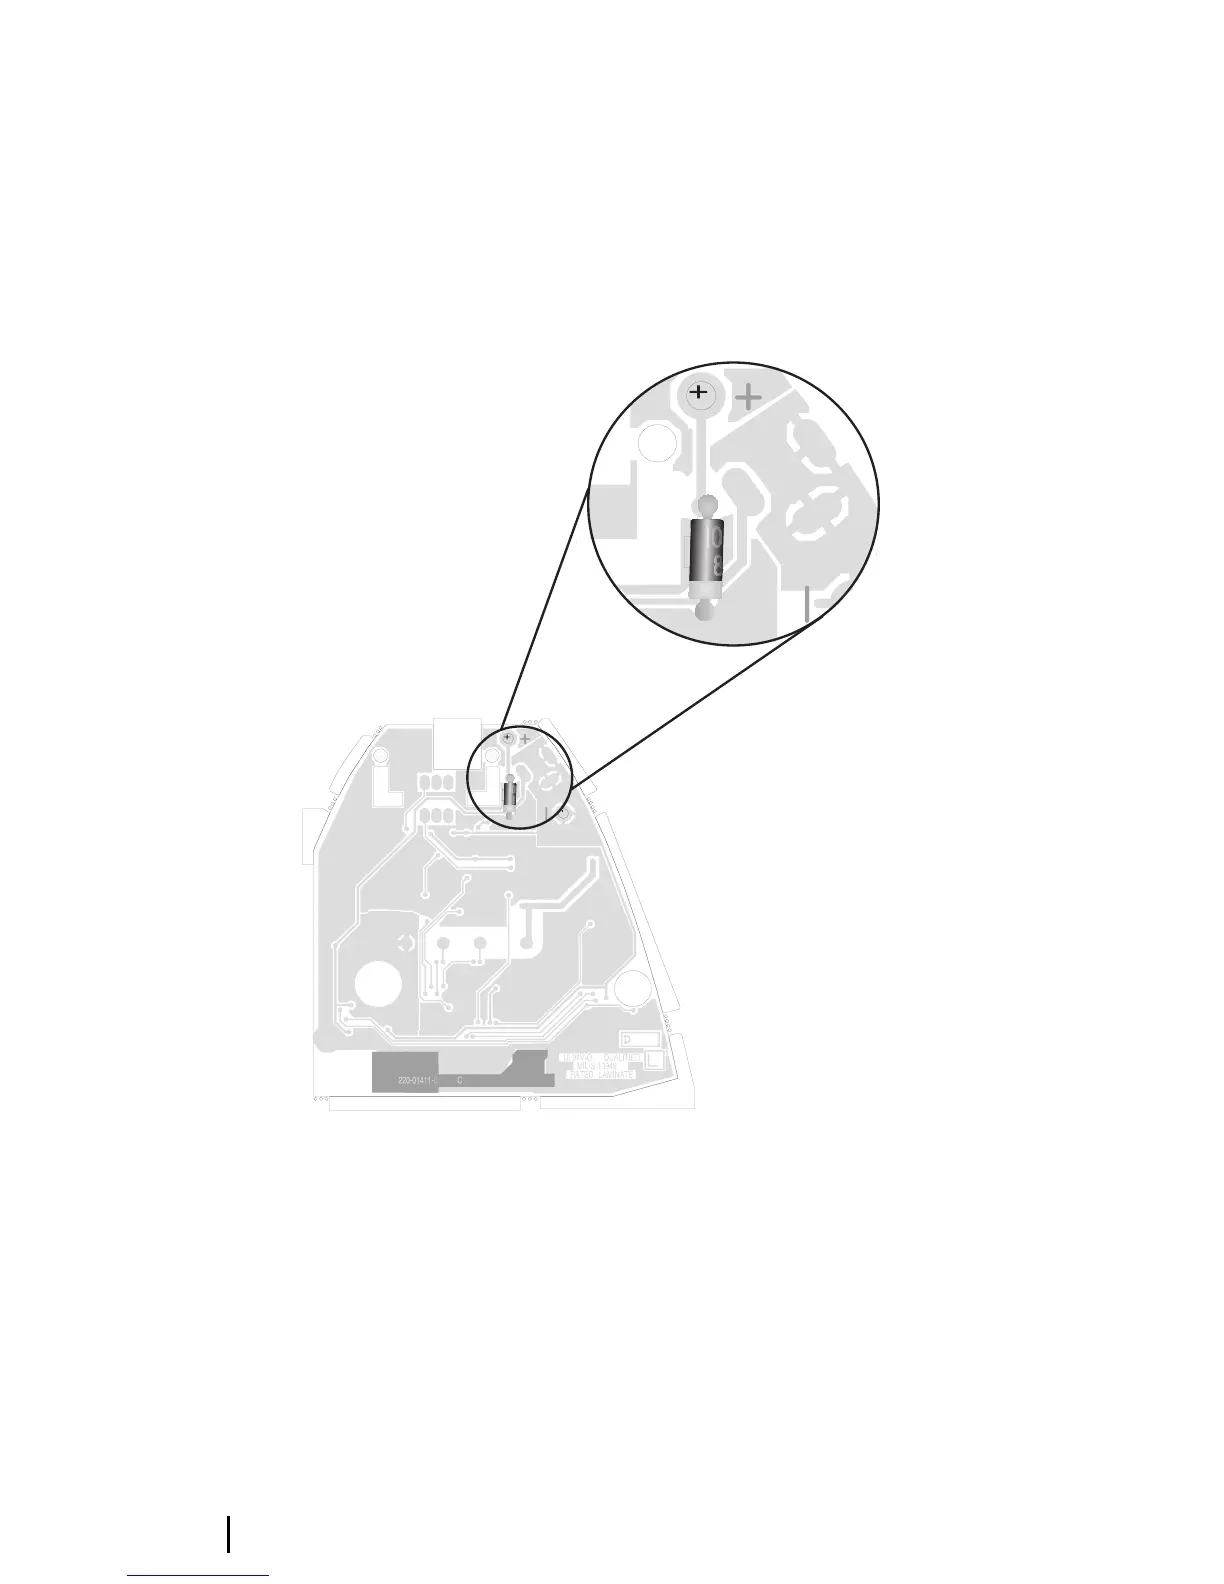
Figure E-8: The Tait Orca Fast Charger PCB.
The inset shows where to place the diode (1N4001
or similar) for using the PCB in a multi-charger
Fuse replacement
Each charger is protected by a 3A fuse. To
replace a fuse, open the multi-charger as
described previously. The fuse must be
replaced with a 12V 3A secondary fuse made
from material with a Class V-2 flammability
rating.
A suitable fuse can be ordered directly from
Technical Support, Tait Electronics (IPN
265-00010-64).