June 2003 IPN: M5000-00-105 Multi-charger E - 15
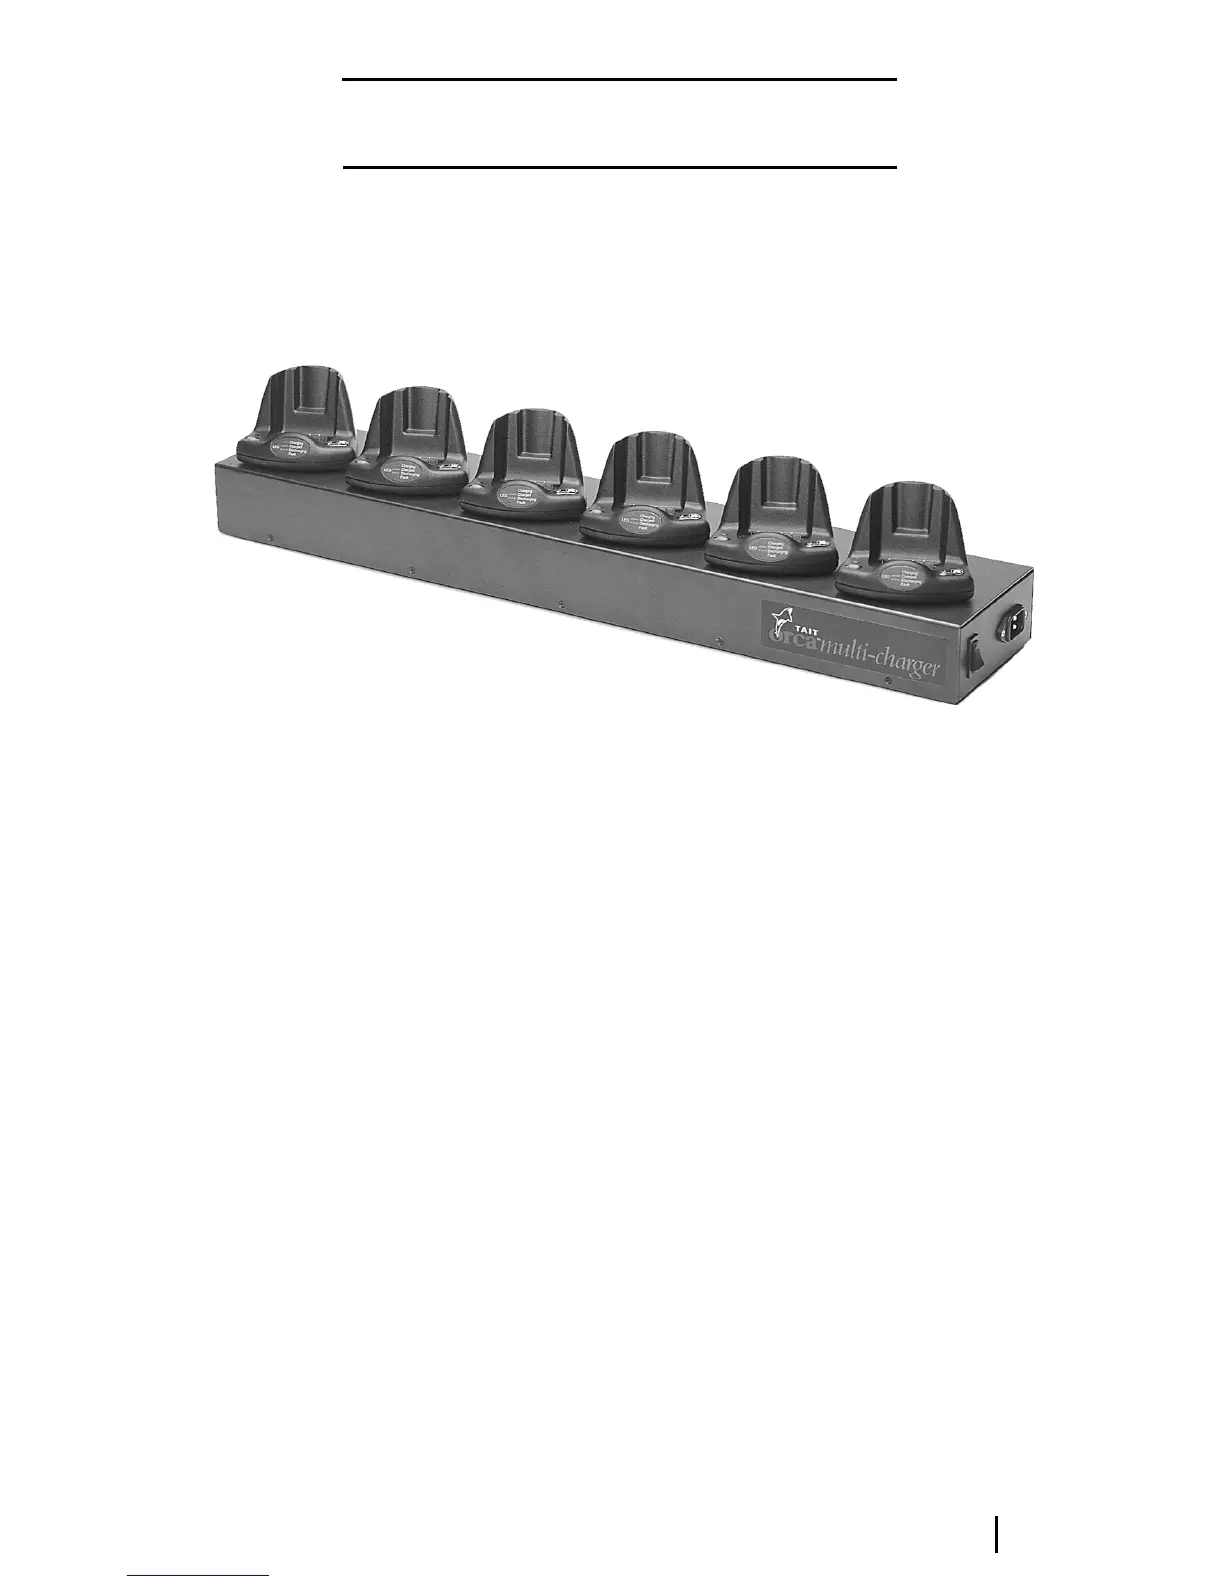
Multi-charger
The multi-charger (TOPA-CH-300) is made up
of six desktop fast chargers that operate
independently of one another. Each multi-
charger PCB has an additional diode.
Multi-charger operation
The operation of the multi-charger is the same
as that of the desktop fast charger.
Figure E-7: The Tait Orca six-way multi-charger
Repairing the multi-charger
Should one of the charger units be faulty, you
can repair it according to the instructions for
the desktop fast charger, or replace the faulty
PCB with a fast charger PCB to which the diode
(1N4001 or similar) has been added (refer to
Figure E-8).
To remove a faulty charger from the multi-
charger:
■ Unplug the power cord.
■ Undo the 10 screws at the base of the radio
using a Pozi 1 driver.
■ Do not
Do not Do not
Do not pull the top off the charger using
the housing of the individual chargers.
Instead, from the side of the charger, lift
the top cover up and gently fold back.
■ Unplug the red and black wires leading to
the faulty charger.
■ Remove the three screws holding the
faulty charger to the top of the multi-
charger.
■ Gently pull the faulty charger away from
the multi-charger top. Turn the charger
upside down so that the release tab is at
the top.
■ Depress the release tab using the end of a
flat-bladed screwdriver and gently pull the
base away from the body.
■ Desolder both wires.
■ Repair the board or replace it with a new
one to which the required diode has been
added.
■ Pass the wires through the charger base.
■ Solder the red wire to the positive terminal
on the PCB and the black wire to the
negative terminal on the PCB.
■ Place the charger upside down and make
sure the conditioning button, the light
pipe and the PCB are seated properly.
■ Attach the base at the front edge, and clip
it down at the back.