(J
D *BäHThtrE)
.t
a^Xtal#:
^füot&Et
6l:zlt.
+3a
^.fr.
,.EEää<
t\
< } ]ä F*?44T
LJ?L\
<
L
J
L\<
L,
J
)"
I
2il-az,zD
t.t
"
thr\t eäß<zL<,r.fü
,.4ä".111
)t
aEd)EßU1]D
lrq
E
6D
tf€].
+,üz4r<h'atrQlFeßE^tu*n"
E
0):F,il./,,4.'l
l-.2
^tr1-a
ü *
L\<'t-
*
"
"
31EEPEt.q?tX&Ai<L&t"
+
F -
1).:-2i57a
^n1*2
t'<=F;'a:UV*C.
a7.
i
^il-E*
:
g16.Di$gß@=-1,
F- t,,\füoßF
Qltt\ ) z)lJ*t"
ri
t )r'?+++1F-Be < <tiJt\" 7.v t-J. v
t
t;
I:ä;äfr)<t
=t.
r-iJä*<
(20e
< 6L\)
l-
Bd)
ä'5M&@Erg,i il-it-J-li
I
n
&"
=*jlr.gtL\/.
6- [ta]i! L teä
rEQ
t
)' / )rä
fr)z.ür.*Rte/jL<)it.än?z<
/: ä
r\.
ats )1 )
)>
+!Z?aalft:,i
D-t)
+6
+^E+
t.
? !\
t iShtr I'dqrR.r,&4
"
&1, )tn
o-ar-ll
t.-5
T't:t:Lt.
fEhf;-
,2,
r-*!
n-rr
T'@tr
''FlT/
,\,n
!5j
-7t5e'LIL)
c. J"J.d"
"o)l\q
(
+$
Ii:zq
D-Ü
zö
t .t.L<r\3*t"
<<
7+>t
o)tJÄ,''')
i4
5
ti
L\ۧrloi#
r\ 6
?
7+ >,
-
-)
+FE
-
<
L\ä
*t"
*tä?7.+
>r
7-7tt;t4
>,
4 2
r;
L <
t trLr\
tr
LI
D L D t4. <
o)1t,
t+.'
Lz
^+
>
t 7
-
7 ä
i < 1S ä ;eßA(.Sääi1
<r. ä*E r,
* t. ;
-
7 &
tJhr3
L
z
uä+lh\
=?1.+:
<
Enla<r\l-r!\la(*riu< < /.äL\.
4168ä=+t-?Zh'Ut
a.
l<
-
4 A -
>P7 a
,\h?Fä
I <. J
h?FFdL
CÄJ-t J i"
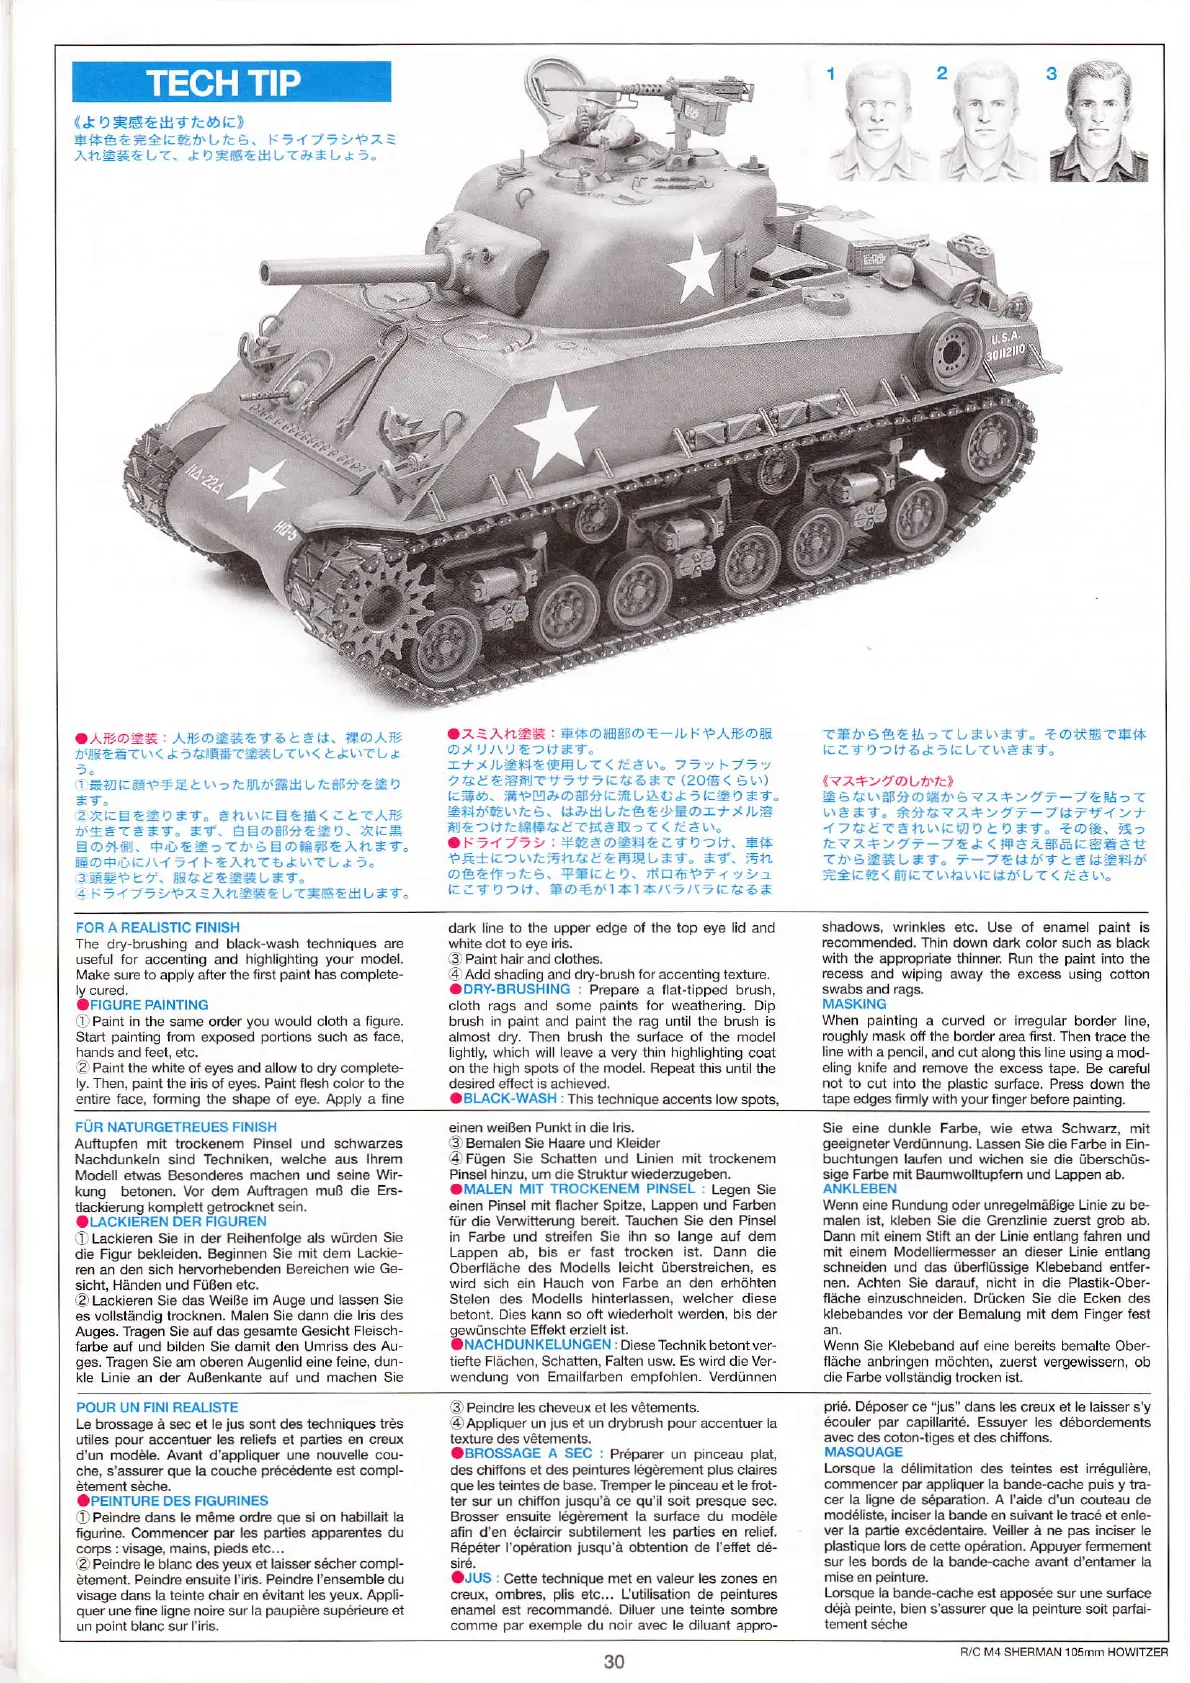
FOR A REALISTIC FINISH
The dry-brushing and black-wash
techniques are
useful for accenting and highlighting
your
model.
lrake
sure
to
apply atter the
filst
paint
has complete-
.FIGURE
PAINTING
al
Paini in the same
order
you
would cloth a figure.
Start
painting
from exposed
portions
such as
face,
hands and feet, etc.
e
Paintthe white of eyes and allow to dry complete-
ly. Then,
paint
the
iris of eyes.
Paint flesh colorto the
entire face, torming the shape of eye. Apply a fine
dark line to the upper edge
of the top eye lid and
white dot to eye iis.
OPaint
hair and clothes.
eAdd
shading
and
dry-brush for accenting texture.
aDRY-BRUSHING
:
Prepare a flat-tipped brush,
cloth rags and some
paints
for weathering. Dip
brush in
paint
and
paint
the rag until the brush is
almost dry-
Then
brush the surface of the model
lightly, which will leave
a
very thin highlighting
coat
on the high spots of the model. Repeat this
until
the
desked effec!
is
achieved,
aBLACK-WASH
:This
technique
accents
low
spots,
shadows, wdnkles
etc. Use of enamel
paint
is
recommended, Thin down
dark color such as black
with the
appropiate thinnet Run the
paint
into the
recess and wiping
away
the
excess using cotton
swaos
ano rags.
MASKING
When
painting
a curved or irregular border line,
roughly
mask off the border
area
first. Then
trace the
line with
a
pencil,
and cut
along
this line
using a mod-
eling
knife and remove the
excess
tape.
Be careful
not to
cut into the
plastic
surface. Pr€ss
down
the
tape
edges lirmly wilh
yourfinger
before
painting.
FUR NATURGETREUES FINISH
AuftuDfen mit trockenem Pinsel und schwazes
Nachdunkeln sind Techniken, welche aus
lhrem
Modell etwas Besonderes machen und seine
Wir-
kung b€tonen.
Vor
dem
Auftragen muß die
Ers-
tlackierung komplett
getrocknet
sein.
.LACKIEREN
DER FIGUREN
e
Läckieren Sie in der
Reihenfolge als würden
Sie
die Figur bekleiden. B€ginnen Sie
mit dem Lackie-
ren an den sich
hewoüebend€n Bereichen
wie Ge-
sicht,
Händen und Fil߀n etc.
?l
Lackieren Sie das Weiße
im Auge und lassen Sie
es vollständig vocknen. Malen Sie dann die
kis des
Auges.
Tragen Sie
aufdas
ge6amt6
Gesicht Fleisch-
fadle auf und bilden Sie damit den Umriss
des Au-
ges.
Tragen Sie am oberen Augenlid eine feine, dun-
kle Linie an der Außenkante auf und
machen Sie
einen weißen Punkt in die lris.
3
B€malen
Sie
Haare
und
Kleider
a
Fügen Sie Schatten und Unien mat trockenem
Pinselhinzu, um die Struktur
wiederzugeben.
aMALEN
MIT
TBOCKENEM PINSEL :
Legen Sie
einen Pinsel mit llacher Spilze,
Lappen und Farben
für die Verwitterung bereit.
Tauchen Sie clen Pansel
in Farbe
und
streilen
Sie ihn so lange auf dem
Lappen ab, bis er
fast trocken ist. Dann die
Oberlläche
des lvlodells leacht überstreichen,
es
wird sich ein Hauch von
Farbe an den erhöhlen
Stelen des Modells
hinterlassen. welcher diese
betont.
Dies kann so ott wiederholt werden, bis der
qewünschte
Effekt ezielt ist.
-NAcHDUNKELUNGEN :
Diese Technik betont ver-
tiefte Flächen, Schatt€n, Falten usw Es wird die Ver-
wendung
von
Emailfarben empfohlen.
Verdünnen
Sie eine
dunkle Farbe, wie etwa Schwarz, mit
geeignet€r
Verdünnung. tassen
Sie die
Farbe in
Ein-
buchtungen laulen
und wichen sae die überschüs-
sige Faöe
mit Baumwolltupfem und
Lappen
ab.
ANKLEBEN
Wenn eine Rundung oder unregelmäßige Linie zu be-
malen ist,
kleben Sie die Grenzlinie
zuerst
grob
ab.
Dann mit
einem Slifl an der Linie entlang
fahren und
mit einem llodelliermesser an dieser Unie entlang
schneiden
und das überflüssige
Klebeband entf€r-
nen. Achten Sie
darauf,
nicht in die Plastik-Ober
fläche einzuschn€id€n. Ddcken Sie die Ecken des
klebebandes
vor der Bemalung mit dem Finger
fest
Wenn
Sie Klebeband auf eine bereits bemalte ObeF
lläche
anbringen möchten, zuerct vergewissern, ob
die Faöe vollständig vocken ist.
POUR UN FINI REALISTE
Le brossage ä sec
et
le
jus
sont des techniques trös
utiles oour accentuer les reliefs et oarties
en creux
d'un modöle. Avant d'appliquer une
nouvelle cou-
che, s'assurer
que
la
couche
pdc6dente
est compl-
.PEINTURE
DES FIGURINES
O
Peindre dans le m6me odre
que
si on
habillait ta
figuine. Commencer
par
les
parties
apparentes du
c!4cs : visage, mains,
Pi€ds
etc. ..
e
Peindre le blanc des
yeux
et laisser s€cher
compl-
dtement.
Peindreensuite I'iris. Peind€ l'ensemble du
visage dans la teinte chairen övitant les
yeux.
Appli-
querlne
line ligne
noire sur
la
pau piöre
sup6rieure et
un
point
blanc sur I'iris,
:3)
Peindre
les
cheveux et
les vCtements.
OAppliquer
un
jus
et un drybrush
pour
accentuer Ia
texture des
vätements,
OBROSSAGE
A
SEC :
Pr6parer un
pinceau plat,
des chiflons et des
peintures
lqlörement
plus
claires
que
les
teintes de base.
Tremper le
pinceau
et le frof
ter sur un chiffon
iusqu'ä
ce
qu'il
soit
presque
sec.
Brosser ensuite
legerement la surface du modäe
afin d'en 6claircir subtilemenl les oarlies en relief.
R6p6ter l'op6ration
iusqu'ä
obtention
de I'effet d6-
süÖ.
OJUS
:
Cette technique met en valeur les zones en
creux, ombres,
plis
etc,.,
futilisation
de
peintures
enamel est recommand6. Diluer une teinte sombre
comme
par
exemple du
noir
avec
le
diluant appro-
priö,
Döposer ce
"jus"
dans les creux et le lajsser
s'y
äcouler
par
capillarit6. Essuyer les d6bordements
avec dos coton-liges etdes chiffons.
MASOUAGE
Lorsque la d6limitation
des
teintes est in€guliöre,
commencer
par
appliquer la bande-cache
puis y
lra-
cer la ligne
de separation-
A I'aide d'un
couteau
de
mod6liste. inciser
la barde en suivant
le
lrac6 et enle-
ver la
parlie
exc6dentaie. Veiller ä ne
pas
inciser le
plastique
lors d€ c€tte op6ration. Appuyer lermement
sur les
bords de la bande-cache avant d'entamer
la
Lorsque
la band€-cache est appos6e sur une surface
dölä
peinte,
bien s'assurer
que
la
peinture
soit
parfaF
tement s6che
30
F/C lV4 SHERMAN 105mm HOWITZER