Chapter
I
Installing the Combination Board in the computer
Warning:
Turn
off
your computer and disconnect all equipment.
If any unit
is on, you can damage the central processing unit or the board. Wait at least
10
seconds before removing or inserting any board into the computer.
1.
Be sure to touch a grounded metal object before beginning the installa-
tion, and do
not
stand on a carpeted floor.
2.
Remove the computer cover by unfastening the screws and sliding it
toward the front of the unit.
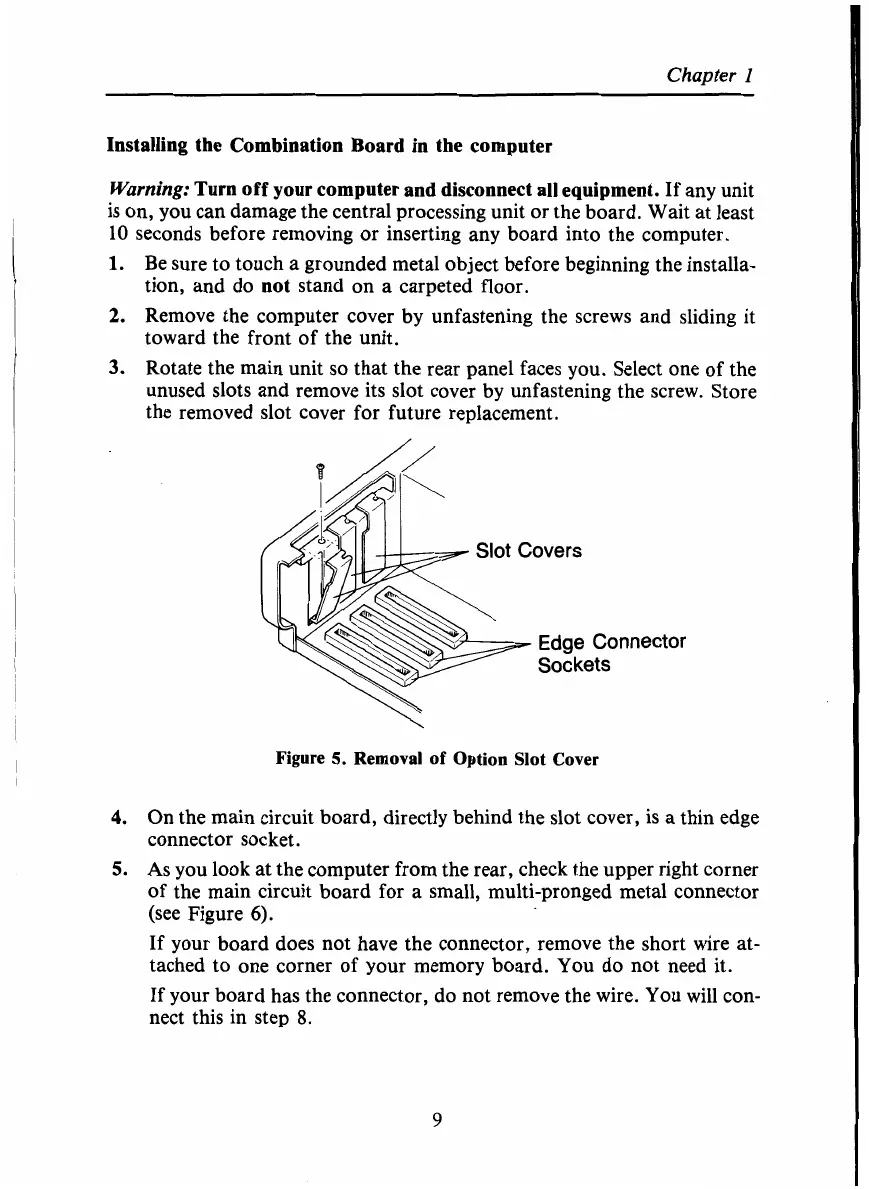
3.
Rotate the main unit
so
that the rear panel faces you. Select one of the
unused slots and remove its slot cover by unfastening the screw. Store
the removed slot cover for future replacement.
Figure
5.
Removal
of
Option Slot Cover
4.
On the main circuit board, directly behind the slot cover, is a thin edge
connector socket.
5.
As
you look at the computer from the rear, check the upper right corner
of the main circuit board for a small, multi-pronged metal connector
(see Figure
6).
If your board does not have the connector, remove the short wire at-
tached to one corner of your memory board. You do not need it.
If your board has the connector, do not remove the wire. You will con-
nect this in step 8.
9
 Loading...