7 Ditto X4 Looper User Manual
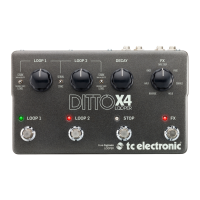
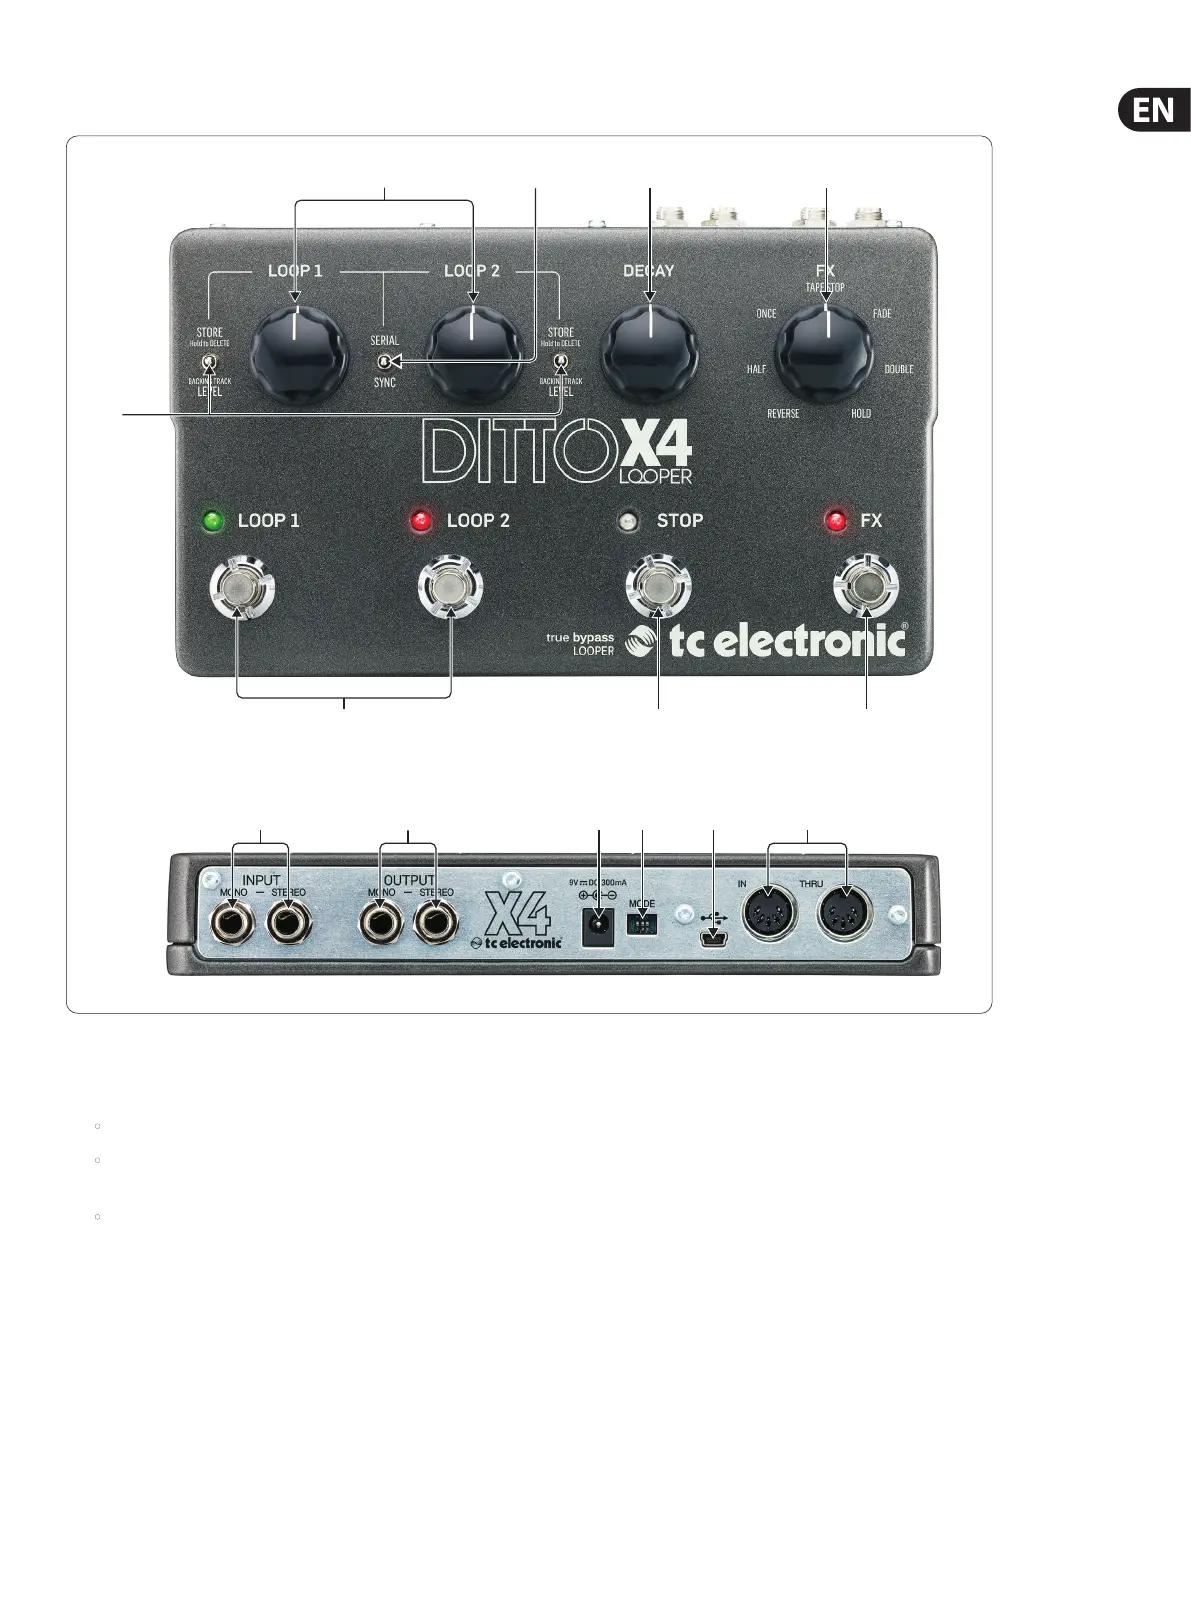
4. Controls
(1) STORE/LEVEL switches – these perform the following functions for their
associated loop:
• Briey ip the switch up to store the current loop as a backing track.
• Hold the switch in the up position for three seconds to delete the stored
backing track.
• Hold the switch in the down position while turning the associated
LOOP knob to set the level of the backing track. See the “Store,
Import, Export ” chapter for details.
(2) LOOP knobs – adjust the level of loop 1 and 2 with these knobs. When
holding the adjacent STORE/LEVEL switch in the down position, the knobs
adjust the volume of their respective stored backing track.
(3) SERIAL/SYNC switch – when set to Serial, either loop 1 or loop 2 can be
played at a time, allowing distinct parts to be switched back and forth.
In Sync mode, both loops can be played simultaneously.
(4) DECAY knob – this controls the amount of volume reduction that occurs
each time an overdub repeats. When set fully clockwise, the loop will not
decay at all. This is useful for creating stacks of overdubs that gradually
disappear from the main loop.
(5) FX knob – select one of the 7 FX with this knob. See the “Onboard FX”
chapter for details.
(6) LOOP 1 and 2 footswitches – use these to control several loop-related
functions. See the “Creating Loops” chapter for details.
(7) STOP footswitch – press this to stop both loops immediately. Press and hold
the switch to erase the loops.
(8) FX footswitch – press this to engage the selected loop FX. See the
“Onboard FX” chapter for details.
(9) INPUT jacks – Connect one ¼" TS cable for mono operation, or 2 cables
for stereo.
(5)
(8)(7)
(4)(2) (3)
(6)
(13)(12)(11) (14)(10)(9)
(1)
 Loading...