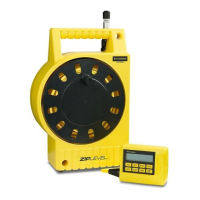
Unlike rotary lasers and optical levels, the ZIPLEVEL
®
is not tilt sensitive,
its level plane does not develop tilt error and it does not amplify error with
distance or require factory calibration. The CAL function lets you calibrate
vertical measurement accuracy much like calibrating the vertical sight rod
of a rotary laser. Calibration may be needed for accurate vertical measure-
ments but is not required for leveling operations.
Always check calibration before doing accurate vertical measurements,
particularly if the temperature has changed 36°F (20°C) or more since the
last calibration causing CAL to ash on the display or if you have never
calibrated a new or newly serviced ZIPLEVEL
®
. You can easily check cali-
bration in two steps: 1) Zero the Measurement Module on bottom or back
on a at surface beside the Base Unit. 2) Raise the Measurement Module
4’ (121.9 cm) above the zero point (still on bottom or back) to be sure the
display closely matches the height raised. The fully extended and calibrated
Unipod, a sheet of plywood or a tape rule can be used as a calibration
standard. If calibration is necessary then follow the easy 3 steps in the il-
lustration. You can exit from calibration at any time by pressing the CAL key
for two seconds.
13 ▪ CALIBRATION
Step 1 Press CAL 2 seconds to start 3 beep tone.
Step 2 Lay bottom or back down close to
Base Unit and press CAL again
[ ] 0 display*
Then [48] or [121.9] ashes and 2 beep tone
Step 3 Raise to 48”(121.9cm), press CAL again and hold steady
[ ] 48” or 121.9cm display*
Then normal display resumes as 48” or 121.9cm
*a single beep sounds until value is locked in.
CALIBRATION ▪ 14
To adjust length, loosen jam nut,
turn foot in or out and re-tighten nut.
To reverse foot for pointed end,
remove foot and rubber tip, place
jam nut in opposite end of foot,
reassemble foot, blunt end rst,
back into Unipod, adjust and
tighten jam nut.
Same spot
Occasionally check
Unipod for 4’ with a
tape rule.
To collapse,
loosen/tighten from
bottom up (3, 2, 1)
To extend,
loosen/tighten
bushings top
down (1, 2, 3)
Ru b ber
tip
Adjustable and reversible foot
Unipod
Jam nut
Step 3
Step 2
CAL
48.00”
(121.9cm)

 Loading...