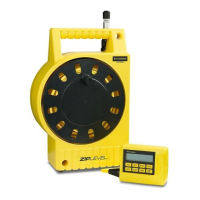
1) Secure the Base Unit after removing the Measurement Module.
2) Extend the Unipod from the top down and retract from the bottom up (see
page 14). Always gently tighten bushings (avoid over-tightening).
3) Hold the Measurement Module in the handgrip areas to the right and be-
neath the keypad. For single handed operation, use the thumb to press
the most frequently used buttons: ON/OFF, HOLD and ZERO. The left
hand can manipulate the Cord. Release or hold steady while reading (see
page 8).
4) In muddy conditions use a rag to wipe down the Cord before reeling in.
This can also remove Cord twists.
5) Place Module on ground beside Base Unit then pick up Base Unit and reel
Cord through Cord entry area by holding the Base Unit handle with Base
Unit tilted backward at about 45° (for example, resting against thigh). This
will ease reeling, reduce wear and keep docking area clean (see page 8).
6) Use a coin, screwdriver or thumbnail to loosen battery door screw to re-
place 9V alkaline battery. Lift the terminal end of battery with thumbnail
or simply thump Measurement Module against your hand and catch the
battery. Note: The protective Boot is more easily removed when warmed.
31 ▪ USE TIPS HOW TO MEASURE ACCURATELY ▪ 32
ZIPLEVEL
®
isothermal readings are typically precise to within 0.2% of mea-
surements 10’ (6m) or less and 0.35% of measurements beyond 10’ (6m).
It can typically level to within 0.1” (2mm) or 0.01” (0.2mm) in High Precision
over a single set-up.
1) For critical levelling frequently re-check or re-zero at the benchmark (CAL
is not necessary for leveling). When possible minimize height differences
between Cord, Base Unit and Measurement Module.
2) For critical elevation measurements, frequently re-check calibration and
benchmark zero. Whenever possible avoid temperature differences be-
tween the Cord and Measurement Module (eg. sun vs. shade).
3) When moving the ZIPLEVEL
®
from one temperature to a much different
temperature, such as from indoors to outdoors on a cold day, pull out as
much Cord as needed and allow 10-15 minutes for ZIPLEVEL
®
to adapt
to the change.
4) Avoid violent tugging, whipping or stomping on the cord without re-check
or re-zero at the benchmark.
5)
Promptly zero or calibrate ZIPLEVEL
®
when its display ashes –0– or CAL.