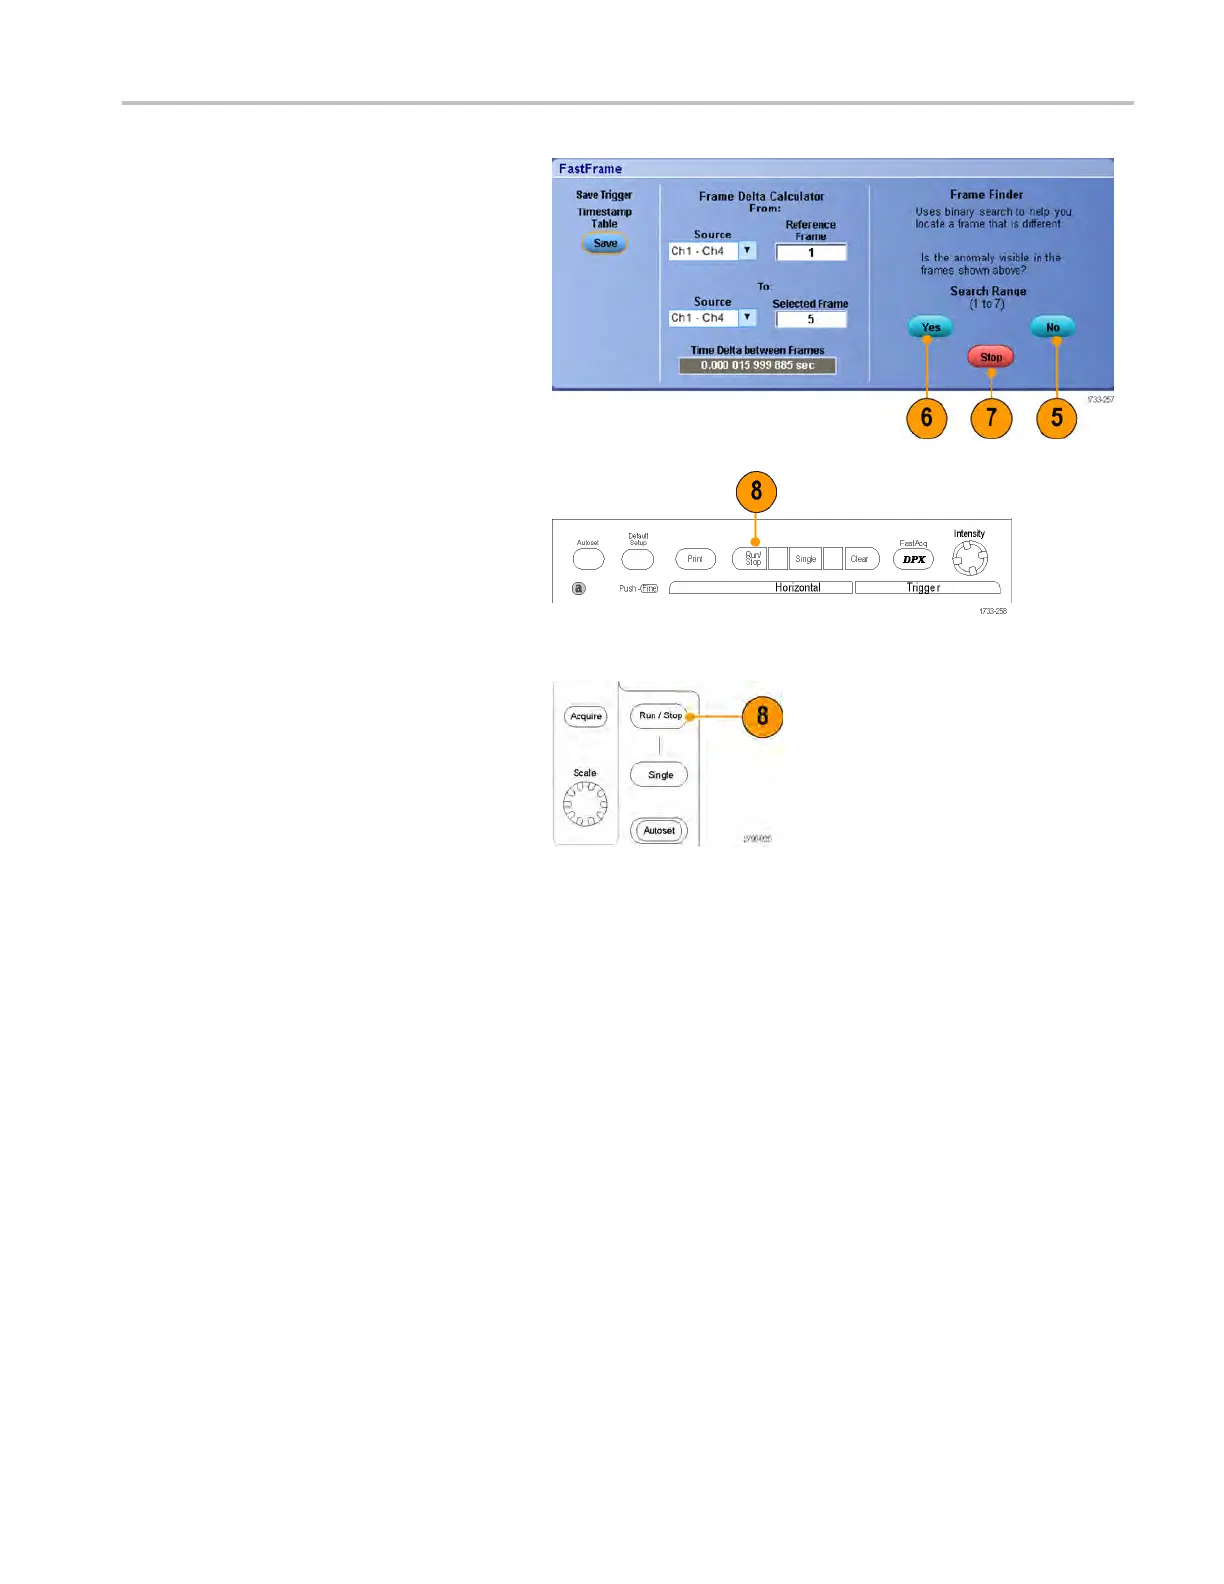
Controls and connectors General purpose controls
General purpose controls
Use the following front-panel controls to perform general-purpose tasks such as to Autoset the instrument,
to send items to the printer, or to enable cursors.
Push the Autoset button to automatically set up the instrument to obtain and display a stable
waveform of usable size. For information on the Autoset default settings click Autoset
(see
page 185).
Push the Default Setup button to reset the instrument to the factory default settings.
Push the Menu Off button to turn o ff a displayed menu.
NOTE. Menu Off is available only on M SO /DPO 5000 Series instruments.
Push the P rint button to m ake a hard copy of the screen. The printed image is sent directly to
the selected (internal or attached) printer. To change the print settings, click the F ile menu
Print command, and change the settings in the Print dialog box.
Push the Cursors button to enable cursors on the screen. The Cursor Type control window
(see page 73) opens so that you can specify the cursor parameters.
NOTE. If cursors are on but the multipurpose knob readouts are not attached to the Position
controls, press the Cursors button to attach the controls to the readouts. Press the Cursors
button again to turn cursors off.
Push the Search and Mark buttons to find and place a mark on a waveform at a point of
interest, or to edit marks. You can return to a m ark and analyze the waveform at a later time.
Push the FastAcq DPX button to turn Fast Acquisition On or Off. The FastAcq button is
lighted when Fast Acquisition is turned on.
Use the Intensity knob to adjust the brightness of the waveform. High intensity settings show
less frequently acquired points more clearly.
xxx
DSA/DPO70000D, MSO/DPO/DSA70000C, DPO7000C, and MSO/DPO5000 Series 65