Pinpoint trigge
rs
Checking trigger status
Check the trigger status from the status lights on the front panel or from the readout.
Check the ARM, READY, and TRIG'D
front-panel controls to determine the trigger
status.
If TRIG'D is on, the instrument has
recognized a valid trigger and is filling
the posttrigger part of the waveform.
If READY is on, the instrument can
accept, and is waiting for, a valid trigger
to occur. Pretrigger data has been
acquired.
If ARM is on, the trigger circuitry is
filling the pretrigger part of the waveform
record.
If both TRIG'D and READY are on,
a valid A event trigger has been
recognized and the instrument is waiting
for a delayed trigger. When a delayed
trigger is recognized, the posttrigger part
of the delayed waveform will fill.
If ARM, TRIG'D, and READY are off,
acquisitions have stopped.
MSO/DPO70
000DX, MSO/DPO70000C, DPO7000C Series
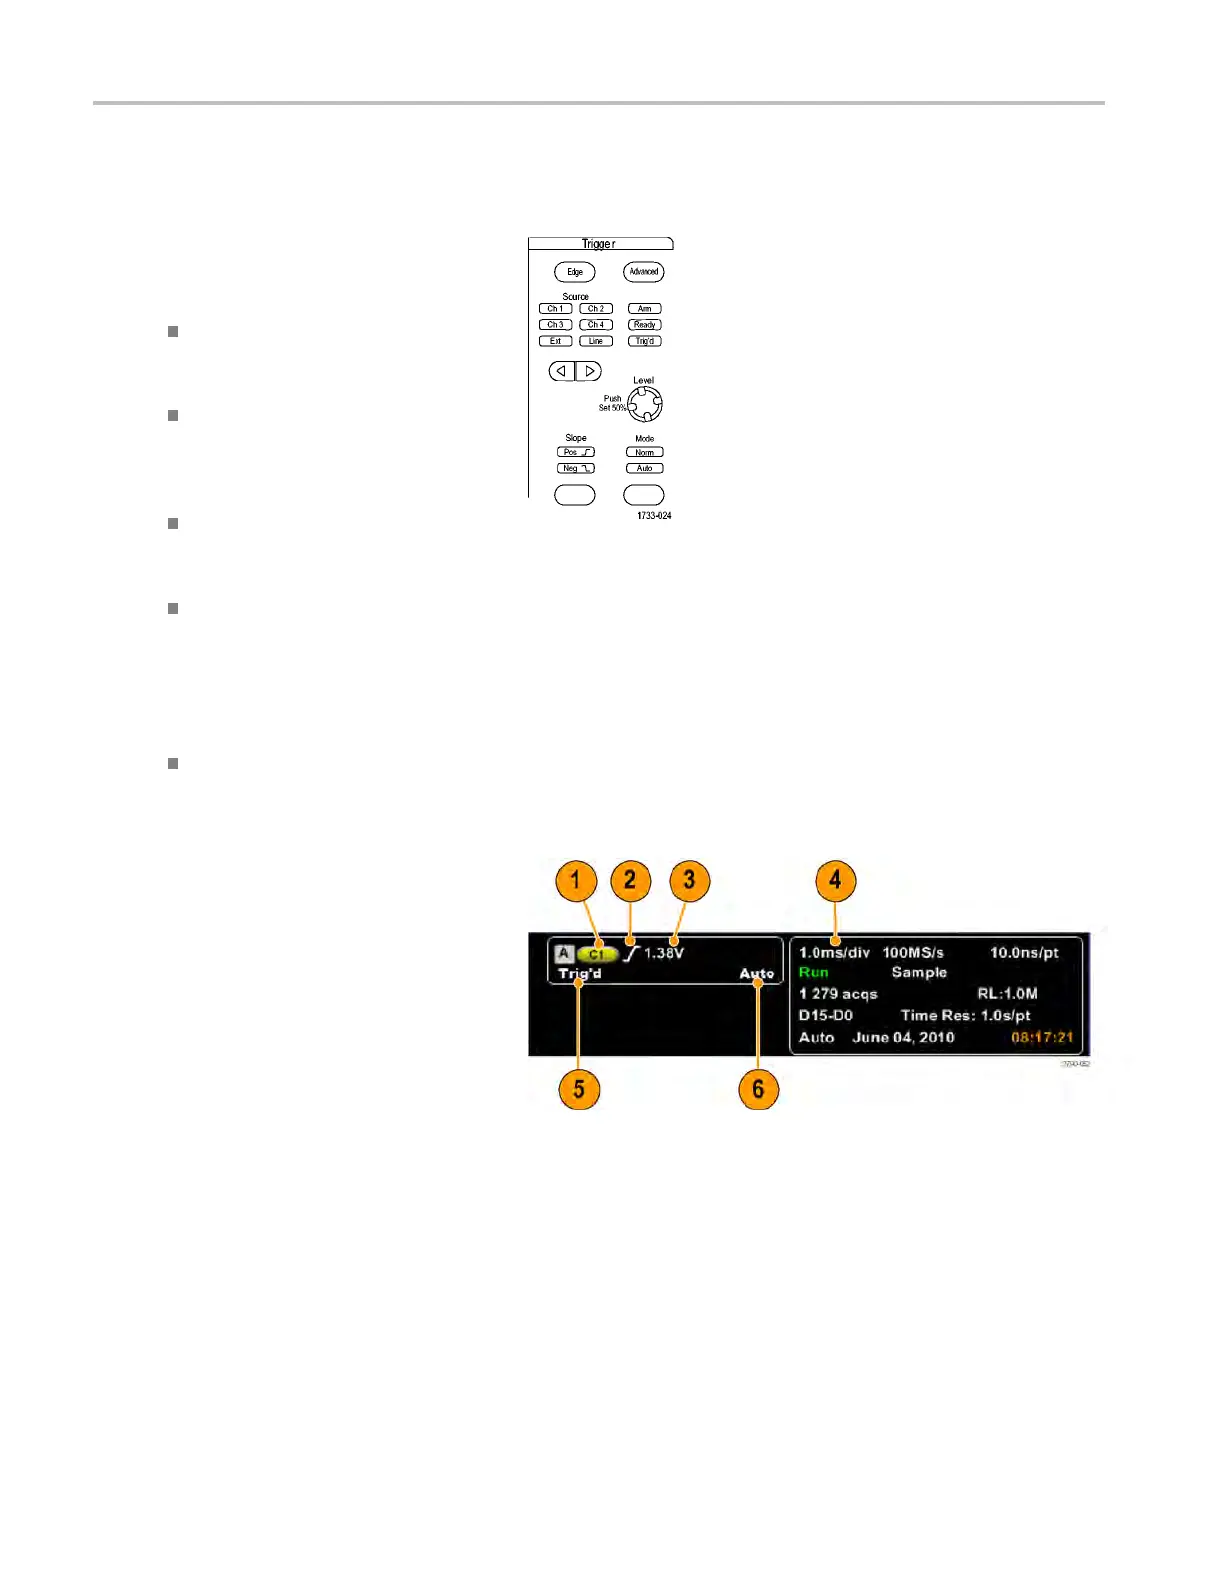
To quickly determine the settings of some
key trigger parameters, check the Trigger
readout at the bottom of the display. The
readouts differ for edge and the advanced
triggers:
1. A trigger source = Ch1
2. Trigger slope = rising edge
3. Trigger level
4. Time base
5. Check the ARM, REA DY, and TRIG'D
readout to determine the trigger status.
6. Check the Auto/Normal readout to
determine the trigger mode.
72 MSO/DPO70000DX, MSO/DPO70000C, DPO7000C, and MSO /DP O5000 Series U ser Manual
 Loading...


