4. Use four bolts and washers from the supplied hardware to attach the front of the instrument to the rack. Tighten by hand to
support the instrument.
5. From the rear of the rack, slide the second rear rack bracket onto the instrument chassis rack bracket until the rear rack
bracket is flush with the rear rack.
6. Use two bolts and washers from the supplied hardware to attach the second rear rack bracket to the rear of the rack.
Tighten by hand.
7. Tighten all bolts to 1.1 N·m.
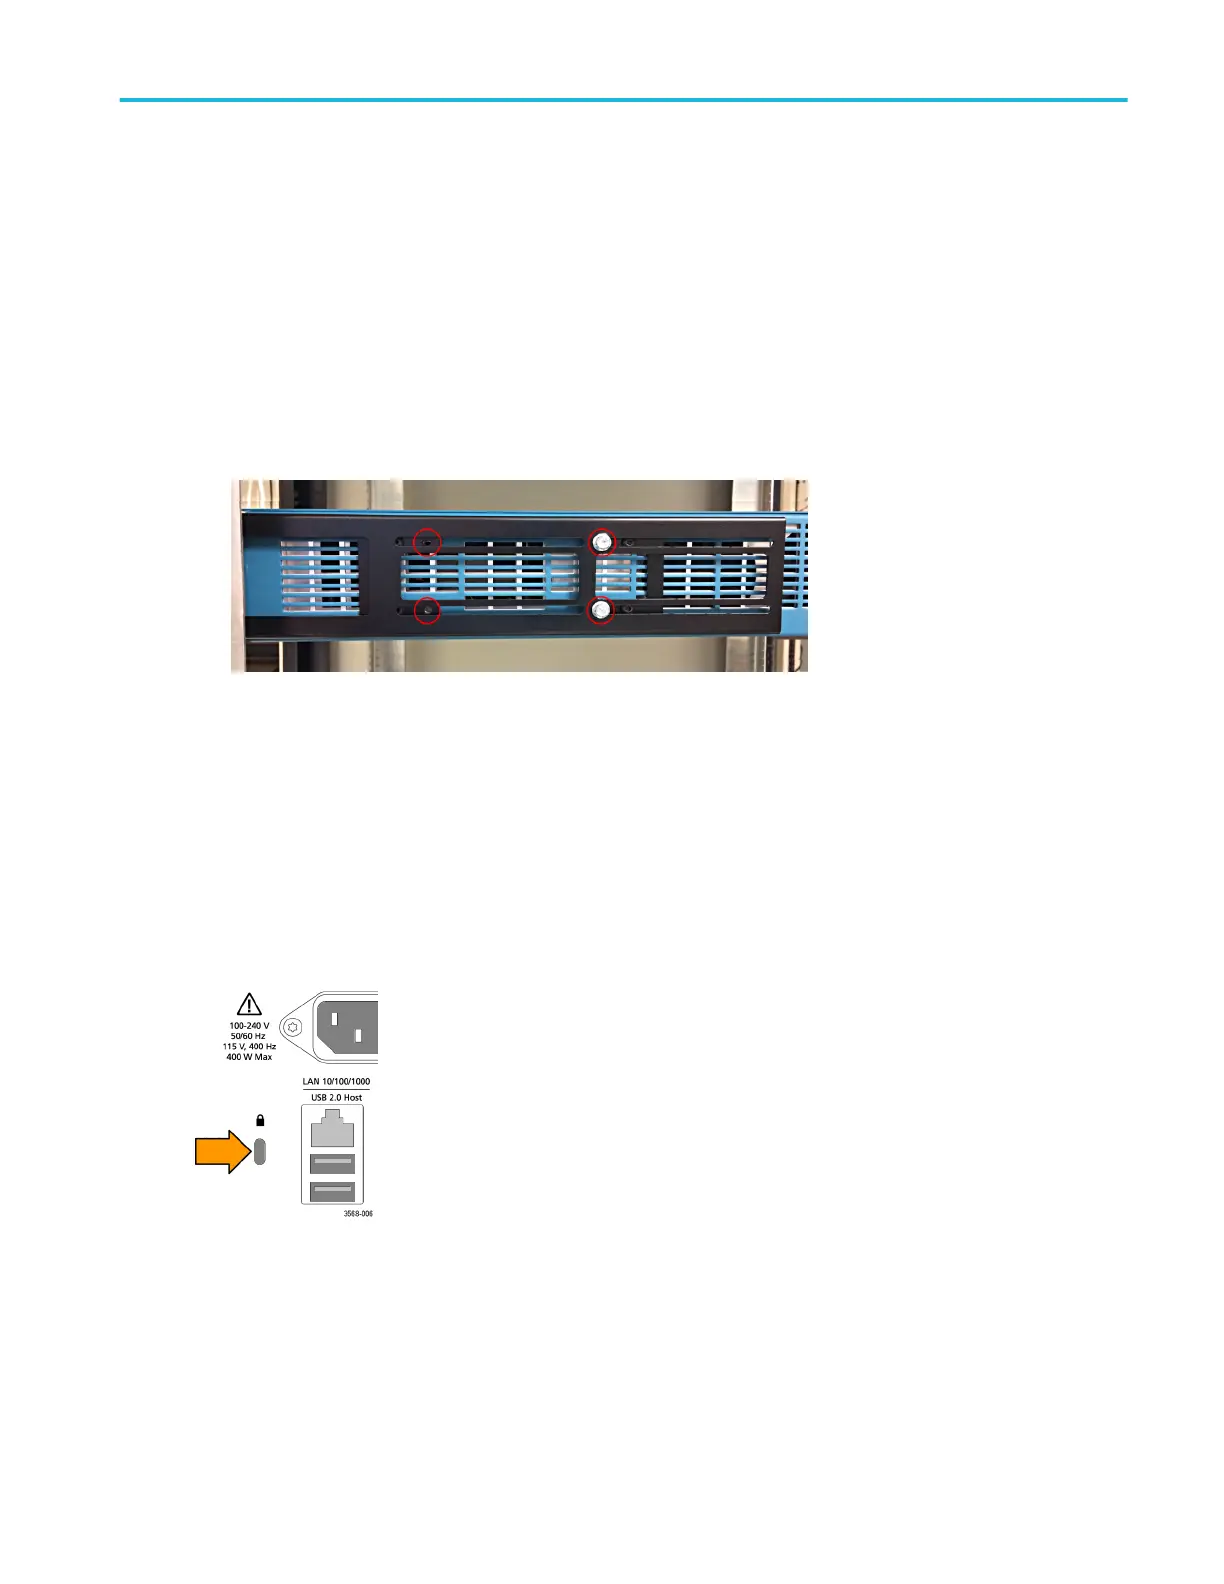
8. Using a 5/16 inch wrench, attach two supplied hexhead bolts to the rack bracket assembly on each side, to lock the
brackets in place and prevent the instrument from unintentional removal when the front rack screws are removed (see the
following image). There are four bolt positions available on each side (see image). Tighten the bracket lock bolts to 0.7 N·m.
9. Attach power cord and cables to rear chassis as needed.
End of rack mount instructions.
Secure (lock) the oscilloscope
Lock an oscilloscope to a test bench or equipment rack to prevent property loss.
Attach a standard laptop security lock to the rear panel of the oscilloscope, to secure the oscilloscope to a workbench, rack, or
other location.
Installing your instrument
MSO58LP Installation and Safety Manual 3

 Loading...