Powering the oscilloscope
Use this procedure to connect the oscilloscope to line power and power on and off the oscilloscope. Always connect the
oscilloscope to AC power using the power cord that shipped with the instrument.
Prerequisite: Use the AC power cord that shipped with your oscilloscope.
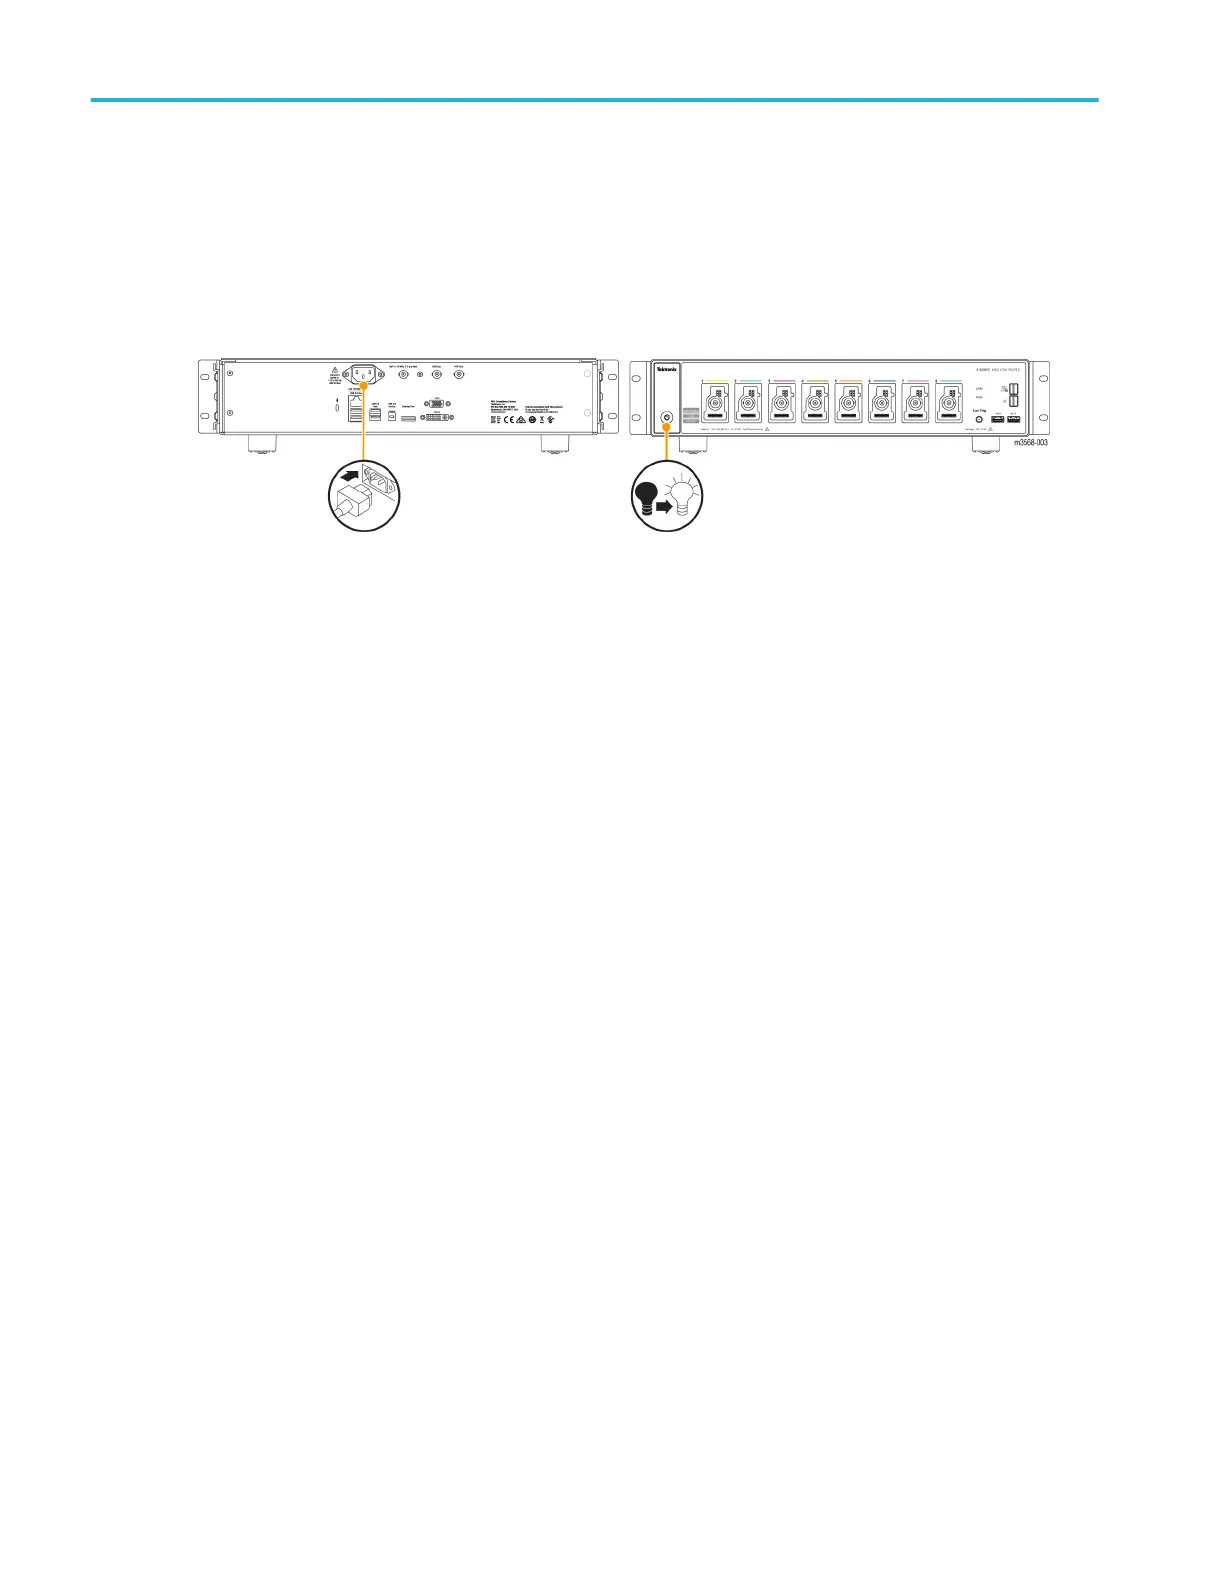
1. Connect the supplied power cord to the oscilloscope power connector.
Figure 1: MSO58LP power cord connector and power standby switch
2. Connect the power cord to an appropriate AC mains source.
Power is supplied to the power supply and some other boards whenever the AC power cord is connected to a live mains
circuit, putting the instrument in standby mode.
3. Push the front panel power button to power the instrument on and off.
The power button color indicates instrument power states:
No light – no AC power applied
Yellow – standby mode
Blue – powered on
4. To completely remove power from the instrument, disconnect the power cord.
Check that oscilloscope passes power-on self tests
Power-on self tests verify that all oscilloscope modules are working correctly after power up.
Prerequisite: Connect a monitor to a video output on the rear panel, and connect a mouse to a USB port.
1. Power on the oscilloscope and wait until the oscilloscope screen appears.
2. Select Utility > Self Test from the top-edge Menu bar to open the Self Test configuration menu.
3. Check that the status of all power-on self tests are Passed.
If one or more power-on self tests shows Failed:
a. Power cycle the oscilloscope.
b. Tap Utility > Self Test. If one or more power-on self tests still shows Failed, contact Tektronix Customer Support.
Installing your instrument
4 MSO58LP Installation and Safety Manual

 Loading...