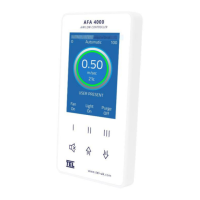
AFA4000/E VAV Airflow Controller / p.106
Note: If a limit is not required set to the max value (300mA)
28. Use the ↓ button and select Back then Back to Set up menu. Press Mute.
29. Use the ↓ button and select Exit and Save Changes. Press Mute.
The controller returns to the Main Menu. Either select Run, or wait a few seconds for it to
automatically enter Run mode.
7.5 Auto Stop
1. From the Run Screen press and hold the Mute button for 5 seconds until the Main Menu is
displayed.
2. Use the ↑ / ↓ buttons to select Set Up Auto Sash. The display shows the message TEL SASH
CLOSER.
3. Press the Mute button to display the current Hardware and Software version, for example, 1.
HW2.0 FW1.1.
4. Press the ↓ button to scroll down and select Setup Menu and press Mute.
5. Enter the password (the factory default password is 1-0-0-1) and press Mute.
6. In the Configuration menu the controller will display the message System Profile.
7. Use the ↓ button to scroll through the menu and select Sash Settings, then press Mute.
8. In the Configuration menu the display will show 1. Enabled.
9. Use the ↓ button to scroll through the menu and select 9. Auto Stop. Press Mute.
10. The Auto Stop will be disabled, Press Mute then use the ↑ button to select Enabled. Press
Mute.
11. Press the ↓ button to scroll down and select Auto Stop Distance and press Mute.
12. Use the ↑ / ↓ buttons to set the required Auto stop distance above the normal position,
Press Mute.
13. Press the ↓ button to scroll down and select Auto Stop Delay and press Mute.
14. Use the ↑ / ↓ buttons to set the required Delay time before the sash returns to the normal
position after it has Auto stopped, Press Mute.
15. Use the ↓ button and select Back then Back to Set up menu. Press Mute.
16. Use the ↓ button and select Exit and Save Changes. Press Mute.
The controller returns to the Main Menu. Either select Run, or wait a few seconds for it to
automatically enter Run mode.