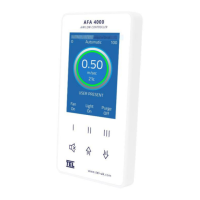
AFA4000/E VAV Airflow Controller / p.172
1. From the Requires set up screen, press Mute, or from the Run Screen press and hold
the Mute button for 5 seconds until the Main Menu is displayed.
2. Select Set Up Monitor > Configure.
3. Enter the password (the factory default password is 0-0-0-0) and press Mute to continue.
4. Select Input 2 > Analogue > Sash Position.
5. Select Input 3 > Closed Contact > Sash Warning.
6. Select Sash Closed Input > Sash Position Sensor > Sash Closed Height.
Note: The Sash Closed Height is the height that the sash is considered to be closed, for
example 100 mm = sash closed alarm not active when the sash is <100 mm.
7. Select Sash Warning Timer > Sash Warning Time Delay.
8. Use the ↑ / ↓ buttons to set the Sash Warn Rpt Time to Enabled / Disabled. If set to Enabled,
use the ↑ / ↓ buttons to set the Sash Warn Rpt Time, then Done.
For example: Sash closed switch height set to 100 mm, sash warning delay set to 1 minute,
sash warning repeat timer set to 5 minutes. If the sash is > 100 mm, the close sash alarm
activates if the fume cupboard is unoccupied for 1 minute. After being muted, the alarm re-
sounds after 5 minutes. The alarm resets if the fume cupboard is then occupied or the sash is
<100 mm.
9. Select Set Up Monitor > Calibration.
10. Enter the password (the factory default password is 0-0-0-0) and press Mute to continue.
11. Select Sash Position Sensor.
12. Follow the on-screen instructions. Open the sash to the normal working height (e.g. 500
mm), then use the ↑ / ↓ buttons to enter the sash height.
13. Follow the on-screen instructions. Lower the sash to approximately half way (e.g. 250 mm),
then use the ↑ / ↓ buttons to enter the sash height.
14. Select Done and Run.
9.3.1 Testing
Once the sash position sensor has been configured the sash height will display in the diagnostics
menu I/O Status.
The sensor data screen is described in section 13.2.