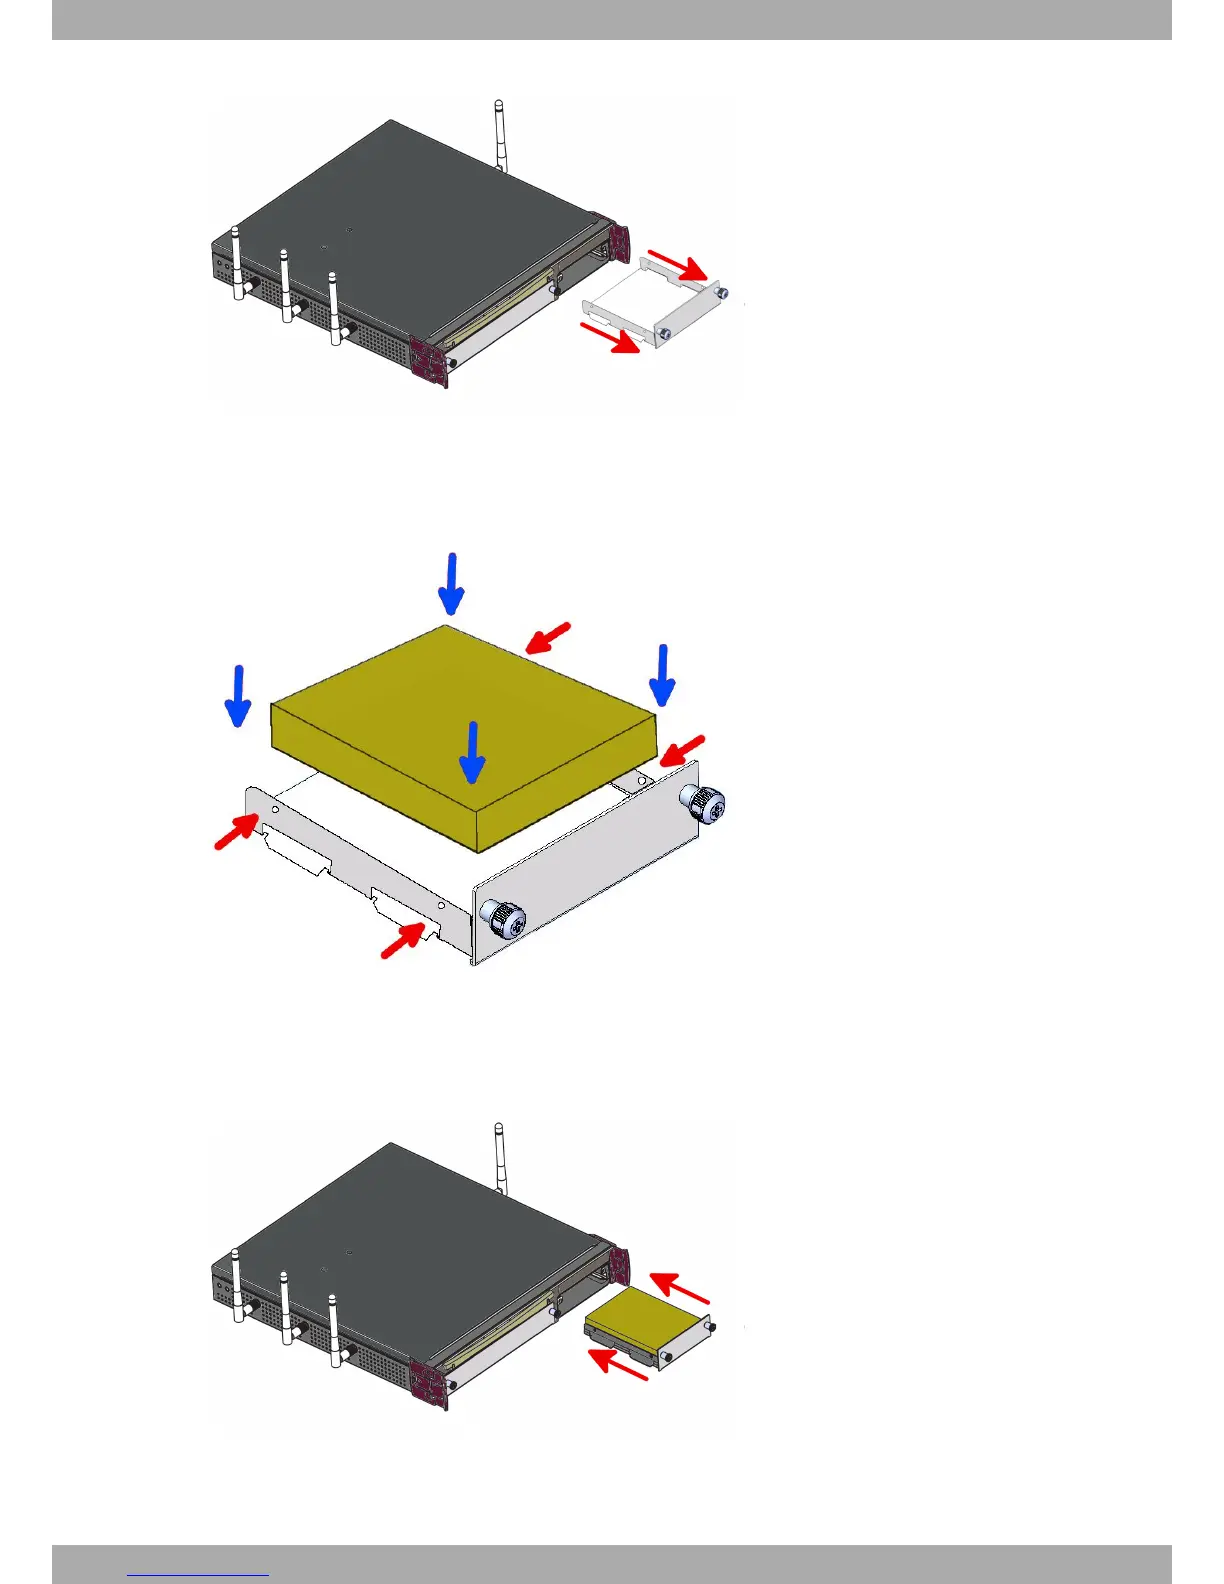
Fig. 33: Extracting the tray from the front panel
(5) If the tray is attached, skip to the next step. Otherwise, once you have extracted the tray, place the hard disk in
the correct position. Then fix the hard disk using the appropriate 4 screws without damaging it during the tight-
ening process (red arrows).
Fig. 34: Placing the hard disk
(6) Finally, insert the tray into the device once again using the slot guides.
Fig. 35: Inserting the hard disk
(7) Screw the tray to the device.
3 Components and Power Supply Teldat S.A.
22 Teldat Router iM8