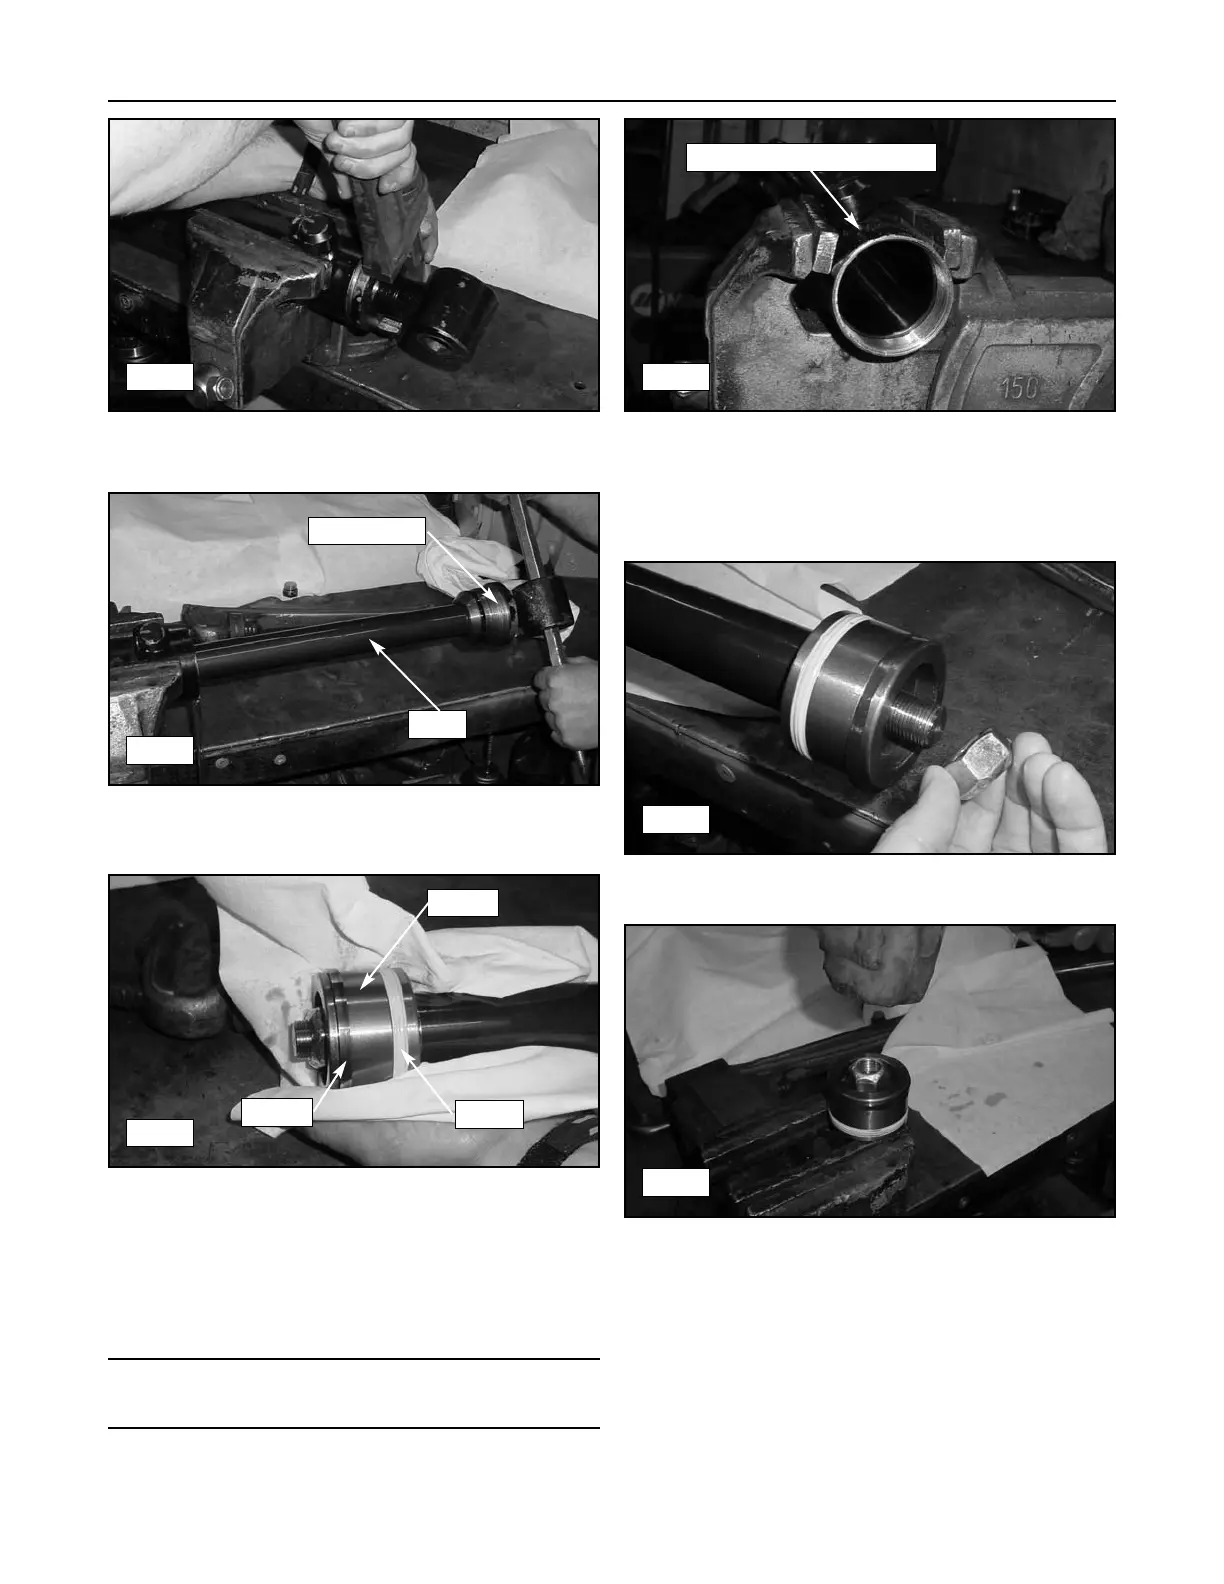
4. Use a open end or pipe wrench to turn and
remove the end gland. (fig. 15-2)
5. Use a pry bar or similar device to pull the rod and
piston from the cylinder. (figure 15-3)
6. Inspect the piston surface, seals and ring for wear
or damage. If any component appears to be dam-
aged in any way, replace it. When inspecting the
piston surface, look for scratches. If any are pres-
ent that are deep enough to catch with your finger-
nail, the piston should be replaced. (fig. 15-4)
Note: Seal imperfections or scratches on the piston, bore or
rod or will cause internal/external leakage and impaired func-
tion. Defective components must be repaired or replaced.
7. With the piston and rod removed from the cylinder,
inspect the cylinder bore for scratches or other
damage. If any are present that are deep enough
to catch with your fingernail, the cylinder tube
weldment should be replaced. (fig. 15-5)
8. Remove the nut from the rod end. (fig. 15-6)
9. Support the piston loosely from the underside (fig.
15-7), thread the nut partially on to protect the
threads and tap the rod end with a rubber or dead
blow hammer to free the piston from the rod.
10. Once loose, remove the nut and piston from the
rod.
15-2
Compact Track Loader
15. Hydraulic Cylinder & Loader Valve
15-2
15-3
15-4
15-5
15-6
15-7
End Gland
Rod
Piston
Seals
Ring
Cylinder Tube Weldment



 To Next Page