4. Initial operation
39
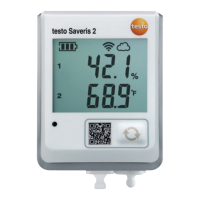
4.1 Power supply to logger
Recharging is not possible with commercially available rechargeable batteries.
Mains unit (0554 1084):
Connect mains unit to logger
.
Batteries/Standard rechargeable batteries:
1
Open cover flap on the back of the logger using a Phillips screwdriver
.
2
Insert batteries/rechargeable batteries. Watch out for +/-!
3
Replace cover and close.
Testo rechargeable battery pack (0515 0097):
1
Open cover flap on the back of the logger using a Phillips screwdriver
.
2
Connect the rechargeable battery pack to the instrument by a cable and socket .
Observe markings on plug.
Avoid kinking or damaging the connecting cable!
3
Insert the rechargeable battery pack such that the rechargeable battery pack label is
visible from above
.
4
Replace cover and close.
Recharging rechargeable battery pack
Recharge rechargeable battery pack prior to first use.
·
The instrument must be switched off.
·
The rechargeable battery pack must be inserted in the logger for recharging.
Insert mains unit into logger.
- Rechargeable battery is recharged, LED lights up yellow
-
Logger is completely recharged once the LED lights up green or flashes.
An empty rechargeable battery needs up to approx. 5 hours for complete recharging.
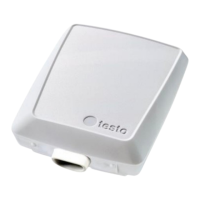
4.2 Power supply to Control Unit
Mains unit (0554 1084):
Connect mains unit to Control Unit
.
Batteries/Standard rechargeable batteries:
1
Release lock
.
2
Insert batteries. Watch out for +/- .
3
Replace cover and close.
The batteries can remain inside the instrument during mains operation.
Recharging is not possible with batteries/standard rechargeable batteries.
testo rechargeable battery pack (0515 0097):
1
Release lock
.
2
Insert plug .
Observe markings on plug.
Do not kink or damage cable!
3
Insert the rechargeable battery pack such that the rechargeable battery pack label is
visible from above
.
4
Replace cover and close.
4. Initial operation
8 V DC
Logger LED