INS760EN-7 28/91
6.1 Ethernet Connection
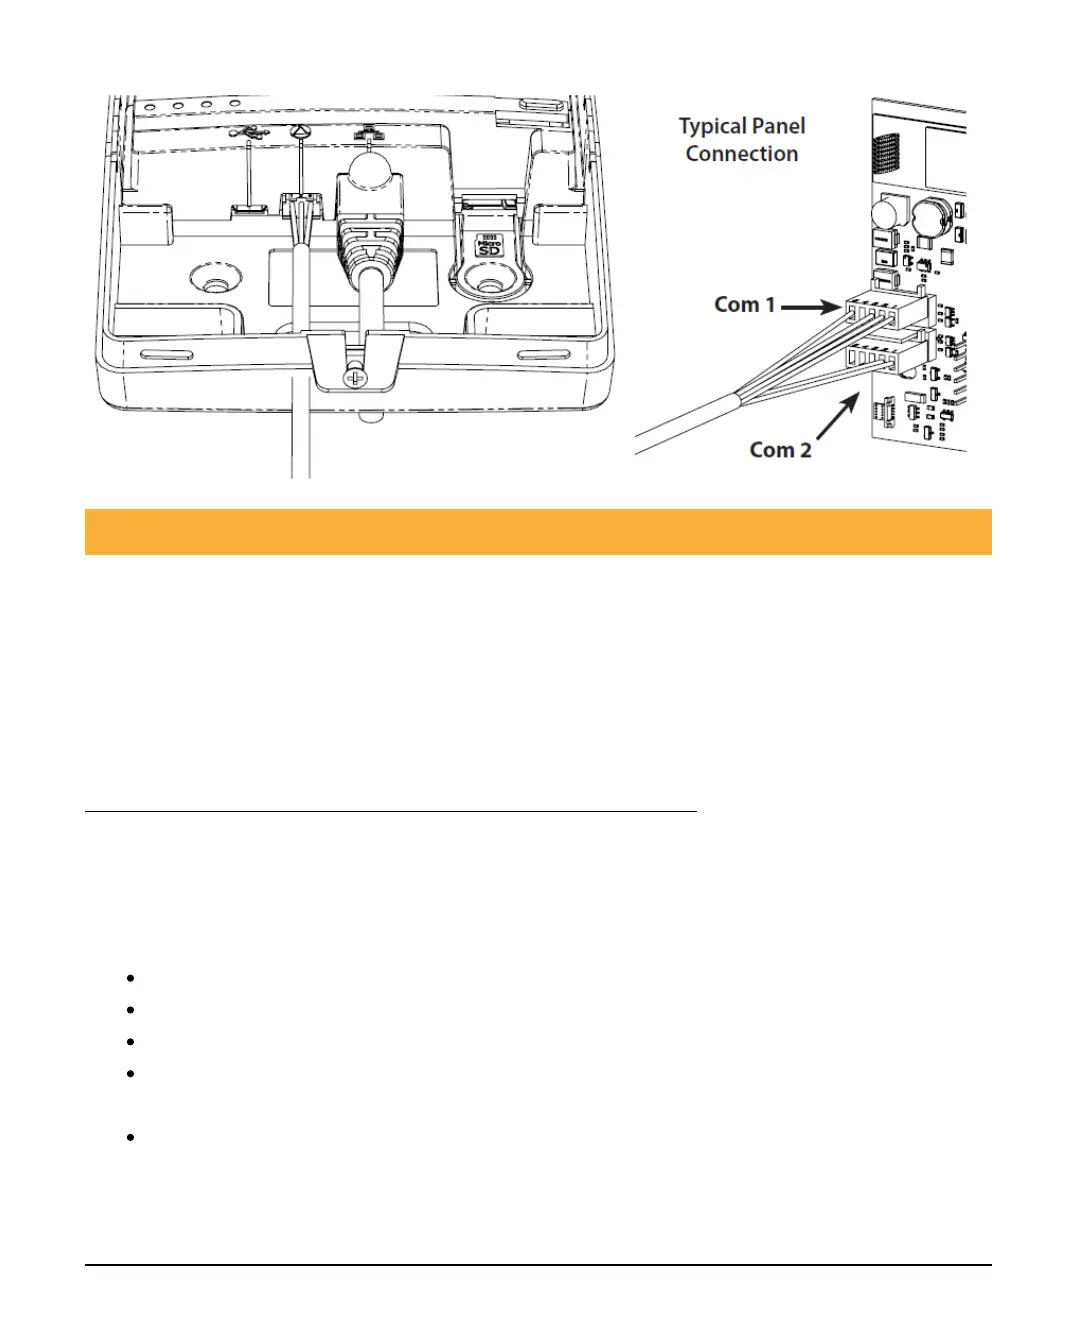
To operate as an Ethernet Communicator, plug a screened Ethernet cable into the
SmartCom and the other end into a spare LAN port on the router or switch.
By default, you do not need to know any details from the router for the system to
work. An IP address will be assigned by DHCP from the router, and programmed
into the panel.
SmartCom Manual Static IP Feature in >v02.01.03
A static IP address can now be manually assigned to the SmartCom.
This is for ETHERNET CONNECTIONS ONLY (doesn't affect WiFi which remains as
DHCP).
The IP data is entered into the panel in the same way as for a Com-IP module.
Enter Engineer mode on the keypad.
Press 7 then y/y (UDL/Digi Options).
Press 7 then y/y for (Setup Modules).
Press 7 then y/y for (Setup IP data). Then select which Com Port the
IP details apply too.
Press n/n and enter the IP address of the ComIP you noted in the
previous steps. Pressing y/y when complete. Pressing the O/B key
twice will enter a dot. For Example 192.168.0.150