INS760EN-7 29/91
Scroll down once to change the port number. This is required if you wish to
setup port forwarding through the router. The port can be left as 10001.
Scroll down and enter the Gateway address assigned to the ComIP.
Scroll down once and enter the subnet mask assigned to the ComIP
Press N/N twice.
Press 4 then y/y (Comport Setup).
Scroll to the comport you have the ComIP plugged onto.
Press n/n 4 and y/y for ComIP module.
The IP data should be entered for the ComIP com port of the SmartCom prior to
Com Port Setup (just like for Com-IP modules)
The data is uploaded to the SmartCom when the com port is changed from
'Nothing Fitted' to 'ComIP'. The DNS service that is used when a fixed IP address is
the Google DNS defined is 8.8.8.8 or alternative service 8.8.4.4
It takes up to 45 seconds for the data to be uploaded to the SmartCom.
The SmartCom can be returned to DCHP mode by clearing the IP data from the
panel com port and then changing the com port to 'Nothing Fitted' and then back
to 'ComIP'. When the blank IP data is uploaded the SmartCom will automatically
switch back to DHCP mode.
Another way to revert back to DCHP mode is to use the new SmartCom default
procedure.
IP addresses will only show for the ComIP com port. This is normal and correct.
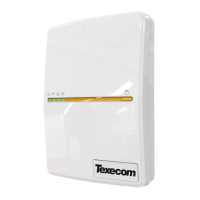
6.2 Wifi Connection
To enable a WiFi connection you will need access to the customers network SSID &
password. The SmartCom will only function on networks with DHCP enabled.
The SmartCom operates at 2.4 GHz supporting 802.11b/802.11g & 802.11n
wireless technology. 5GHz bands are not supported.
Press and hold the WiFi button for 5 seconds until the WiFi LED starts blinking
approximately once per second.