EasyManuals Logo

Thecus N2200 User Manual

Thecus N2200
98 pages
To Next Page IconTo Next Page
To Previous Page IconTo Previous Page
Page #27 background imageLoading...
Page #27 background image
System Management
The System Management menu gives you a wealth of settings that you can use to
configure your N2200’s system administration functions. You can set up system
time, system notifications, and even upgrade firmware from this menu.
Time: Setting System Time
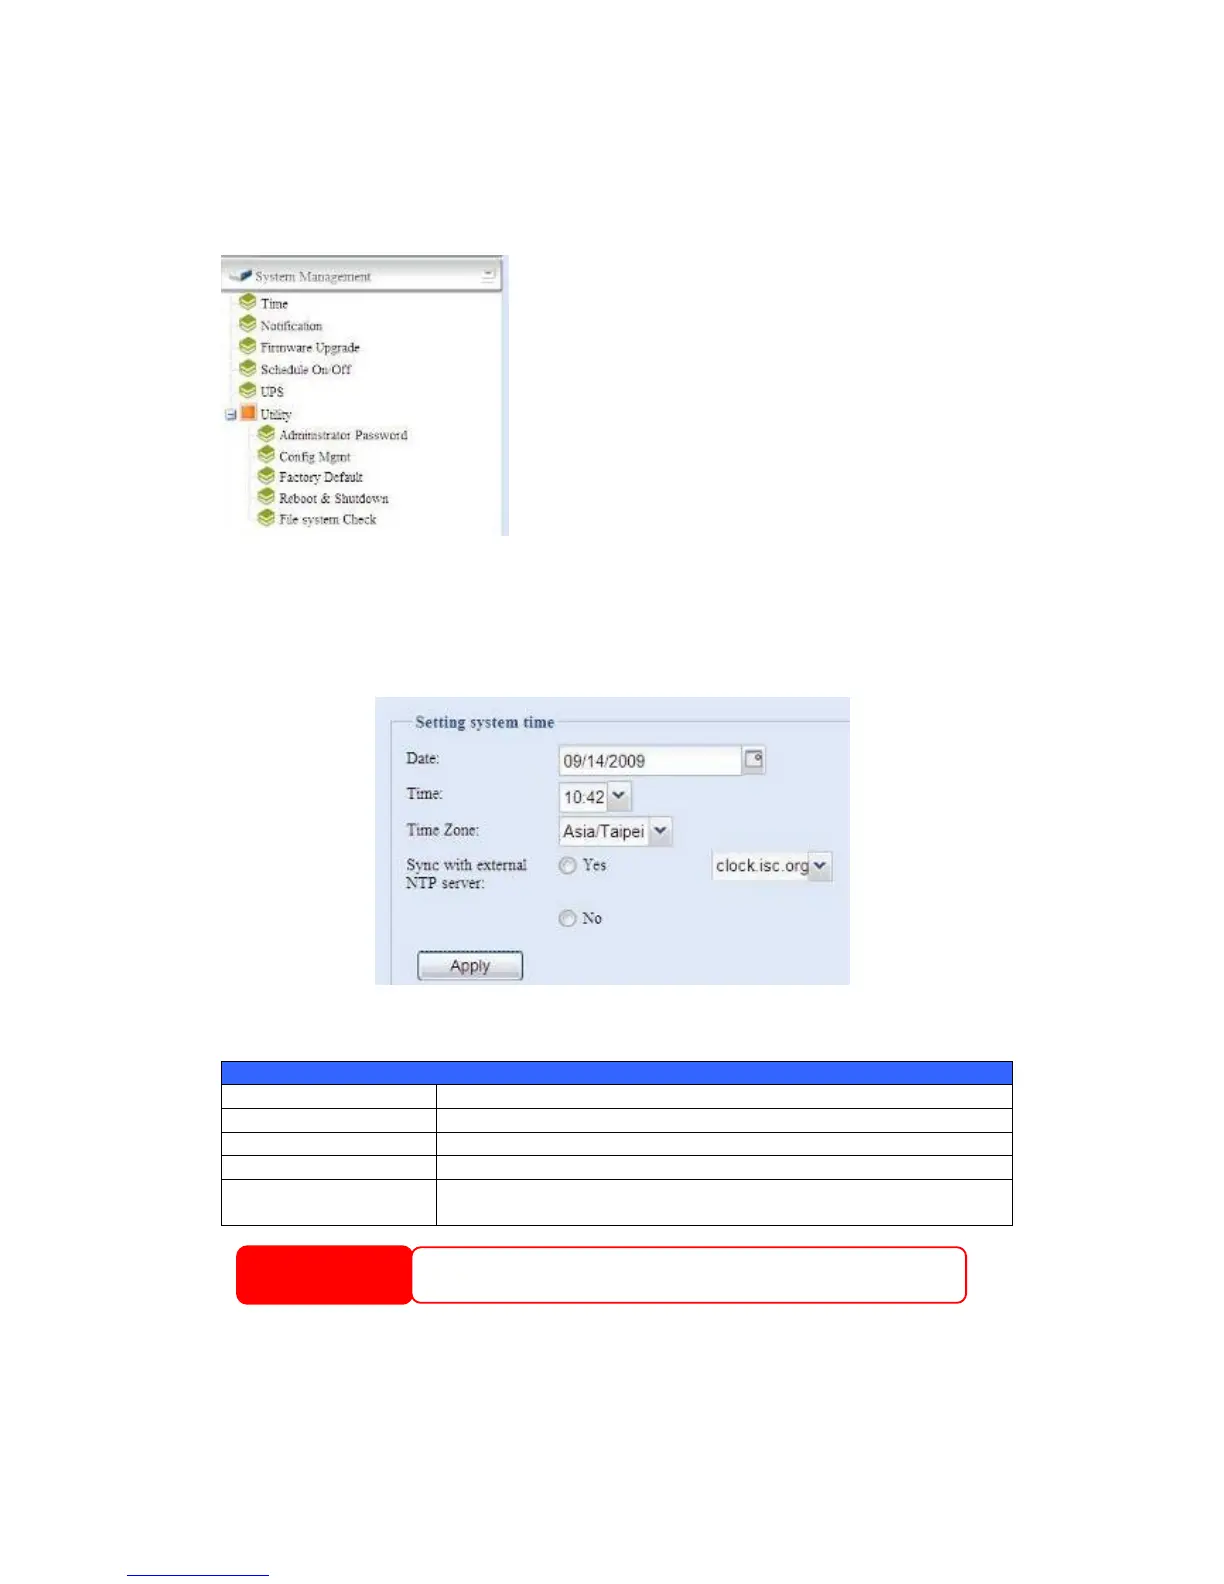
From the Time menu, choose the Time item and the Time screen appears. Set the
desired Date, Time, and Time Zone. You can also elect to synchronize the system
time on the N2200 with an NTP (Network Time Protocol) Server.
See the following table for a detailed description of each item:
Time
Item Description
Date Sets the system date.
Time Sets the system time.
Time Zone Sets the system time zone.
Sync with external NTP
Server
Select YES to allow the N2200 to synchronize with an NTP server
of your choice. Press Apply to change.
If an NTP server is selected, please make sure your N2200’s network has been
setup to access the NTP server.
WARNING
27

Table of Contents

Questions and Answers:

Question and Answer IconNeed help?

Do you have a question about the Thecus N2200 and is the answer not in the manual?

Thecus N2200 Specifications

General IconGeneral
RAID levels0, 1, JBOD
Storage drive size2.5/3.5 \
Storage drive capacity2000 GB
Storage drive interfaceSerial ATA, Serial ATA II
Storage drives installedYes
Installed storage drive typeHDD
Total installed storage capacity4 TB
Number of storage drives installed2
Networking featuresGigabit Ethernet
Compatible operating systemsWindows 7/2000/XP/2003/Vista UNIX/Linux Mac OS 9/X
USB 2.0 ports quantity4
Ethernet LAN (RJ-45) ports1
USB 3.2 Gen 1 (3.1 Gen 1) Type-A ports quantity0
Processor model-
Ethernet LAN data rates10, 100, 1000 Mbit/s
Product colorBlack
TypeNAS
Device classHome & Home Office

Related product manuals