84
Create a RAID
On the RAID Information screen, press the Create button to go to the RAID
Volume Creation screen. In addition to RAID disk information and status, this
screen lets you make RAID configuration settings.
Using Create RAID, you can select stripe size, choose which disks are RAID
disks or the Spare Disk. .
Number assigned to the installed hard disks.
Capacity of the installed hard disks.
Model number of the installed hard disks.
Status of the installed hard disks.
If this is checked, current hard disk is aalready part of a RAID
volume.
If this is checked, current hard disk is designated as a spare for
a RAID volume.
Check a box to designate this as the Master RAID volume. See
the NOTE below for more information.
This sets the stripe size to maximize performance of sequential
files in a storage volume. Keep the 64K setting unless you
require a special file storage layout in the storage volume. A
larger stripe size is better for large files.
The percentage of the RAID volume that will be used to store
data.
Press this button to configure a file system and create the RAID
storage volume.
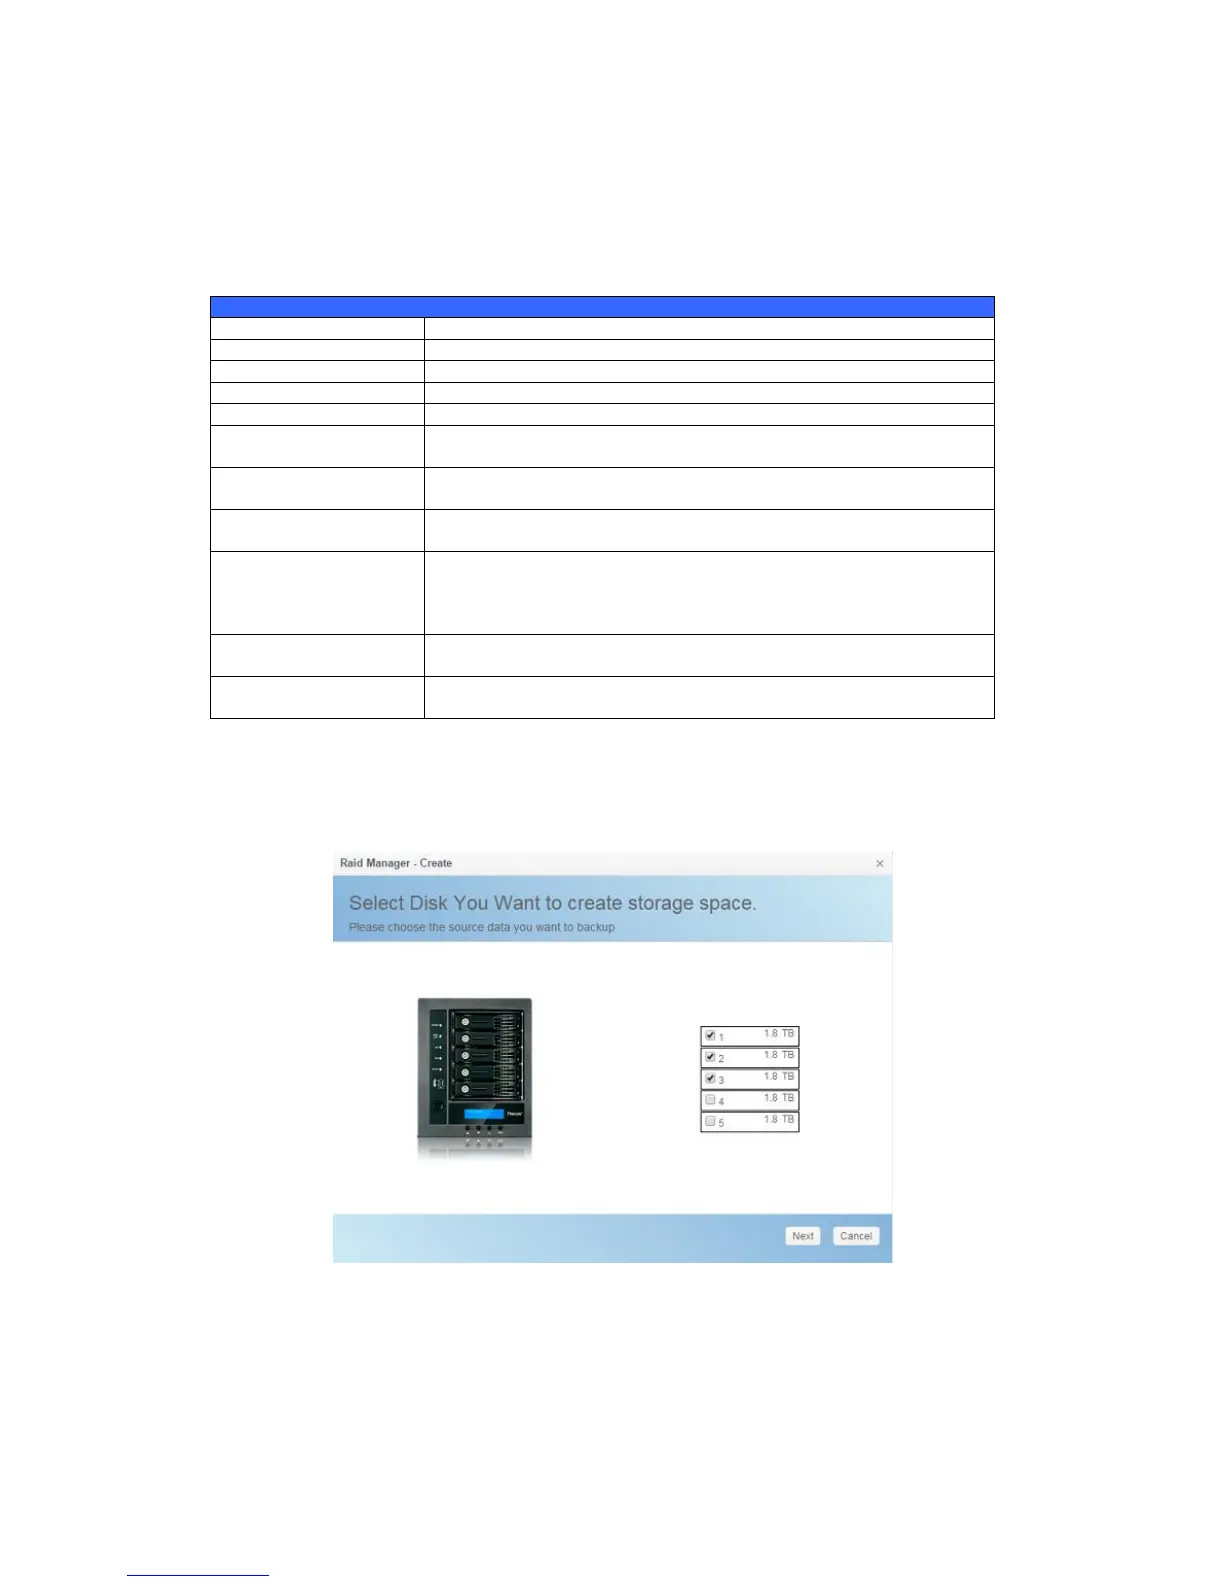
To create a RAID volume, follow the steps below:
1. On the Select Disk screen, select available disks for the RAID volume
member(s).
2. Set the RAID storage space as JBOD, RAID 0, RAID 1, RAID 5, RAID 6,
RAID 10, RAID 50 and RAID 60 (depends on how many disks has
installed into system)— see Appendix B: RAID Basics for a detailed
description of each.
 Loading...