8
Maintenance
Maintaining the API Source Interface
68 TSQ Endura and TSQ Quantiva Hardware Manual Thermo Scientific
6. Align the flat edges of the custom removal tool with the flat edges on the exposed tip of
the ion transfer tube, and then do one of the following:
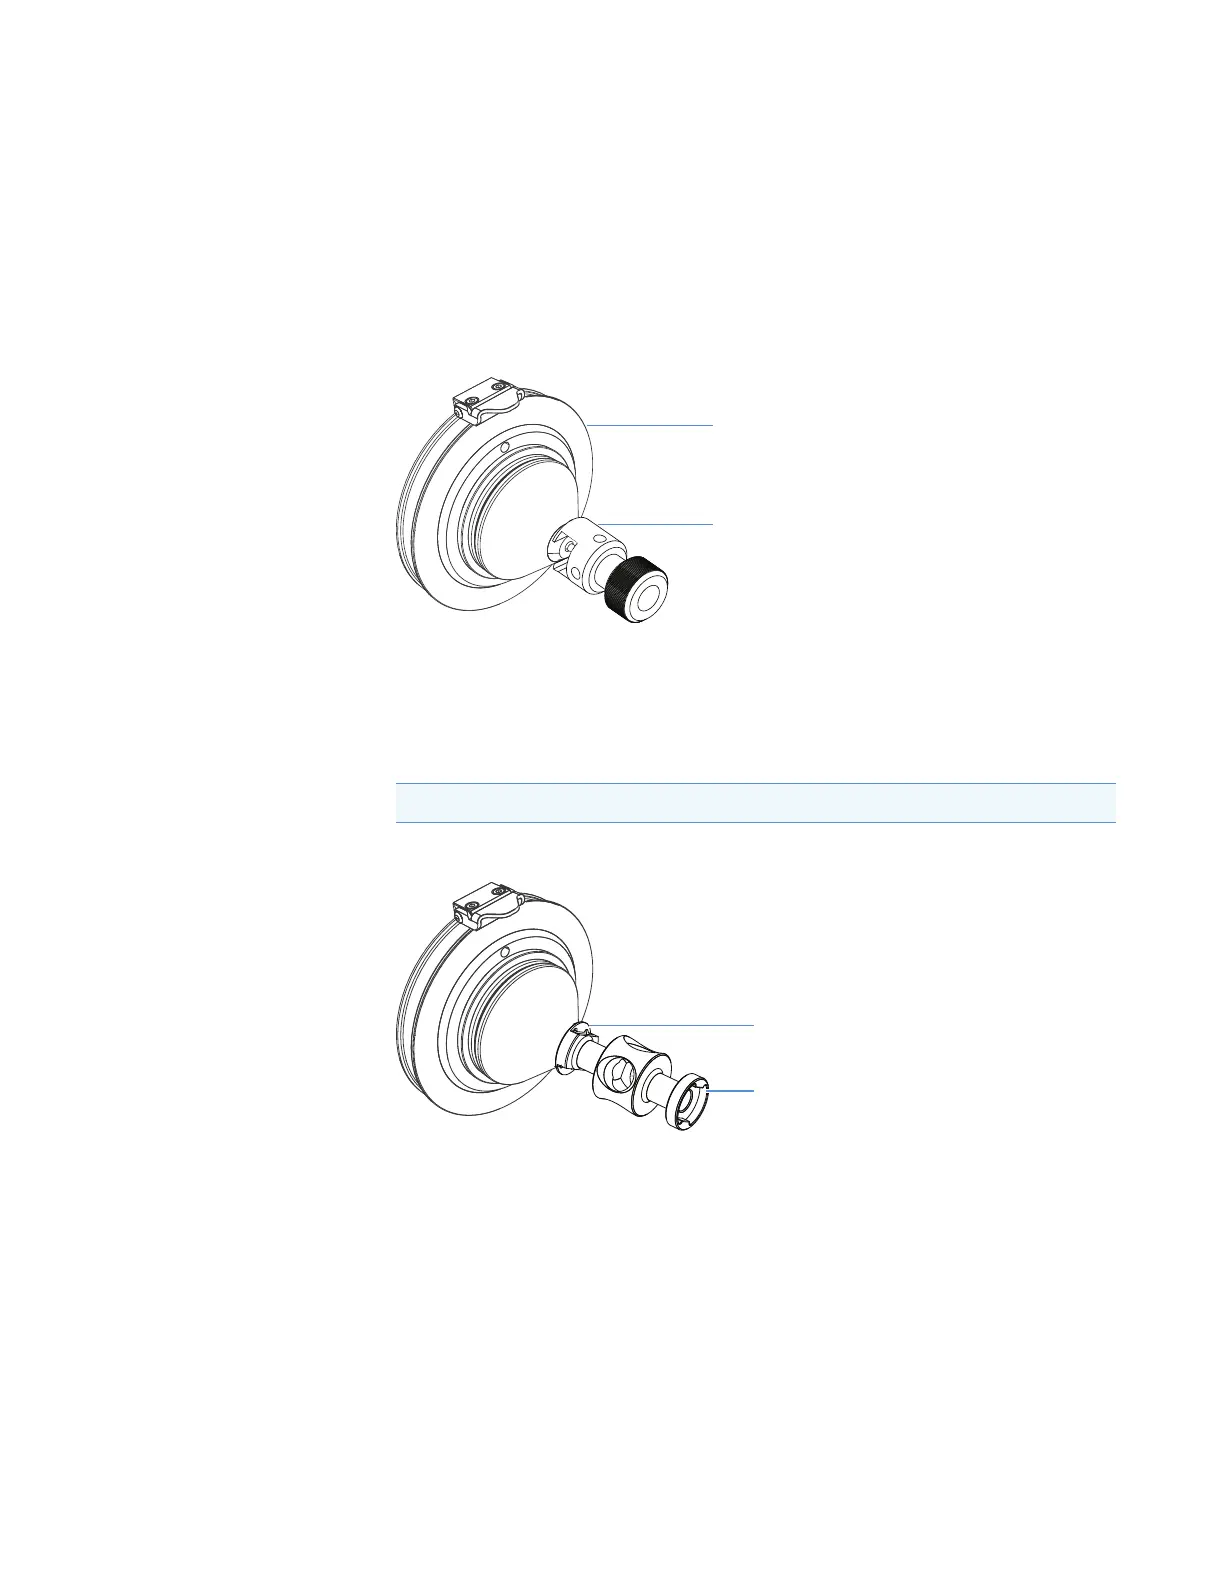
• (TSQ Endura MS) Rotate the tool (Figure 32) counterclockwise. When the tube is
free of the spray cone, use the hook (flat edges) on the tool to slowly pull it out of the
API source interface.
Figure 32. Ion transfer tube removal tool (TSQ Endura MS)
–or–
• (TSQ Quantiva MS) Loosen the ion transfer tube with the correct end of the custom
removal tool (Figure 33), and then use the other end of the tool to remove the ion
transfer tube from the API source interface.
Figure 33. Ion transfer tube removal tool (TSQ Quantiva MS)
Tip If necessary, insert a hex key through a side hole for leverage.
Fit this end of the tool around the
exposed ion transfer tube.
API source interface
Use this end of the tool to loose and
reinstall the ion transfer tube.
Use this end of the tool to hook onto and
pull out the ion transfer tube.
 Loading...